How to prepare a shoot
Suitable cuttings can be taken throughout the growing season. Only in autumn and winter the rooting process is delayed due to insufficient lighting, as well as the natural slowdown in the life processes of the plant. The best time is the end of winter and the beginning of spring, then in the warm season the shoots will take root better and the planted plants will take root faster.
The best cuttings are obtained from the upper parts of the plant. All flower stalks are removed. On an adult bush, twigs 5–8 cm long with three developed buds or leaves are selected. The shoot is cut off with a sharp knife disinfected with alcohol. The cut is made at a right angle, 1-2 cm below the internode. The cut area is sprinkled with crushed activated carbon or “root”. Before rooting, the shoot needs to lie in the open air for 3-4 hours, without direct sunlight.
How to get a baby orchid at home?
Let's find out how to make an orchid give birth to babies. The appearance of a young baby is always considered good luck for the gardener, as it indicates that there will be more orchid plants.
Flower growers sometimes sell the newly born orchids.
And that means you can have an extra child:
- Exchange for another variety;
- Or, after selling, buy yourself a new attractive copy.
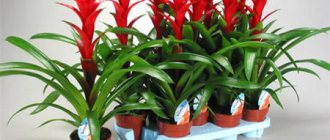
IMPORTANT! 2-3 bushes of the same variety, planted in one container, when flowering, look like a beautiful tropical bouquet.
The necessary conditions
Many beginners ask the question: how to force a flower to produce a baby? The plant needs certain conditions in order for it to begin growing babies.
Also, two factors can influence the appearance of a young rosette:
- Ideal conditions for baby growth;
- Extreme conditions: before death, an orchid can also give birth to babies.
It is better not to simulate the second situation; this is an extreme case, which is necessary when resuscitating the plant. Let's consider the normal conditions under which a baby appears.
Temperature
The ideal temperature is considered to be in the range of 20-28 degrees Celsius. Deviation in any direction can provoke not the appearance of a young baby, but the death of the plant.
Indoor air humidity
Humidity should be high and reach 85%. If it is very hot outside and there is no precipitation for a long time, then you need to place containers with water between the flowers, and the water, evaporating, will increase the humidity around the plants.
Air humidity for orchids should be at least 70%.
It is important at this moment to monitor the amount of water in the containers and add it as it evaporates
Lighting
But if the temperature and humidity are ok, then how can you make the orchid give birth to a baby? The plant should receive a lot of diffused sunlight for 12-13 hours throughout the day.
Do not forget that direct sunlight can destroy the plant. And the lack of sunlight will delay the development of children. Therefore, it is necessary to choose the right lighting for the flower.
Watering
Watering the plant must be organized in such a way that the root system is dry for a couple of days between waterings. The orchid needs this for the process of photosynthesis, which involves not only the leaves, but also the root system.
IMPORTANT! In order for a plant to produce a baby, all these parameters must be observed, and then after flowering there is a possibility of a baby appearing.
Rooting methods
The appearance of roots on geranium cuttings is possible in an aquatic environment or soil substrate. When choosing a method, consider:
- Variety of plant. Varieties or hybrids, for example planting pelargonium, require increased attention, because... takes root up to 40 days.
- Time of year: In spring and summer, any methods are used, and in winter and autumn it is advisable to use only soil.
- Speed of root emergence. Simple varieties take root quickly, so an aquatic environment is often used for them. Hybrid plants rot during prolonged contact with water.
In water
Rooting occurs best in a warm, dark place. It is important to ensure that there are no significant night/day temperature changes. Take an opaque container, disinfected with an alcohol-containing liquid. The cutting is immersed 4 cm deep. To prevent the plant from rotting and the appearance of a black leg due to excess moisture, add activated carbon powder - 1 tsp. for 1 l. water.
Take soft, clean, settled water at room temperature. Change every 2 days or top up with fresh water to the original level. The dishes with cuttings are placed in a lighted place without direct rays of the sun. The first roots appear after 2-3 weeks.
In the ground
You can purchase ready-made universal soil or create the optimal soil mixture yourself. To do this, mix in equal proportions: drainage soil, peat, sand, preferably add vermiculite. Expanded clay, 1-2 cm, is poured into the bottom of the pot, then a layer of prepared soil, and on top - a thin layer of sand, protecting the cutting from waterlogging.
The pot and soil must be disinfected before use, for this:
- the container is doused with boiling water, formalin solution or a hot solution of potassium permanganate;
- The soil is heated in the oven for about 30 minutes.
The prepared shoot is planted in nutritious, loose soil. The branch is buried 1-2 cm, the soil around it is carefully compacted. It is not recommended to cover the pot with film or a jar. A “greenhouse” is needed only if the outer edges of the leaves begin to dry out. It is recommended to place the container in a bright, warm place, without drafts and direct rays of the sun. Water moderately, with water at room temperature, after the soil has dried on the surface.
Features of care after transplantation
In order for a young phalaenopsis to grow and develop well, it is important to avoid mistakes in caring for it from the very first days, since after replanting the baby begins an adaptive period.
Did you know? After moistening, the roots of young phalaenopsis become bright green, and after the moisture evaporates, they turn silver.
This way the orchid’s need for regular watering is determined. Caring for the baby after transplantation is as follows:
- the container with the shoot is placed in a bright place, without direct sunlight;
- placement - western or eastern windows;
- the preferred temperature is +21 °C;
- The baby is watered for the first time on the sixth day after transplantation;
- water for irrigation is used only warm and settled (it is acceptable to use boiled or filtered water);
- time of the first feeding - 1 month after the separation of the cake;
- for fertilization, use orchid fertilizer (50% of the concentration recommended for an adult plant);
- further feeding is carried out once every 14 days.
Video
This beautiful plant is found in almost every home. There are many tips on how to plant geraniums and how to care for them. But we will tell you in detail how to plant a geranium with a shoot without roots. However, despite the apparent ease of growing this beautiful plant, there are several fundamental rules. Pelargonium (Pelargonium) belongs to the geranium family. Another, more common name for this flower is geranium. Both the names "geranium" and "pelargonium" come from the Greek language. The first of them is translated as “stork”, and the second as “crane”, since the shape of the plant fruits resembles the beak of these animals.
Soil preparation
Under natural conditions, Crassula grows on soils that necessarily contain a significant amount of sand. The soil should be very loose or fairly loose. At home, it is necessary to create conditions for the flower that will be as close as possible to its natural habitat. , suitable for cultivating cacti or any succulent plants, is very suitable for growing decorative indoor plants
If you need to plant a “money tree” shoot in a self-prepared soil mixture, then it is recommended to give preference to a composition based on three parts of medium-grained sand, a couple of parts of peat and a couple of parts of leaf soil. In order to ensure an optimal level of air permeability, it is advisable to add raising agents in the form of vermiculite and perlite to the prepared soil mixture.
It is important to remember that any variety of Crassula is very difficult to tolerate too dense and poorly drained soil, which often causes stagnation of moisture at the root system of the ornamental crop.
How to grow geranium from a cutting
To grow geranium from a shoot, geranium cuttings can be cut from a house plant, purchased from hand or at a specialized exhibition. Exchange of cuttings or searching for collectors on the Internet is gaining great popularity among flower growers.
You can cut and root cuttings from any variety of geranium, but hybrid varieties can only be propagated in this way. However, rooting time will vary. The shoot of zonal pelargonium will take root the fastest - in 2 weeks. Royal varieties will give roots in a month. And for fragrant geraniums this process will take up to 1.5 months.
Geranium cuttings are used not only for propagation. From time to time it is recommended to rejuvenate the plant. Several cuttings are cut from it and planted in one or more containers, and the old bush is thrown away. Young geraniums are more decorative, they bloom more profusely and retain all the characteristics of the plant from which they were cut. The plant is usually completely replaced after 3–4 years.
Planting in open ground
The shoots on which roots have appeared are planted in the prepared bed or in the holes. The holes are made according to the size of the root. After this, the shoot is deepened by 2 cm and covered with earth. After planting the shoots in the ground, we cover them with plastic caps or plastic bottles with the bottom cut off. The latter are more convenient, since you can water them moderately through the open neck.
Moisture at this time is very important, since without it the formation of the root system will be difficult. They need to be kept covered for 2-3 weeks. After the first leaves appear, the jars and plastic bags are removed.
Rooting
Geranium cuttings are often rooted not in water, but directly in the soil. The fact is that its trunk tends to accumulate water, and this often leads to rotting. However, in water the shoot will take root faster, and the process itself can be observed.
When rooting geraniums in water, it is important not to lower the cuttings too deep: 1–2 cm under water will be enough. Take an opaque container, preferably dark, in which roots will appear faster. The water should settle well and be at room temperature. It is changed once a week and topped up as it evaporates. As soon as the roots reach 2.5 cm, the cutting can be planted in the ground. It makes no sense to wait longer, since there is always a risk of rotting. The cutting with roots will develop more actively in the soil where there is free access to air.
Geranium cuttings can be planted in the ground as soon as the first roots appear.
If the soil rooting method is chosen, the prepared shoot is stuck into the ground to a depth of 2–3 cm. You can sprinkle the tip with a root growth stimulator. A special composition of the substrate for rooting is not required; any universal soil for home flowers will do. The main thing is that the soil is loose and well-drained. It is better if it contains a large percentage of sand near the surface. The biggest risk when rooting geraniums is rotting. Therefore, the soil is disinfected: calcined in the oven or microwave, treated with a weak solution of potassium permanganate.
While waiting for the roots to appear, abundant watering is not necessary; it is enough to ensure that the earthen ball does not dry out completely. It’s not scary if in the first days the leaves on the cuttings begin to wither and turn yellow - geraniums without roots need to go through a period of stress. But if the wilting is prolonged, you can help the plant adapt to new conditions: cover the cutting with a plastic bag or place it in a greenhouse.
In water
The cuttings are placed with a dried cut in water (at a level of 4 cm). It is better to take an opaque container and disinfect it before use. The water should be soft, clean, settled, at room temperature (+22...+24 °C), it should be changed after 1–2 days. Some gardeners argue that you cannot change the water when rooting cuttings - they say, it’s better to just top it up. To reduce the risk of stem rotting, you can add crushed activated carbon.
The dishes with the appendage are placed in a lighted place, avoiding direct sunlight. Daylight should last at least 16 hours, and at night the temperature should not drop sharply. With this method, it is convenient to observe the growing roots, and you can easily determine the moment of planting in the ground.
In the ground in a pot
If you know how to plant a varietal geranium with a shoot without roots directly in a pot with soil, you can quickly wait for a new plant. To prevent the shoot from rotting, planting prepared geranium shoots should be carried out in nutritious, loose, slightly acidic soil to a depth of 1.5–2 cm. Experienced gardeners make a soil mixture of drainage soil, peat and sand, sometimes adding vermiculite. A layer of expanded clay is poured into a pot with drainage holes, then soil, and a small layer of sand is added on top, which provides some protection from waterlogging of the base of the cutting.
How to grow at home: step-by-step instructions
Getting an orchid to produce a shoot and then taking it for planting is quite simple, but how exactly should this be done so as not to ruin both flowers? There are a number of conditions that must be met for a guaranteed result.
Preparation
To get a baby orchid after it blooms, you need to shorten the peduncle to the upper dormant bud a couple of centimeters above it.
Watering
Orchid is a tropical plant. For its normal functioning, you need to monitor the moisture content of the substrate and water it as needed. In winter and autumn, it is enough to water the flower once a week. In summer and spring, the frequency of watering is increased to 2 - 3 times a week.
For irrigation use settled water at room temperature.
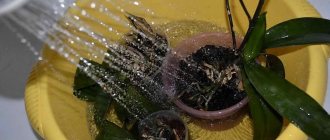
During the hot season, it is important to organize a warm shower. To do this, place the pot with the plant in the bathroom and water it with warm water from the shower for 5-7 minutes.
This simple procedure promotes the birth of children.
Sometimes, to stimulate the appearance of young shoots, it is beneficial to arrange a “drought” - do not water the flower for 1.5 - 2 weeks.
Fertilizer
Dissolved mineral fertilizers are used as fertilizers. In such complexes all vitamins and microelements are maximally balanced.
Use fertilizers strictly according to the recommendations and scheme prescribed in the instructions. After most of the buds have bloomed, you should start feeding the orchid once a week. After flowering stops, feed the flower for another week. Then do not disturb or feed the plant for two weeks.
Prerequisites
The process of formation and growth of orchid babies is actively carried out when the following conditions are provided.
Air and water temperature
The ideal temperature for growing is + 27 – 30°C. But often, under ideal conditions, the orchid does not bloom and does not bear children. In this case, you need to ensure a temperature difference: +15°C at night, +30°C during the day.
The water temperature for irrigation should be higher than the air temperature. Under such conditions, there is the greatest likelihood of awakening the dormant flower buds.
Humidity
Sufficient humidity is a necessary condition for the birth of babies. The best results can be obtained by increasing the humidity to 70 - 80%.
You can create such humidity in a specially equipped greenhouse with lighting.
At the same time, it is important to regularly ventilate the greenhouse, since humid air increases the risk of bacterial and fungal infections.
Pot
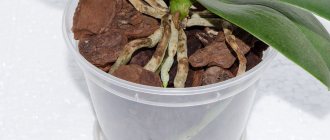
The container for the orchid should be transparent, of optimal size and with a drainage system.
When can I expect results?
The formation of children is influenced by many limiting factors:
- ambient temperature;
- proper care;
- individual characteristics of the plant.
But usually, if all conditions are met and the necessary stimulating measures are taken, babies appear in 3 to 4 weeks.
When to plant?
The growth and development time of a baby on its mother is six months. During this period, a shoot is formed, leaves and roots grow, and it gains strength for independent life.
The baby can be transplanted into the ground after its roots reach 5-6 cm.
You can learn more about how to separate a baby orchid here.
Further care
You need to specially prepare the cups - make holes in them for water to drain. In addition, thanks to the holes, air penetrates to the roots, which is also very good. Next you need to follow the following instructions:
- Add a little vermiculite to slightly wet, damp soil.
- Fill each cup with soil,
- If the soil was treated with boiling water, you must, of course, wait until it cools down. Fortunately, this will not take much time. Only a few minutes.
- Place the shoots that were previously freed from the lower leaves and deepen them a few centimeters.
- Place the cups on a tray (to make them convenient to move) and place them in a dark place for a while,
- After 5 days, the cups need to be moved to the window. Preferably NOT on the south side.
What to do if yellow, limp leaves appear on some plants? You can place them under the jars. That is, create something like mini-greenhouses for them. Thanks to the special microclimate, the plants will recover in a couple of days.
Propagation of a plant such as geranium is a fairly simple process that anyone who takes it upon can do it. And proper and timely care for a rooted plant will help it delight the eye with its attractive and aesthetic appearance.
Geranium is a well-known plant that almost all gardeners know and grow without problems. Or at least have experience in growing this unpretentious flower.
He loves rare, but at the same time abundant watering, he is not afraid of open air. Geranium is more associated with our grandmothers, but no one forbids those who are much younger from growing it. How to properly plant geraniums with shoots, including without roots, read on. Also watch a useful and interesting video on the topic.
Step-by-step instructions for growing at home
In addition to growing babies on a peduncle, there are several other methods, and we will describe each of them in detail.
How are they formed naturally?
After the orchid finishes blooming, in order to grow a baby on the peduncle, it is necessary to recreate special natural conditions for the plant and create a little peculiar stress.
- The best time of year for growing babies on a peduncle is spring. Stimulation of the kidneys can begin as early as February, when daylight hours begin to gradually increase to 10 hours.
- By the beginning of spring, move the pot to a window on the west side. Thus, the plant will be exposed to sunlight for about 5-6 hours a day.
- It is also necessary to ensure sudden temperature changes. During the daytime, the temperature should remain at a level of +25 to +27 degrees, and at night drop to +15-17 degrees.
- Watering should be no more than once every 7-10 days.
- Until the bud wakes up, you should not fertilize or feed the orchid.
Can the culture produce keiki after stimulation?
If for some reason the orchid does not reproduce on its own, this process can be stimulated with a special means. Cytokinin paste has proven itself best in this matter.
The process of stimulation with cytokinin paste is as follows:
- First of all, you need to warm the paste to room temperature.
- Decide on the peduncle on which you want to raise the baby and choose the healthiest bud available.
- Disinfect the knife and use its tip to carefully separate the scaly skin on the kidney.
- Moisten the exposed area with water, and then, using a thin needle, evenly apply a small amount of cytokinin paste.
- The result should appear within two months.
You cannot process more than 3 buds on one orchid. If several babies appear at once, you need to choose the strongest one and remove the rest.
How to grow in water on a peduncle cutting?
This method is suitable for growing babies on sick, young or weakened plants. In this state, the orchid is simply not able to form a baby on its own, but this does not mean that you cannot stimulate this process. To do this you need:
- Separate the peduncle from the plant and cut it into separate parts so that each has a while.
- Fragments of the peduncle must be placed in water with activated carbon. The water level should be a few cm above the cut. It is necessary to change the water every 3-4 days.
- As soon as the babies form on the fragments of the peduncle, you need to start spraying them with nitrogen fertilizers. This must be done once a week.
How to get it from a part of a plant?
Another way to grow babies is to divide the mother plant into parts. The division occurs as follows:
The plant must be removed from the pot and properly shaken off the substrate. Then the root system must be soaked for half an hour in warm water. Next, the bush must be carefully laid out on a newspaper and, with a sharp, disinfected knife, cut off the upper part of the plant, capturing several aerial roots.
Please note that the cut part must have at least 5 leaves. All cut areas should be thoroughly dried and treated with activated carbon or regular brilliant green. The plant will dry out within 24 hours, after which the upper part should be planted in the substrate and a small piece of foam should be placed under the stump - this will help avoid rotting. The lower part is also carefully planted back into the pot and they continue to care for it as before, but by reducing watering the plant by half. After some time, babies should appear on the lower part of the plant. If there are about 3 of them, don’t hesitate to remove them and then in the future you will get a beautiful and fluffy bush.
Landing Features
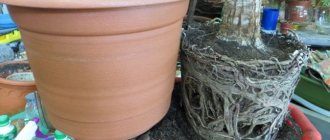
When to plant or transplant this flower? You should be guided by two criteria:
Appearance of the plant : if the flower grows very slowly, but is properly cared for, then this most likely means that it is time to plant it in another, larger pot.- Soil inside the pot : if after watering, the soil dries out quickly enough, this means that the roots of the flower have grown, and it’s time to change the pot to a larger one.
There is also a universal method that will help determine whether it is time for a transplant or not. You need to remove the plant from the pot and carefully examine the lump of earth. If the roots literally penetrate right through the ground and there are a lot of them, then it’s time to replant the plant.
Watch a video about transplanting geraniums:
General Tips
- Ideally, it is better to replant geraniums in the spring . It is necessary to prepare in advance a larger pot into which the flower will “move”.
- It is not necessary to replant the geranium into a new pot, but it must be disinfected . Also, to transplant geraniums you will need a watering can with water and fresh soil.
- It is not advisable to replant geraniums during flowering, but it is possible . If possible, it is better to avoid this.
- To remove geraniums from an old pot, you must first water it . And then you need to hold the pot with one hand, and carefully pull the flower with the other. As a last resort, there is an option to use a knife. With its help, you need to very carefully separate the soil from the walls of the pot.
What is it baby?
How does she look?
If you do not remove the peduncle after flowering, then after some time (3-4 weeks) you can find 2-3 buds on it. This can either be a new peduncle sprouting, or a baby phalaenopsis, or keika.
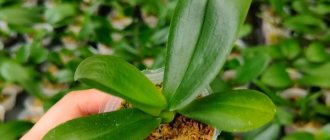
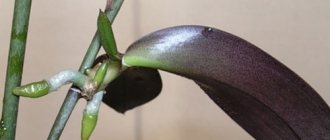
By the appearance of a developing bud, it is possible to determine what will grow:
- if the sprout is pointed, this is a sign of the appearance of a peduncle;
- a round bud indicates the appearance of a baby, which over time forms a rosette very similar to the mother plant.
Where does it grow?
An orchid shoot can grow:
- on a faded peduncle, if it is not cut off after flowering;
- on the stem between the axils of the leaves of the plant;
- on the root collar.
When is it formed and how to get it?
At home, an orchid usually begins to reproduce in the spring: an increase in daylight hours gives a signal to the plant about the onset of a favorable period. At the same time, other conditions should also contribute to the formation of a healthy flower that can produce offspring.
- Warm and humid air with a temperature of 23-25C and a humidity of 60-80%.
- Good nutrition - regular feeding with special fertilizers for orchids. However, overfeeding the plant can lead to absence of flowering for a long time.
- Watering is plentiful, but rare. No more than once a week, a pot of phalaenopsis should be placed in a container of water and left for 20-30 minutes to saturate the flower tissues. It is also advisable to water the leaves from a watering can or shower. After this procedure, make sure that there is no water left in the sinuses.
- Good lighting, but in the absence of direct sunlight.
The orchid should bloom and have a peduncle, which should be cut to the top bud. The age of the plant is at least 2 - 3 years. If favorable conditions are met, sprouts can be expected to appear.
If the orchid does not produce children on the stem or other parts, stimulating measures should be taken to grow them; Here's how to do it:
- Light stimulation. In February-March, the plant is positioned so that the sun hits the peduncle for 5-6 hours a day. The plant itself should be protected from direct sunlight to prevent the leaves from burning.
- Provide a temperature difference: during the daytime – 23-25 C, at night – 15-17 C. Such conditions will be created if the plant is placed on a window on the east or west side of the house.
- Reduce watering by 2 times compared to usual. Stick to this regimen for a month.
- Do not apply fertilizer during this period.
Ideally, the plant has bloomed in the fall, rested and gained strength over the winter.
So, everything is done correctly, shoots begin to develop from dormant buds on the peduncles. The appearance of sprouts can be stimulated by:
- treating the plant with succinic acid;
- applying cytokinin paste containing growth hormones to the kidneys.
Radical, or basal, children are formed when the plant is in danger; it is impossible to influence their occurrence.
What do you need to know before propagating a flower?
How to propagate? There are several ways to propagate geraniums . But the best way is to use cuttings or shoots.
Why exactly is this method better? One of the advantages is that with this choice you can see which geraniums are grown using this method - it is clear what will grow in the future. That is, the growth of the plant, what color the flowers and leaves will be. When is the best time to take cuttings? It is possible all year round, best in July-August and February-March.
When should I take a cutting from geranium flowers to plant? Before taking a shoot, you need to follow a number of simple rules :
You need to choose a well-developed specimen of the flower as the mother plant; in order for rooting to take place, you need to cut off the apical shoot, which has a well-developed growing point. The length of the cutting should be about 7 cm. Such a cutting should have about 4 leaves. The bottom two must be torn off.- Then you need to put the cutting in water so that roots form. This usually takes 2-3 weeks.
- Is it possible to plant a cutting without roots in the ground? Oddly enough, yes. But under special conditions. Many gardeners, having kept the shoots in the shade for about a day, and having previously dipped them in crushed coal, need to plant them in a light mixture at a temperature of +20...+22°C. You need to wait about a month for rooting in this way.
- It is important to compact the soil around the seedling well and always in a generous manner.
- It is important that the shoot is provided with good lighting at room temperature.
- How do you know if the cuttings have taken root? If they have formed new leaves, this means that their horse system is developed and there is no need to wait any longer. You can transplant the plant into a permanent pot.
Find out more details on how to transplant geraniums into another pot and grow them from cuttings here.
Is it worth separating the root children of an orchid (video)
At first, it is better to place the separated baby in conditions of high humidity and heat.
It can be a greenhouse, a bag, an arboretum, a terrarium or an aquarium, but without inhabitants. So a young individual should grow throughout the year. Then it is transplanted into an adult substrate. In the future, it is necessary to care for a young plant in the same way as for an adult - to ensure high temperature, sufficient humidity, timely watering, and good lighting. If the plant has been planted correctly and will continue to receive the necessary quality care, then it will certainly take root and even, perhaps, bloom soon.
At first, it is better to place the separated baby in conditions of high humidity and heat.
If you do not touch the young plants at all and do not try to separate them, then the growth of foliage will stop, and the rapid development of the root system will begin. As a result, the children can produce flower stalks that will bloom with a couple of regular buds. In this case, you should wait until the young plant has flowered and gained strength, only then can it be separated from the parent individual
To understand that the baby is rested and ready for transplanting, you need to pay attention to the rhizome. It will begin to grow rapidly again
How to plant correctly in a pot with soil?
How to plant correctly? First you need to properly prepare for this. To do this, you need to follow the following instructions:
- Sharpen the knife as sharp as possible.
- Carry out thorough disinfection with medical alcohol.
- Cut the cuttings as carefully as possible. Definitely from the top with 3-4 leaves. But under no circumstances with buds! Otherwise, roots will not grow on such shoots for very long.
- Place the resulting raw material in the shade for a while. Which one? When a new film appears at the cut site.
- Sprinkle the cut with Kornevin; if desired, you can use coal dust instead.
Watch a video about propagating geraniums by cuttings without roots:
Further care
You need to specially prepare the cups - make holes in them for water drainage . In addition, thanks to the holes, air penetrates to the roots, which is also very good.
Next you need to follow the following instructions:
Add a little vermiculite to slightly wet, damp soil.- Fill each cup with soil,
- If the soil was treated with boiling water, you must, of course, wait until it cools down. Fortunately, this will not take much time. Only a few minutes.
- Place the shoots that were previously freed from the lower leaves and deepen them a few centimeters.
- Leave the glasses on a tray (to make them convenient to move) and place them in a dark place for a while,
- After 5 days, the cups need to be moved to the window. Preferably NOT on the south side.
What to do if yellow, limp leaves appear on some plants? You can place them under the jars. That is, create something like mini-greenhouses for them. Thanks to the special microclimate, the plants will recover in a couple of days .
Rooting shoots using potatoes
How to plant a rose shoot from a stem and what other germination methods are there? A slightly unusual but effective method using ordinary potatoes. To do this, you will need several young tubers, the number of which should be equal to the number of cuttings. They contain nutrients. Potatoes must be carefully prepared before use. To do this, they are washed, treated with a weak solution of potassium permanganate, all eyes are removed and dried.
They need to be inspected to ensure there is no damage. A hole is made in each potato into which the rose stem is immersed. The tuber is placed in the ground and covered with a layer of soil equal to 7 cm. One bud is left above the surface. Water with a weak solution of potassium permanganate and cover with a plastic bottle. After about 15-20 days, the first leaves appear, after which the bottles are removed.
This method gives 90% rooting of the plant. It is relatively new, but a large number of positive reviews show its effectiveness. It is suitable both for planting roses directly in the ground, and for planting them in a pot that should be high.