When and how do babies appear?
With good care, phalaenopsis very often produces babies or so-called keiki. Babies are small, well-developed young plants. They can be used for reproduction. In order for a baby to appear on an orchid, it needs to create the following conditions:
- Provide the plant with sufficient sunlight during the period after flowering.
- Maintain the temperature not lower than + 25°C both during the day and at night.
- Trim the peduncle to the level of the first dormant bud.
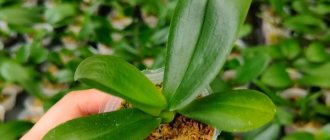
After the phalaenopsis has given birth to a baby, its development on the mother plant continues for six months. During this time, it grows 5-6 leaves and its own root system. After the size of the roots reaches 5 cm, the baby orchid is planted in a separate pot.
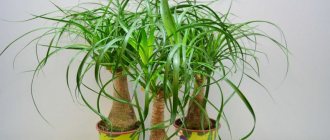
Keiki Phalaenopsis
Unlike the hybrid Dendrobium phalaenopsis, which can reproduce vegetatively (cuttings, dividing the bush), the Phalaenopsis orchid reproduces by growing keiki (babies, aerial offspring) - fully formed small plants. Baby orchids can grow on stems, on peduncles, or sprout from roots. This is quite a rare occurrence. It is believed that children grow up in two cases:
- when caring for a flower is far from ideal, the plant, with all its might, fulfills the program embedded in it - it reproduces its copy;
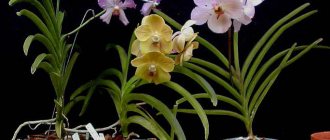
- healthy, blooming and happy orchids give their owners a new sprout in gratitude for their care.
You can use shoots to propagate an orchid.
Whether it is worth planting the baby orchid or leaving it on the mother stem is up to you to decide. Both approaches have their advantages. If you want to create a completely new flower (for example, as a gift to friends), then you can separate the baby, with some caution, at home. Or you can leave the new orchid. The result will be an interesting branched plant.
Types of children
Depending on the location, the following types of children are distinguished:
- basal;
- located on the peduncle;
- developed in the leaf axil or stem.
Most often, the development of shoots in phalaenopsis is observed on the peduncle. This may be due both to the creation of favorable conditions and to the approaching death of the mother plant. In most cases, they manage to develop into an independent plant without outside help.
The mechanism of development of root and stem children is somewhat different. It is not the dormant bud that participates in their formation, but the meristem tissue of the plant. Experienced gardeners associate the appearance of such shoots with the approaching death of the plant. Their appearance is also possible due to injuries to the trunk, death of a growing point, during a prolonged drought, or when a peduncle forms from the center of the rosette. Children that develop on the trunk or in the leaf axil may not produce roots for a long time, so their rooting is somewhat difficult.
Stem baby phalaenopsis orchid
Separation from the mother plant
The procedure for separating the shoot can be carried out when the baby grows at least three leaves and 1-2 pairs of roots. In fact, in this form it appears as a one and a half to two year old seedling, which can already be grown on a substrate for adult orchids.
Application of cytokinin paste
Cytokinin paste is used to intensively speed up the awakening of sleeping ones or the birth of new buds on orchid flower stalks, and not only. This is a very affordable tool in all respects, which, when used correctly and with a reasonable approach, gives almost one hundred percent results.
The procedure itself is simple even for a beginner. A dormant bud is selected, cleared of the scales covering it and treated with the drug.
Stimulation with cytokinin paste.
Attention! Cytokinin paste should not be used on young, sick, exhausted plants or orchids that are recovering after resuscitation. Such a plant may not be able to withstand the load - it simply does not have enough resources, which will lead to unpleasant consequences.
How to properly separate a baby from an orchid
The separation of the baby from the mother plant must be carried out correctly, only in this case the small plant will successfully take root in its new place. Planting of the sprout begins after roots have formed on it. To do this, it is cut off with a small part of the peduncle using sharp pruners or scissors.
All cut areas must be dried for half an hour, and then treated with crushed cinnamon powder or charcoal. The treatment procedure should in no case be neglected; the cut site is like an open wound, which without appropriate disinfection can become a source of putrefactive infection.
How to plant an orchid shoot
The work of separating the baby from the mother plant is behind us. Now all that remains is to figure out the landing rules. Planting a baby phalaenopsis orchid is done in a small transparent plastic pot. It can be purchased at a specialized gardening store.
If for some reason you cannot find a pot of suitable volume, you can use any plastic container with transparent walls. For example, it could be a glass of cotton swabs. The main thing is to make a sufficient number of drainage holes in the sides and walls of the container.
Planting baby orchids
A small orchid should be planted in a special substrate consisting of pieces of bark, moss and light turf soil. When planting, the baby orchid should be located strictly in the center of the pot, and its root collar should be at soil level; it should not be buried. In order for the root system of the phalaenopsis to be evenly distributed throughout the entire pot when planting, you need to hold the plant with one hand and gradually add soil to the roots with the other.
Immediately after planting is completed, the pot is lightly tapped on the sides, this helps the soil to settle. The substrate cannot be compacted by force. Phalaenopsis roots are quite fragile and break easily even with slight pressure on them. You cannot water the orchid sprout immediately after planting. The cuts on the peduncle should have time to heal. Usually this takes no more than 2-3 days.
Care after transplant
Aerial orchid roots: transplantation and other options
To grow an orchid, you need to carefully care for it. The flower is not like other indoor plants, since it comes from the tropics, so it is better to choose a different growing principle.
During the growing process, you should pay attention to the following nuances:
- Observe the mode and method of watering.
- Feed the plant during its growth period.
- Prepare the right soil and collect a quality substrate.
- Monitor the condition of the stem and root.
Caring for a transplanted orchid
Additionally, it is worth adjusting the temperature. The plant should not receive too much direct sunlight. In general, you need to create a tropical climate for the flower.
Watering
It is especially difficult to monitor the water balance of the plant and water it correctly. If there is too much water, the roots will begin to rot, so the standard watering procedure should be modified:
- Place room temperature water in a bowl.
- Place the flowerpot with the flower in the container for 15 minutes.
- Remove the flowerpot and place it on a towel. Excess moisture should be absorbed by the fabric.
- Before placing the pot in the tray, make sure that the moisture through the holes in the bottom is completely absorbed by the towel.
Note! Immediately after watering, the flowerpot should not be placed on the windowsill. You need to keep the plant in a warm place for several hours. Watering should be done when necessary, so there is no exact schedule.
Top dressing
In order for the plant to develop normal leaf mass, flowering to occur every year and babies to be planted, it is worth periodically “feeding” the plant with fertilizers of various classifications.
For fertilizing, you can use a variety of fertilizers:
- organic;
- mineral;
- to accelerate growth.
Feeding the plant during growth
Each type is used in accordance with specific instructions for doses and periods of fertilizer application. But the most popular option is mineral fertilizers, since they contain a lot of minerals and vitamins necessary specifically for orchids.
In any case, the dosage for the flower should be 1/10 of the standard. The timing of “feeding” is determined by the size of the plant and growth conditions. It is advisable to apply a certain type of fertilizer during the flowering period, and a week after - a different type of substance. The further schedule of “feeding” depends on the condition of the flower.
The soil
Many problems in the process of caring for an orchid arise if you prepare the wrong substrate for the plant. Novice flower growers even use ordinary soil for flowers. In fact, the orchid belongs to the family of epiphytes, so by its nature it must be attached to a wooden support by its roots.
Extraction from old soil
You can plant the plant in purchased soil. A floriculture store may offer several options, but it is better to prepare the substrate yourself. You need to mix dry, finely chopped pieces of bark and pieces of moss in equal proportions. Pre-soak the components in flower antiseptics to remove pests and insects.
An orchid is a very beautiful and unusual flower that requires proper care during the process of growth and replanting. You need to know how to remove the baby from the mother bush without harming the second specimen. Preparation and further actions significantly affect the condition of the plant. Proper care will help the orchid develop into a full-fledged flower after transplantation.
How to grow orchid babies without a root system
In some cases, for example, when the mother plant dies or for other reasons, a baby orchid is found without roots. How to plant an orchid shoot in this case so that it successfully takes root in a new place and begins to develop a root system?
Under normal conditions, transplanting a baby orchid without roots is not possible. It is left on the mother plant until the root system develops. But if time passes and the roots still do not appear, you can try to stimulate their appearance.
You can use sphagnum moss for this. It is applied to the root zone of the process and secured with a bandage or any other available material. After this, the moss is moistened daily; it should not be allowed to dry out completely. Usually, in this way, the root child is forced to grow roots.
Growing roots of a baby orchid on a peduncle
But what is the right thing to do if it is not possible to wait for the natural formation of roots. In this case, you need to act as follows:
- Cut off a small piece of the peduncle along with the baby.
- Disinfect cut areas with 70% alcohol.
- Dry and powder the sections with crushed sulfur or charcoal powder.
- Rinse living sphagnum moss with boiled water.
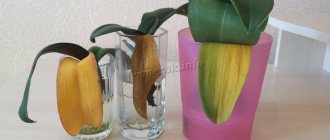
- Place a layer of moss in a glass jar of a suitable size.
- Place the baby in the center of the moss layer.
- Cover the jar with a lid.
- Place the jar in a warm, well-lit place.
During rooting, the jar must be ventilated. If after 1.5-2 months from planting the root buds have not appeared, then you can try growth stimulants. For example, powder the junction of the baby with a piece of peduncle with Kornevin powder, and spray the leaves with Epin solution.
After roots of at least 3-5 cm in length have developed on the young plant, begin replanting it. In a plant such as an orchid, the roots develop slowly, so the babies are first planted in a small plastic cup.
After planting, the glass with the sprout is again placed in a glass jar. In conditions of high humidity, the root formation process occurs much faster. Properly planting a baby orchid is only half the problem, but how to grow it into an adult flowering plant?
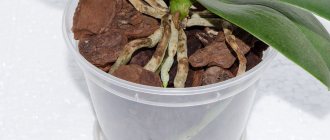
Transplanting into substrate at home
A new sprout, separated from an adult plant, must be placed in an individual pot with fresh substrate for further growth and development. Only those children whose roots have grown 5 cm in length can be planted in a pot, otherwise the plant may die due to lack of nutrition.
The substrate for young plants should consist of bark fragments about 1 cm in size. In addition to bark, the substrate should contain charcoal and sphagnum moss. There is no need to lay sphagnum on top of the substrate, as is done when planting adult plants.
Preparing a pot for planting a shoot
The pot for planting the baby should be made of transparent plastic with perforations. The container size should be minimal. In the future, when the shoot takes root and begins to grow leaf mass, it will need to be transplanted into a larger container.
How to seat a baby?
Before placing the sprout in the substrate, add some drainage to the bottom of the pot. This could be expanded clay, pumice, pebbles, or other similar material.
After laying the drainage, place the plant in the pot:
- the root collar should be level with the edge of the pot;
- the substrate is laid gradually, without crushing it, so as not to injure the roots;
- if some of the roots remain outside, then do not touch them.
How to plant a sprout so that it takes root?
To stimulate further root growth after planting, you can use special products. Before placing the sprout in a pot, it must be kept in a liquid with the addition of a phytohormone, which stimulates the formation of new tissues. Keep the flower in the solution for 15 minutes. After planting the baby in the right soil and providing it with proper care, the root system will develop properly