Author: Elena N. https://floristics.info/ru/index.php?option=com_contact&view=contact&id=19 Category: Houseplants Published: January 17, 2019Last edits: January 11, 2021
- Growing conditions
- Growing from seeds
Did you know that the first gloxinias brought from South America in the 18th century were rhizomatous, and tuberous species were brought from the same places only in the last century? And what exactly was tuberous gloxinia that became the basis for the development of many beautiful varieties of this indoor crop? What’s also interesting: Gloxinia is listed in botanical reference books as Sinningia beautiful, although Gloxinia and Sinningia are two different, albeit related crops: Sinningia is a rhizomatous plant, and Gloxinia beautiful is a tuberous plant. From this article you can learn how to care for gloxinia during the growing season, how to stimulate its flowering and how to then organize a dormant period for the plant.
Planting and caring for gloxinia
- Flowering: from March to late summer.
- Lighting: bright diffused light with 12-14 hours of daylight.
- Temperature: during the growing season - normal for residential premises, during the dormant period - about 10 ˚C.
- Watering: during the growing season - regular, but moderate, by bottom watering; from August the plant prepares for a dormant period, and watering should become less frequent.
- Air humidity: high, but spraying the leaves is strictly not recommended; it is better to keep containers of water around the plant.
- Feeding: during the active growing season, once every 10 days with a solution of complete mineral fertilizer for flowering indoor plants.
- Pruning: in May or June, after the end of the first flowering, and in the fall, before the start of the dormant period.
- Dormant period: from late October to late February.
- Transplantation: at the end of the dormant period.
- Reproduction: seeds, leaf cuttings.
- Pests: thrips, cyclamen and spider mites.
- Diseases: gray rot, viral infections.
Read more about growing gloxinia below.
plant (lat. Gloxinia) , which received its name in honor of the Alsatian doctor and botanist Benjamin Peter Gloxinn, forms a genus in the Gesnerieceae family. Gloxinia flowers are perennial tropical herbs and shrubs. Gloxinia is native to Central and South America, where it grows in the deciduous forests of Brazil and Peru, in the rocks of Mexico, in the Andes or on river banks. Another name for gloxinia - Sinningia (lat. Sinningia) - was given to it in honor of Wilhelm Sinning, a gardener at Boston University, who devoted himself to the selection and hybridization of gloxinia. Thanks to his efforts, hybrid or domestic gloxinia (sinningia) appeared in floriculture, represented by many varieties and hybrids.
Feeding with fertilizers
After planting the tuber, there is no need to feed gloxinia for the first 1.5 - 2 months. Fertilizers are applied an hour after the main watering, along the edges of the pot, making sure that the solution does not get on the leaves or at the growing point. It is advisable to do this in cloudy weather or in the evening, so that after feeding the plant is not in the sun. Fertilizing with complete mineral fertilizer alternates with organic fertilizers every two weeks, but the first fertilizing should be mineral.
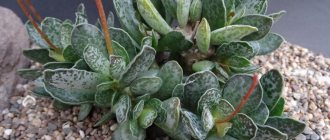
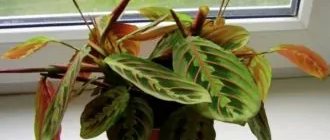
Lack of iron in gloxinia (photo by Tideya)
You can feed once every 10 days, but then make the solution concentration weaker.
Before the appearance of buds, organic matter is alternated with nitrogen: (potassium nitrate, ammonium nitrate). With the appearance of buds, organic matter is alternated with phosphorus: superphosphate, potassium phosphate), if this is not done, dormant vegetative buds will awaken, which will lead to a suspension of the normal development of the plant.
- Nitrogen fertilizers cause increased vegetative growth; if they are in excess, flower buds are almost not formed. Excess nitrogen can also cause root rot. For this reason, nitrogen fertilizers are given only at the beginning of growth.
- Phosphorus fertilizers - enhance flowering, but their... excess causes premature aging of leaves and leads to chlorosis of the plant.
- Potassium fertilizers improve flowering. Excess leads to the formation of shortened peduncles, yellowing of the lower leaves, and deterioration of flower color.
- Microelements - affect the size of flowers, their color and the number of buds.
Organic fertilizers for tuberous flowers
Bird droppings
Manure is a very potent fertilizer and when using it, the concentration should be strictly observed. Pour 1 tablespoon of litter into 2 liters of water, close the lid and place in a warm and dark place. Over the next 3-4 days, stir with a stick until fermentation begins (bubbles appear on the surface). After the fermentation process is complete (about a week), the bubbles disappear, solid particles settle to the bottom of the jar, and the solution becomes lighter. It is now ready for use.
250 ml of concentrated solution is poured into 1 liter of water and mixed well; the plants are watered with this solution after preliminary moistening. (one hour after the main watering).
You can simply buy ready-made organic fertilizer.
Mineral fertilizer for tuberous flowers
for 10 liters of water take:
- 10 g simple superphosphate
- 10 g potassium chloride
- 4 g ammonium nitrate
- 5 g magnesium sulfate
- 0.1 g ferric chloride
- 0.07 g boric acid
- 0.004 g copper sulfate
- 0.05 g manganese sulfate
- 0.008 g of zinc sulfate.
If you can’t or are too lazy to look for everything separately, then just buy phosphorus-potassium mineral fertilizer and microelements.
I use Uniflor - flower, Uniflor-bud or Baby (dry, granulated for peppers and tomatoes) as phosphorus-potassium, Uniflor - growth, Uniflor - green leaf as nitrogen and Uniflor-micro as microelements.
After flowering, feed 2 times with potassium-phosphorus fertilizers with an interval of 14 days. This will help the tuber regain strength and survive the dormant period well.
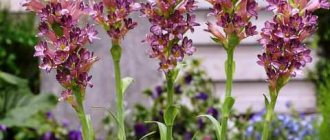
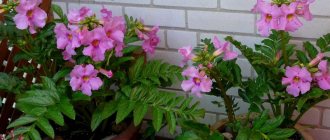
Gloxinia hybrids F1
Gloxinia hybrids F1
Gloxinia hybrids F1
Botanical description, species
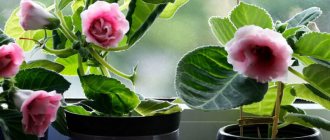
Indoor gloxinia is a tuberous perennial with a short stem and juicy velvety leaves of rich green color. The same velvety bell-shaped flowers, simple or double, pink, red, white, purple, speckled, frilly or two-colored, reach 5 cm in length and 7 cm in diameter. Numerous gloxinia seeds are very small. Of the 25 species that exist in nature, only Gloxinia royal and Gloxinia beautiful became the basis for breeding work.
Royal Gloxinia (Gloxinia regina)
It is a flower with thickened stems up to 10 cm in height. Dark green pubescent leaves, with silver veins on the upper side and reddish on the bottom, broadly oval, arranged oppositely in 4-6 pieces, from 15 cm to 20 cm long. Peduncles are long, bell-shaped drooping flowers of a dark purple hue reach a length of 5 cm , and in diameter 7 cm.
- How to properly care for fuchsia
Gloxinia speciosa
A herbaceous plant with broadly oval, evenly green leaves narrowed at the base on long stalks. Flowers of various shapes, depending on the variety, including double gloxinia, white, red, violet, blue, pink, purple, there are forms with a white rim around the edge.
Like any plant, gloxinia has some features:
- after flowering, the above-ground part of the flower dies, and it is important to wait until this process spontaneously completes;
- before the dormant period, gloxinia requires feeding with fertilizers that do not contain nitrogen - potassium monophosphate, for example;
- a gloxinia pot requires a decent size, for an adult plant - at least 15 cm in diameter;
- if you want your gloxinias to bloom all year round, arrange a rack or a warm shelf for them with additional lighting for 14 hours a day.
Types of plants and photos
Let's consider the most popular types of beautiful gloxinia with the name of the varieties, their descriptions and photos. Today, 14 species of gloxinia are known to the general public , which are adapted by breeders for home cultivation.
Perennis
One of the most common types of flower. It grows as a small lush bush with heart-shaped leaves of dark green color. The flowers are mostly small, blue, lilac and purple. 1-4 pieces bloom on one stem.
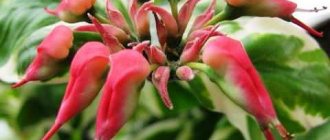
Gymnostoma
The delicate pink flowers of this gloxinia have red specks in the center and are somewhat reminiscent of the mouth of a fairy-tale creature reaching for food. This is probably why the variety received its name, translated from Greek as “opening mouth.”
Erinoides
These flowers are valued by gardeners not for the beauty of the buds themselves, but for their pretty leaves. They are quite large in size, have pronounced veins and beautiful pile. The flowers of erinoides are inconspicuous: small, light with dark strokes . But the general appearance of both the flowers and the “green part” give this variety a special, one might say, aristocratic charm.
Lindeniana
Also a “nondescript” variety from a floral point of view. Its leaves are especially beautiful. All of them are bright green in color, have whitish veins and are framed by a dark outline.
Nematanthodes
Garden plants, which, thanks to their half-meter size and lushness, look like a green carpet. They have small red-yellow flowers with a bright center.
Purpurascens
A distinctive feature of this variety are pink flowers tapered to the end , which no longer resemble bells, but small amphorae. The leaves look like pointed hearts, have a dark green tint and are drooping.
Sylvatica
The variety is characterized by narrow oblong leaves with bright red flowers. It was first found in Peru quite recently - in 1968. The plants are distinguished by dimensions that are quite impressive for gloxinia: the height of the bush is half a meter or more.
It is noteworthy that the flowers of sylvatica are located in the axils of the foliage. The remaining types of gloxinia either cannot be cultivated at home, or are so capricious that they do not grow in our climatic and “apartment” conditions.
Imposter
Another variety of gloxinia is called “sinningia” . It was officially discovered much later than the well-known flowers, but it had long been cultivated by European flower growers. The difference between Gloxinia and Sinningia was established by the German botanist Wilhelm Sinning. He was the first to notice that the difference between this variety is not the root system, but the tuberous system. That is, Sinningia belongs to a completely different type of plant.
In the reference books, the differences were noted and the flowers were divided, as they say, into different paragraphs. But flower growers refused to change their minds and began to call Sinningia “The Beautiful Gloxinia.”
Important : To obtain other varieties of flowers at home, cross-pollination is used.
Caring for gloxinia at home
Growing conditions
If you decide to grow gloxinia, provide it with a spacious place where bright, diffused light will fall: it needs twelve to fourteen hours of daylight, so during long nights, be prepared to provide the plant with additional lighting. There is an easy way to tell if a flower has enough light: if the dark green leaves are horizontal and the stem is short, there is no need to worry, but if the leaves and stem stretch upward, then the plant is not getting enough light.
However, remember: caring for gloxinia involves, first of all, protection from direct sunlight, which is detrimental to the plant.
And one more important point: no drafts! If you decide to keep the flower on the windowsill, you will have to forget about frequent ventilation. And the air humidity that gloxinia needs will have to be increased artificially by placing containers of water around the flower, since the plant does not like moisture on the leaves and flowers, which cannot be avoided when spraying.
As for the temperature, during the growing season gloxinia will be satisfied with the usual room temperature for this time of year, but during the dormant period it needs coolness - about 10 ºC. Observe the plant, and it will tell you what changes in care it needs: overheating causes gloxinia leaves to stretch upward, but if the leaves are lowered below the edge of the pot, the flower freezes.
Watering
During the growing season, water gloxinia in a tray or by overhead watering, being careful not to wet either the leaves or flowers. Between waterings, the top layer of the substrate should dry out. At the end of August, the intervals between waterings are increased so that the plant gradually enters a dormant period until the end of October. Both overwatering and underwatering should be avoided. Water the gloxinia with settled or filtered water a degree or two warmer than room temperature.
- How to properly store hippeastrums
Fertilizer
During the period of active growth, gloxinia is fed once a decade with a complete complex fertilizer for ornamental flowering plants. In mid-August, feeding is stopped. If you neglect the application of fertilizers, problems may arise with both growth and flowering: growth slows down, the buds become smaller, the color of the flowers fades, causing the decorative appearance of the plant to suffer, and the flowering period becomes much shorter.
Sometimes the plant suffers from a lack of boron. This becomes noticeable in the summer with maximum daylight: deep notches appear along the edge of the leaf blade. In this case, you need to foliar feed gloxinia with a two percent borax solution. And let me remind you that excess fertilizer is much more dangerous for the plant than its lack, so try to observe moderation in this matter.
Landing
Every year, at the end of the rest period, the gloxinia is transplanted into a new pot. The soil mixture used is the same as for begonias and violets. It can be purchased at the store, or you can make it yourself from two parts of leaf, one part of humus soil and one part of sand.
So, in February, gloxinia tubers are taken out of the pot along with a lump of earth and transferred to a new pot, slightly larger than the previous one, in which a layer of drainage is first laid, and a layer of soil is placed on top of it. Then the substrate is gradually added and compacted. As a result, the tuber should only be buried halfway into the substrate. The same principle applies to the initial planting of gloxinia.
Gloxinia has faded - what to do?
When gloxinia has bloomed (usually this happens in May-June), cut off the stem and almost all the leaves, leaving only 2-4 lower leaves on the plant, in the axils of which stepsons will soon appear, of which you will leave a couple of the strongest ones and remove the rest . At this time, it is advisable to fertilize the flower with fertilizers for growth, and a month later, when the buds appear, you need to introduce fertilizers for flowering.
The second bloom most likely won't be as lush as the first, but that's normal. Sometimes gloxinia blooms all summer, and the question of re-blooming disappears. When gloxinia has completely faded, you need to gradually reduce watering and stop feeding, wait until the leaves turn yellow and dry, then cut off the tops, leaving a stump of 1-2 cm above the tuber.
Planting a tuber
In February - March, less often January (it all depends on the storage temperature) the tuber begins to germinate. If it was stored in a pot with old soil, you need to take it out and clean it of the remnants of last year’s roots and soil. Disinfect in a pink solution of potassium permanganate (30 min) or in any fungicide solution. For faster root formation, the tuber is soaked in a heteroauxin solution for 18-24 hours (making sure that the solution does not get into the recess of the tuber), but this is not necessary. The tuber is planted in the ground with the depression upward and sprinkled with soil no more than 1 cm. There must be drainage at the bottom of the pot (foam plastic, expanded clay, crushed stone chips, etc.). The higher the pot, the more drainage (up to 1/3).
During the period of tuber germination there are always the greatest losses and they are associated with waterlogging of the soil, as a result of which the tuber rots. Since the development of roots is preceded by the formation of the above-ground part, watering should be very careful along the edge of the pot or into the tray and only until the soil is lightly moistened. To avoid unwanted losses I do this:
I plant the tuber in moist soil level with it, place the pot in a bag and place it in a bright place without direct sunlight (22-25 degrees). I ventilate once a day for 10-15 minutes. After the first pair of leaves appear, I open the top of the bag and acclimate the young plant to room conditions for 3-4 days, then remove the bag completely. As the stem grows, I add soil and cover the tuber by 1-2 cm. While the plant is in the bag, there is no need to water it, the soil remains evenly moist and loose, increased air humidity and heat are maintained, the roots grow faster and there is almost no loss.
Gloxinia in winter
to the question “how to store gloxinia after flowering” :
- Gloxinia, pruned for the winter, is stored in a cool, dark place until the end of February. Gloxinia is moistened in winter only 1-2 times a month so that the tubers do not dry out. Gloxinia can overwinter under a bathtub or in an insulated loggia;
- the second way to preserve gloxinia during the dormant period involves removing the tuber from the pot, and since at the end of January or beginning of February you will still have to transplant the gloxinia into a new pot with a new substrate, so why not remove the tuber from the pot in the fall? The extracted tuber is cleaned of soil residues, placed in a plastic bag with a zipper, vermiculite and substrate are added to the bag in a 1:1 ratio, the zipper is fastened and the bag is placed for winter storage in the vegetable section of the refrigerator. Now you don’t have to worry that the tuber may dry out without watering after three to four months of dormancy.
You don’t have to worry about how to preserve young gloxinia grown from seeds in winter: it is left in a pot and watered moderately so that the small, still weak tuber does not die over the winter.
- Sowing lobelia seeds for seedlings in bunches and in bulk
Secrets of success
Gloxinia needs constant ventilation, but it does not tolerate drafts.
The plant is replanted in the spring, as soon as the pot becomes too tight for its root system. As a rule, it is required annually.
To ensure longer and more abundant flowering, it is important to remove faded flower stalks in a timely manner.
The rhizome of Gloxinia needs a rest period of up to three to four months to avoid depletion.
The more intense and prolonged the flowering, the longer the rhizome should rest after it.
Before placing the underground part of the plant to rest, all remnants of shoots are carefully removed. Otherwise, it may rot. It is necessary to moisten the Gloxinia rhizome with light spraying no more than once or twice during the entire rest period.
It is advisable to “awaken” the rhizome from hibernation gradually. First, it is placed in a bright place with a temperature of +16°C. Then you can gradually increase the temperature to the usual +20–22°C for Gloxinia.
Reproduction of gloxinia at home
Growing from seeds
The rich assortment of gloxinia seeds in specialized stores inspires optimism for those who want to test themselves as a breeder. But don't expect too much from this experiment. Growing gloxinia from seeds begins with purchasing seed material - thank God, this is not a problem today - and it is better to purchase granulated seeds. The packaging usually indicates a germination period of 4-6 months, or even 9-10, but this is only if you sow in winter or autumn. If you do this in March, the process will go much faster.
You can use purchased greenhouses for sowing, or you can make a greenhouse yourself: loosely place and soak peat tablets in a deep plastic container with a lid, and spread the granules onto them without embedding them in the soil. Make several holes in the lid for ventilation. Place the greenhouse with the seeds in a bright, warm place with a temperature of approximately 22-23 ºC and for one and a half to two weeks, carefully moisten the soil as necessary and wait for the emergence of seedlings. When the sprouts sprout and get stronger, plant them together with peat tablets in disposable cups, and after a while in permanent pots.
Leaf propagation
Whatever they say, vegetative propagation is usually more reliable than seed propagation, and if you do not have a particular reason to grow plants from seeds, use the vegetative method, and we will tell you how to grow gloxinia from leaf cuttings. Since Gloxinia leaves are quite large, take either the smallest leaf or divide a large leaf into fragments. The leaf blade must be cut across, parallel to the transverse veins; the leaf petiole is also cut off, leaving no more than 2 cm. Use a sharp tool for cutting, otherwise the edges of the leaf or its fragments may rot.
Plant the fragments in pots with a light, slightly moist substrate and place them in a greenhouse or cover them with a plastic bag - for a month you will not have to water the soil or ventilate the greenhouse, and after a month the rooted fragments should be gradually accustomed to life outside the greenhouse, opening the plastic for a short time . The greenhouse with the rooting parts of gloxinia should be kept in a well-lit, warm place.
Where is the best place to put it?
Each plant must be placed correctly in the house. If the flower is in its place, its effect will be more effective.
It is recommended to place Gloxinia in a prominent place so that its lush flowers are not limited to walls or furniture. This way the plant can more freely fill the space with positive energy. It is best to place gloxinia in the center of the room, but the corner is absolutely not a suitable place for it.
In addition, if it is necessary to improve the situation in a specific area of life, gloxinia is placed in accordance with the cardinal directions :
- It is required to attract love and happiness in family relationships - the plant is placed in the southwestern side of the home.
- The problem concerns raising children - the eastern side of the apartment is suitable.
Gloxinia is a bright and lush flower. It can not only decorate the interior, but also attract prosperity and good luck to the house. The signs regarding this plant are the most positive. Therefore, if you want to grow gloxinia at home, you should do it without the slightest doubt.
Pests and diseases
Unfortunately, gloxinia, like other flowers, suffers from diseases, which are usually the result of improper care. Gloxinia is affected by gray rot, which appears as brown spots on the leaves. It must be combated by treating the plant with a fungicide, after removing all damaged areas. But most often the plant suffers from root rot: the roots turn dark brown, the stem rots at the base and the plant dies. This happens from constant waterlogging of the roots or watering the plant with too cold water. In addition to the diseases mentioned above, protect gloxinia from late blight, blackleg, powdery mildew and fungal diseases. For preventive treatment, use phytosporin; for treatment, use foundationazole.
Viral diseases will also not bypass gloxinia, especially if thrips, cyclamen or spider mites infest it, so try to avoid this.
The cyclamen mite can only be seen under a microscope; with the naked eye you can only detect a large accumulation of mites, looking like a layer of dust on the underside of the leaf blade, but if the leaves of the plant begin to deform and thicken, and curl down at the edges, if the stem twists, the buds wither , the petals of the flowers are deformed, and the tops of the shoots dry out - this means that the flower is occupied by cyclamen mites.
The spider mite is also almost invisible; it also settles on the underside of the leaf and feeds on the cell sap of the plant. You can tell that you are dealing with a spider mite by the white dots that later turn into yellow-brown spots, or by the thin web if the infestation is already at a very strong stage.
The presence of thrips is revealed by light dots, streaks and spots on the leaves and a silvery sheen of undamaged areas of the leaves, which dry out over time, turn brown on the underside, and the edges begin to curl upward. Thrips larvae go into the soil, so to combat the pest you will have to change the top layer of the substrate, or better yet replace it with a new one, but before that, triple treat the plant with insecticides (actara, karbofos, fitoverm, actellik) at intervals of a week. The same measures are also effective in the fight against ticks, but the soil will not have to be changed.
Transfer
It is recommended to replant the gloxinia tuber annually at the end of the dormant period (last days of February - beginning of March).
For gloxinia, take light and loose soil. Soil mixtures designed for violets or begonias are best suited. Recommended pH is 5.5-6.5.
I take violet soil and add perlite to it (about a quarter of the pot's volume). This makes the substrate more loose. Zemfira Khasanova, Novy Urengoy. 4 years of experience in growing gloxinia.
When preparing it yourself, mix leaf soil, sand and peat in a 2:1:1 ratio.
Scraps of polystyrene foam or wine cork, or eggshells are used as drainage. It is better not to use expanded clay. The drainage layer must be at least 3 cm.
To plant gloxinia, take a low but wide pot. Its diameter should exceed the size of the tuber by 5-6 cm.
Step-by-step instructions for transplanting gloxinia:
- The tuber is removed from the container where it was stored during the winter.
- It is cleaned of remnants of dead roots and inspected.
- If rotten areas are found, they are cut off with a clean tool and sprinkled with coal.
- If there are many sprouts on a tuber, the least strong ones are broken off. It is best when gloxinia has only one growing point.
- For additional disinfection, the tuber is placed in a solution of potassium permanganate for half an hour. For better germination - in a solution of a growth stimulator. But the top with the growing points should not get wet.
- Dry the tuber after soaking (about a day).
- Drainage and substrate are poured onto the bottom of the pot (about ⅔ of the height).
- The tuber is placed in the ground with the concave part up and covered with soil so that the growing points remain open.
- The flower is watered, covered with film and placed in a warm, bright place.
The tuber should not be completely buried at the time of planting. It is buried approximately ⅔. When the first leaves appear, add soil to the pot to cover the growing points.
The pot with the gloxinia tuber is ventilated twice a day, morning and evening. When leaves appear, the film is removed.
In the video below you can see how an expert from the Garden World channel plants gloxinias.
Problems when growing gloxinia
By the way gloxinia looks, you can guess what care rules the grower is violating.
The consequences of common errors are shown in the table.
| Problem | Probable Cause |
| Yellowing of leaves near veins | Nitrogen deficiency |
| Yellowing of the entire leaf blade | Overwatering Watering with hard water Sun fading Dry air |
| Falling buds | Sudden temperature change Draft Dry air |
| Leaf discoloration | Lack of lighting Lack of magnesium in the soil |
| Brown spots on leaves | Phosphorus deficiency |
| Curling leaves | Dry air Direct rays of sun Excess potassium in fertilizing |
| Rotting stems and buds | Waterlogging at low temperatures Too acidic soil Excess nitrogen |
| Drying leaves | Potassium deficiency |
| Spots on petals | Contact with water droplets |
| Serrated edges along the edges of leaves | Boron deficiency |
| Redness of leaves | Lack of potassium and phosphorus |
| Brown spots on leaves | Watering with cold water Draft Sunburn |
| Unopened buds | Lack of lighting |
| Green peas in place of a bud | Too cold wintering Lack of feeding |