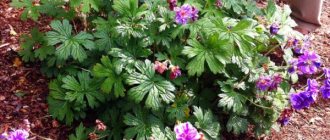
Geranium is one of the most beautiful flowers that can grow both in a room, planted in a pot, and planted in a garden plot. Very often the plant is called pelargonium, although this is not entirely true, since pelargoniums are a variety of indoor crops, while geraniums usually grow in open ground.
Be that as it may, in order for the flower to grow and develop, you should know the planting rules, which will be discussed below.
How to plant geraniums in a pot
Considering that most gardeners do not have the opportunity to plant a flower in the garden, they use a regular pot for these purposes. If everything is done correctly, the plant will delight you with its lush flowering. The flower does not like to be left with a lot of space in the container, so pots for pelargoniums should be small.
When planting a cutting, you can take a small jar (be sure to make drainage holes in it), and when the roots begin to grow, then you can buy a small pot. As for the material from which the product is made, the soil in a plastic pot will dry out much more slowly than in a ceramic one, but the second option is preferable, because ceramics is a natural material.
Read How to propagate geraniums from cuttings in the fall
Planting geraniums at home is very simple. True, first you need to take care of the substrate. The flower is quite capricious, so it will not grow in soil that does not meet certain requirements.
The soil mixture may be as follows:
- Purchased soil, which will need to be mixed with some components (vermiculite, perlite and river sand).
- Earth taken under trees or bushes (before use it must be disinfected using a manganese solution).
- Mix eight parts of turf soil, two parts of humus and 1 part of coarse river sand.
Important! Geranium shoots are best planted in spring. This is the period when the young plant will quickly grow, and by winter it will be a small flower.
If for some reason it was not possible to plant in the spring, then you can still consider September. At other times, it is better not to start rooting the shoot, because there is a high probability of its death.
How to carry out the procedure?
The cut shoots do not yet have roots, which are necessary for the development of full-fledged geraniums, so after their preparation it is necessary to root the cuttings. This can be done in water or directly in the prepared substrate.
Rooting cuttings in water
How to propagate a plant by placing cuttings in water? The main advantage of this method is the ability to observe the process from beginning to end and not miss the moment when the shoot has roots and can already be planted in the substrate.
Prepare a small transparent container (disposable cups work great).- Pour settled water at room temperature into a container up to about half a glass (5 cm).
- Place the shoots in water.
- Change the water once every 2 days.
- After about a week (during this period the first roots should appear), transplant the rooted cuttings into the prepared substrate in a container of a suitable size.
Rooting in water also has its significant disadvantage: sometimes the cutting can rot before it even takes root, and in order to prevent this, gardeners strongly recommend adding crushed activated carbon to it for disinfection every time you change the water.
Using this method, you can get beautiful and healthy geraniums.
Rooting in the ground
Is it possible to plant a cutting without roots directly into the ground? Thanks to rooting in the ground, you don’t have to worry about the shoots rotting, since this happens extremely rarely, but you won’t be able to see when the roots will appear, which is why the planting material sometimes gets spoiled by being replanted ahead of time. How to plant correctly can be read in the instructions:
Prepare a substrate from garden soil and peat.- Place the prepared soil in a small container, moisten it generously and compact well.
- Choose a place with sufficient diffuse lighting. Cuttings really do not like scorching rays.
- Place the shoot into the substrate to a depth of 4–5 cm and again compact the soil around it.
- Waiting for new leaves to appear on the cuttings means that it has successfully taken root and is ready to be transplanted into a full-fledged pot. This will take about a month.
General rules for planting a flower
There are rules that should always be followed when planting pelargonium. In this case, you can count on a successful outcome of the case.
These rules are:
- If the pot has become small, the plant should be transplanted into a larger container. In this case, manipulation is carried out by transshipment. That is, an earthen ball is taken along with the root and placed in the prepared soil mixture. After this, soil is added to the edges of the pot and compacted. Next comes watering.
- When the plant takes root, it will be necessary to pinch it from time to time so that the pelargonium stretches upward.
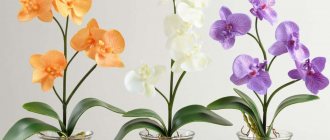
What kind of plant is this?
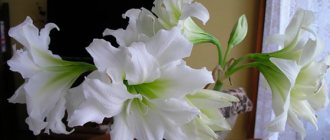
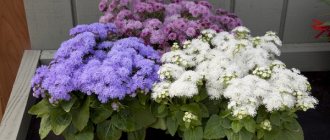
Already in the 19th century, pelargonium was a popular plant. It was used to decorate windows in the mansions of influential gentlemen and ordinary peasant houses. Today she is a favorite of mothers and grandmothers, a real retro flower. They fell in love with it because it blooms brightly and luxuriantly.
If you do not place the pot with it on the windowsill and keep it in the shade in the garden, the geranium will bloom with bright buds and protect gardeners from nasty mosquitoes and other insect pests, as they thin out the nasty smell. Many gardeners propagate the plant by cuttings or dividing the bush so that there are more “defenders” from insects. The type and variety of geranium affects the transplantation procedure.
Important! Zonal geranium produces roots in a glass of water, but royal geranium does not.
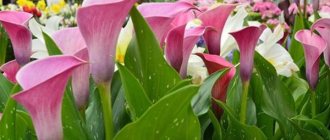
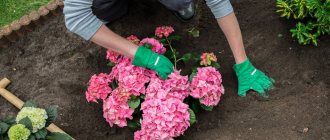
How to plant geraniums in open ground
When deciding to plant a flower outside, it is important to know how to properly plant geraniums in open ground so that the plant does not die.
This is done like this:
- First of all, you need to choose a place. This should be a light area, but not open, so that occasionally the pelargonium is in the shade.
- Next, you should thoroughly loosen the soil.
- Afterwards, you need to scatter the compost on top and mix it with the soil mixture.
- At the next stage, you need to dig a shallow hole, take out the geranium shoots and send them into the hole. After completing this manipulation, you can water. The leaves should also be moistened from time to time. At this point the procedure can be considered complete.
Considering that young plants, and old ones are no exception, cannot withstand frost, bushes cannot be left in the winter. When it gets colder outside, you will need to cut the flower itself by 5-7 cm, dig it out of the ground, cut off a third of the rhizome, and then put it in a container with soil.
What is a cutting, how to choose and prepare it correctly?
A shoot, or cutting, is a cut part of a plant with one or more nodes. This cut off part is precisely used for vegetative propagation (by cuttings). In order to get a new geranium, completely identical to the previous one, you first need to select this cutting.
When should you take a cutting from the mother flower in order to plant and grow a young plant? The mother plant should be well developed and absolutely healthy, ideally it should be 2 - 3 years old. You need to select the apical cuttings of the mother geranium. This process should be 7–8 cm in length, have one or more nodes (buds, growth points) and 3–5 leaves. If there are leaves left at the base of the cutting, they must be carefully removed.
If the branches of the shoot are the same length as the shoot itself, then you definitely need to cut them off, and then you can use them as independent cuttings. And the finished shoots are left in the air so that the cut areas dry out. If after a few hours they are covered with a thin film, it means that everything went well and the cuttings are ready for the next stage.
Some gardeners recommend sprinkling the cut areas with crushed activated carbon and leaving the cuttings in a dark place for a day.
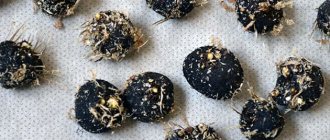
Methods for planting geranium seeds
Some gardeners do not like to take the simple path, choosing something more difficult. Therefore, they decide to propagate geranium using seeds. In order to implement our plans, it is necessary to carefully select planting material; it must be of high quality. If the seeds turn out to be old or rotten, then seedlings may not be expected. After this, you will need to take a tray or other wide container, fill it with soil, water it a little, scatter the seeds on top and cover the greenhouse with a transparent film. Be sure to put all this in a warm place. Having noticed the first sprouts, you can remove the film and wait for the leaf plates to appear. After this, the young pelargonium is allowed to be transplanted into a separate pot.
Why carry out the procedure at home?
Planting geraniums is one of the important and necessary conditions for your plant to have an attractive appearance and remain healthy and strong. Geranium can grow for up to 10 years - naturally, during this time it grows into a large bush. Rejuvenating the bush helps give it a more well-groomed appearance and cause abundant flowering.
In addition, replanting is used when new plants are needed. After all, you can never have too many geraniums! Pelargonium can be used to decorate not only a window sill or a balcony. In summer, geranium will look great in a flower bed in the garden (how to grow geranium in open ground?).
When planting the plant, do not choose a pot that is too large. It is better to replant pelargonium as it grows (for example, once a year - in February, March) and gradually increase the size of the flowerpot.
Early spring is considered the best time for this procedure - by summer the plant will already adapt and will delight you with bright flowers.
You can also plant geraniums after the period of active flowering - this is September-October.
How to plant geraniums as shoots
Planting by cuttings is the easiest way if you want to propagate geraniums. In addition, the shoots make it possible to preserve all the properties of the main flower.
Important! Geranium cuttings are cut and planted only in spring.
In order to perform the manipulation you must:
- Take small plastic cups or other containers. Make holes in them and add drainage to the bottom. It must be said that good drainage will not allow young plants to rot if overflows are suddenly carried out.
- After this, you need to take the soil and sprinkle it with a manganese solution.
- Next you need to choose and take a shoot from a geranium. Only strong specimens should be used. In addition, the shoots must have several leaf plates. After cutting off the planting material, the sections need to be rubbed with activated carbon.
- At the next stage, the cuttings are planted in the ground and watered. The rest of the time there is no need to irrigate the future flower. To prevent it from drying out, you should take a tray, pour some water into it and place the cups there. This entire structure is placed in a cool room. As the water evaporates, it can be added.
- Young pelargonium is planted in the ground after a month.
As already mentioned, planting a geranium with a shoot without roots is simple, and the result will not take long to arrive.
Diseases and pests
If geraniums are not properly cared for, a number of problems can arise.
- If your pelargonium grows in a dark container, it is exposed to drafts, or it is waterlogged in winter, then its leaves begin to turn yellow. Yellowing can also be caused by lack of drainage, dryness and excess nitrogen in the soil.
- If the plant does not bloom, the reason for this may be that the pot is too large, which is why the flower will devote all its energy to growing roots.
- Also, delays in flowering occur due to pinching. Royal geraniums need to be pinched less often than others, as they may not bloom at all.
- Warm wintering and excess nitrogen fertilizers also cause this effect.
- If geranium leaves turn yellow and dry out, the culprit is a spider mite, which can be recognized by the thin webs on the foliage.
- White coating on the leaves indicates powdery mildew.
- Geranium foliage curls when there is a lack of nitrogen, light, or moisture. Spider mites or viral diseases may also be to blame. The latter, in addition to leaf curling, appear in crooked colors.
- If your geranium is not growing, it may be that it is not getting enough light or the room is too hot and dry. Another reason is poor soil or its depletion.
- Small leaves appear without pruning. They may also indicate the aging of the plant.
- Limp stems and leaves indicate excess moisture, resulting in rotting of the roots, which often leads to the death of the flower; or about its lack.
- When there is little light, geranium leaves begin to fall.
- Blackening of stems and leaves occurs due to various rots or “black leg”.
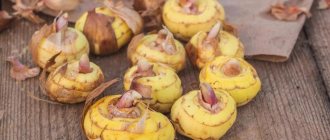
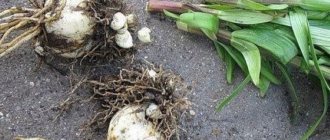
Methods for planting pelargonium with rhizomes
We figured out how to plant geraniums without roots, now we need to tell you how to do it using rhizomes.
Everything is extremely simple:
- A flower is taken out of the pot, the roots are washed with water, and then divided into several parts with a disinfected knife.
- All sections are carefully covered with activated carbon.
- The planting material is soaked for some time in a special solution - a growth stimulator, and then sits in a pot.
If there are any doubts about this method, then it is better to plant the geranium correctly with a shoot and not suffer with the roots.
Diseases and pests
Geranium has a wonderful property - it repels insects that can harm it. But sometimes this green “fighter” is still exposed to diseases and pests.
- Gray rot. The entire plant is covered with bluish-gray spots and bloom. Occurs due to high humidity, lack of lighting and lack of heating. For treatment you need to use fungicides.
- Powdery mildew. Characterized by a white coating. It is necessary to remove the affected areas and treat with a fungicide (Bordeaux mixture).
- Rust. Brown-rusty spots appear on the leaves. Subsequently, the leaves dry out. Fungicides will help get rid of rust.
- Alternaria blight. Brown spots appear on geranium leaves with a light center and a velvety coating. You can get rid of it by treating the plant with fungicides.
- Ring spot. Light spots shaped like a ring form on the plant. The leaves then curl up and hang like umbrellas.
- Verticillium wilt. The leaves begin to turn yellow below, then completely turn yellow and wilt. Stems and inflorescences can also be affected. The disease appears if the soil is too dry.
- Root and stem late blight. Because of this disease, the plant withers and rots. It is necessary to reduce the amount of watering and treat the flower with special products.
- Edema. Characterized by the appearance of bubbles on the leaves. It is necessary to remove the diseased plants immediately so that the disease does not spread to the entire plant. To avoid the occurrence of such a disease, the flower is planted in warm, well-drained soil. Moisture-loving neighbors are not suitable for geraniums.
The main flower pests are:
- aphids (ash infusion - 1 spoon of wood ash per 1 liter of water - used to combat it);
- whitefly;
- thrips;
- caterpillars (they are collected by hand);
- spider mite (it appears if geranium grows in a dry and hot climate; to get rid of spider mites, the plant is treated with a soap solution).
Geranium can get sick due to improper care:
- the leaves have turned yellow and become withered - this is facilitated by a violation of the watering regime;
- the stems become bare - the plant does not have enough light;
- spots appear and the flower begins to rot - due to a fungal infection.
Ways to care for young geraniums in the cold season
Geraniums not only tolerate cool weather well, they literally look forward to it. During this period, the flowering period stops and the plant can rest a little, gaining strength for the spring. At this stage, you should properly trim the flower, feed it and shape its crown.
If we are talking about a houseplant, then you need to pay attention to the following nuances:
- In the last days of summer, as well as in September, watering is noticeably reduced. At this moment, carefully monitor the root system. If the pot is standing outside, where the temperature begins to drop to +12 degrees Celsius, then irrigate the plant with caution. When the temperature drops, pelargonium should be brought into the house.
- In order to form a bush, you need to trim off all rotten and dry leaves and pinch the crown.
- In winter, the flower pot is transferred to a cool place where the temperature fluctuates between +12..+15 degrees Celsius. Watering at this point is reduced to a minimum.
- With the arrival of spring, the first thing to do is fertilize the geranium, and then begin to plant it in the ground or propagate it.
Read How to fertilize geranium so that the leaves bloom and do not turn yellow
As for a flower growing outside, it is dug up for the winter, planted in a pot and cared for as described above.
Further care
Gradually, over time, the geranium in the lower part of the trunk sheds its leaves. A plant that was once fluffy and blooming can become a lonely stick with sparse flowers. To grow a plant with lush leaves and an abundance of flowers, it needs to be constantly and correctly taken from cuttings.
And also when growing geraniums, you need to remember that constantly transplanting the plant from one pot to another can reduce or even stop flowering. Geranium is one of the plants that do not like frequent replanting; it should be replanted only in special cases. For example, when a plant’s roots are sick, or when it has grown too much.
The place in which you will have a pot of geraniums needs to be chosen correctly. This should be a room in which there are no drafts. The plant should be watered sparingly as the soil dries, preferably through the tray of the pot.
If you have dry air at home, the plant can be carefully sprayed with a spray bottle; the water should be clean and at room temperature.
Geranium can be fed once a month with any mineral fertilizers for indoor plants. During flowering, you can add potassium-phosphorus fertilizers. The plant is light-loving, and therefore it is better to place it in a well-lit place.
With a lack of natural light, the leaves and flowers of the plant become small and pale. Since the plant produces flowers from all sides, the pot needs to be turned from side to side periodically. And lastly, if you want to have a lush bush over time, and not a lonely stem, then after transplanting the sprout into the main pot, cut off the top.
In addition to indoor conditions, geranium grows very well outside during warm seasons. With proper watering, temperature and humidity, and lighting, you can grow a lush plant with abundant flowering within a few months.
You can learn more about propagating geraniums by cuttings from the following video.
Dividing the bush
Preparing tools
In order to propagate geranium by dividing the bush, you need to prepare tools. The plant will have to be cut, so a sharp knife or scalpel is needed. The tool must be disinfected before use by treating the blade with medical alcohol.
Preparing the landing site
Geraniums need to be planted in new pots with a drainage layer and soil. A mixture of peat, sand and turf or leaf soil is used as soil for this plant. You can add a little humus or rotted manure.
Seating dates
It is best to divide the bush and plant new plants in the second half of February and early March. But if the flower has already grown greatly and it is impossible to wait, then these deadlines can not be observed, but the division can be carried out immediately.
Preparing for division
24 hours before the planned procedure, the geranium should be watered well. The water will be absorbed within a day, and the plant will be easy to remove from the pot, and the roots will remain unharmed.
Division
The next day, you need to carefully remove the plant from the pot. Shoots with roots are divided into parts, trying not to tear off the roots. All cut areas should be sprinkled with crushed activated charcoal or charcoal; you can use cinnamon for this purpose. This measure will allow the cut areas to heal faster and reduce the risk of infection, rot and plant disease. The resulting plants can then be planted in new pots. Before you pour soil into the pot, you need to put drainage materials. They help remove excess moisture, create better conditions for aeration, and prevent waterlogging and waterlogging of the soil.