What kind of soil does geranium like?
Most plants react negatively to incorrectly selected soil composition; each flower has its own preferences.
Indoor pelargonium is quite demanding on the soil. The ideal solution is unused, loose soil with good drainage. For young plants without a formed root system, light soil is more suitable, so sand and peat, vermiculite and perlite are added to the composition.
There are several soil options that are suitable for pelargonium.
- You can buy a ready-made mixture in special stores - ordinary universal black soil for flowering plants, and place expanded clay at the bottom of the pot. On the packaging, the manufacturer indicates what types of flowers the product is suitable for. If the name is not on the list, then soil for plants of the same type, for example, for succulents, is suitable.
- Mix purchased chernozem with coarse sand and perlite, this will make the soil light and breathable. Line the bottom of the flowerpot with fine crushed stone.
- There are also specialized mixtures for geranium on sale - they already contain all the necessary components and nutrients in the required proportions.
When choosing a soil mixture for pelargonium, you need to focus on neutral characteristics that make the composition universal for most plants:
- porosity, looseness of the soil, providing breathability
- moisture permeability
- moisture capacity - the ability to retain moisture
- conductivity of nutrients
- neutral acidity level.
What's the best way to grow?
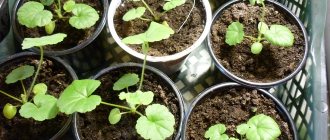
There are three ways to grow pelargonium: from seeds, cuttings and transplanting. Each of them has its own characteristics and nuances.
The first method is from seeds
Although replanting is considered the best option, if you wish, you can grow “adult” geraniums from seeds. To do this, you need to purchase seed material from a specialized store (or from familiar florists) and plant it in previously prepared soil. The working algorithm looks something like this:
- formation of fertile land - from turf soil, sand and peat;
- mixing and loosening the soil;
- placing the soil in a pot (in bulk - without tamping) and moistening it;
- disinfection of the soil - with a weak solution of potassium manganese or a similar substance (so that the plant does not get sick in the initial stages of development);
- planting seeds - to a depth of at least 25 mm from the surface.
After this, you should cover the pot with transparent film or glass to create a comfortable microclimate for shoots to emerge. Condensation must be removed from the coating regularly so that the humidity level remains at the specified level. When the first seedlings sprout, the transparent covering should be removed and the pot should be moved to a cool (16-20 degrees), well-lit place.
Approximately 7-8 weeks after seed germination, the seedlings will form several leaf blades (2-4 pieces). This means that it’s time to plant the plants in different pots, using the same soil with the addition of bait. After this, the geranium is grown as usual - with regular watering and pinching of shoots.
The second method is cuttings
If you have access to already mature geraniums, on which stems and foliage have fully formed, you can carry out the cutting procedure. It involves cutting mature cuttings and planting them in a separate pot. The soil should be quite loose and moist, preferably with the addition of sand. When cutting cuttings, it is important not to overdo it with watering, as this can lead to rapid rot and damage to the plant.
When a full-fledged rhizome is formed on the underground part of the cutting, it can be transplanted into another pot with previously prepared, fertilized soil. When cuttings are taken, not all plants take root, so it is worth initially making a double or triple supply of cuttings. The optimal temperature for rooting is 20-22 degrees.
The third method is transplantation
Having grown geranium outdoors, it can be transplanted into a pot of suitable size - with a small margin to give room for root growth. This is the easiest way to grow at home, allowing you to avoid all the risks inherent in the initial stages of plant development. As the geranium develops, it may need to be replanted. This will be signaled by:
- exposed roots;
- limp stems and leaves;
- poor flowering, or its complete absence.
Replanting into a larger pot with well-fertilized, loosened soil will help solve the problem. The watering regime also plays a critical role here, as does the lighting intensity. Ideally, you need to organize liquid drainage - so that all excess water after watering leaves the pot in the pan.
Composition and properties
Any soil mixture has characteristics such as acidity and fertility, mechanical and microbial composition. These indicators must be taken into account when choosing a habitat for a flower.
- geranium grows well in fertile soil rich in nutrients
- the composition of the earth must be neutral or slightly acidic
- Microorganisms are necessary for normal plant life
- The air permeability of the soil directly depends on the mechanical composition, which is extremely important for geraniums.
The mechanical composition is easy to determine: you need to squeeze a small amount of abundantly watered soil in the palm of your hand - good soil will crumble, bad soil will form a dense lump.
In addition to beneficial microflora, purchased mixtures may also contain pathogenic organisms; if desired, the soil can be sterilized at home. To do this, place it in an oven or water bath preheated to 80 degrees for one hour. After the procedure, the soil is kept for two weeks so that the microbial composition is restored.
You can prepare the planting mixture yourself. For the composition in equal parts you will need the following components:
- Peat
- Sand
- Turf
- Humus
- Leaf ground
Or garden soil mixed in equal proportions with sand and peat. For better oxygen supply to the root system, it is necessary to periodically loosen the soil.
Optimal soil composition
The following soil composition is required:
- turf land;
- leaf soil;
- humus;
- sand;
- peat.
How to prepare the land?
The substrate selected is neutral or slightly acidic (pH about 6), lightweight, and highly permeable to air and water. May consist of equal parts of turf, leaf soil, peat, humus and sand with a small addition of charcoal.- You can prepare the soil mixture yourself, for which you need to mix peat and perlite in a 1:1 ratio, or peat, sand and turf in a 1:1:2 ratio.
- The main condition is looseness.
Good drainage is a must. You can add coarse sand or small pebbles. You are allowed to take regular soil from the garden and add some kind of baking powder to it. Important: The sand must be washed well, without clay inclusions. - It is advisable to add a little chopped moss or humus to store-bought soil. To maintain moisture, you can add a little peat to the soil.
- In order for the plant to develop favorably, it is advisable to use moderately nutritious soil. In well-fertilized soil, pelargonium can begin to grow foliage.
- Once every three months you should feed the plant with liquid fertilizers. At the beginning of flowering and before it, fertilizers with a high phosphorus content are required.
Pelargonium does not tolerate organic fertilizers. You can prepare the fertilizer yourself.It requires:
- 1 drop of iodine;
1 liter of water.
You can find out more about how to feed pelargonium here.
In winter, fertilizing is not needed.
We also recommend watching a video on how to properly feed pelargonium with iodine:
Care Tips
Proper care of a plant is a whole complex of measures: proper watering and lighting, replanting and temperature conditions. Some useful tips:
- To prevent the soil from becoming compacted when watering and not moving away from the walls of the pot when it dries, coarse impurities are added: pebbles, crushed expanded clay, chopped moss, coarse sand, large brick or foam chips.
- Water the flower with a moderate amount of water at room temperature; do not “flood” the plant. In winter, this should be done no more than twice a week. In summer, when geranium is actively growing, daily watering is necessary, but without waterlogging, avoiding water getting on the leaves.
- The optimal temperature for the normal functioning of pelargonium: 18-22 degrees in summer and 10-15 degrees in winter. This is a fairly cold-resistant plant, but it needs a lot of light, even direct sunlight is acceptable, with the exception of particularly hot days.
- Geraniums are replanted in two cases: when the pot becomes crowded, and if a lot of water gets into it during watering. The approximate replanting schedule is once every 2-3 years, in spring or summer. It is better to choose pots that are not too spacious - this will worsen flowering.
- Mineral supplements are suitable as fertilizers, but it is better to refrain from fresh organic ones - the plant does not tolerate such fertilizing. During the period of rapid flowering, mixtures with a high content of potassium and phosphorus are used, and during the dormant period, nitrogen supplements are used. You need to fertilize the flower once a week, from late spring to early autumn. If the geranium has been replanted, it is better to start fertilizing after 2-3 months.
proudobreniya.ru
Temperature
In the spring and summer, when pelargonium is actively growing and blooming, it is necessary to maintain a temperature of 20 to 25°C. From October to the end of February, you can organize a cool winter for the plant with a temperature of 12 to 15°C. In such conditions it is at rest and does not grow.
In winter, it is advisable to create dormant conditions for pelargonium.
If there is no suitable place for wintering, geranium can be kept in winter and at room temperature. But in this case it is necessary to organize additional lighting.
What soil is needed for indoor geraniums?
In the spring, after pelargonium, it is advisable to replant it in fresh soil. The new soil will give the plant minerals to stimulate growth.
It is better to choose the composition of the soil for pelargoniums yourself, or you can enrich the finished soil with additives (for example, ash). You can also find special soil for pelargoniums on sale; it has a balanced composition.
If you want to prepare the soil for pelargoniums yourself, the following composition is optimal for adult plants after spring pruning: 10 liters of universal soil; 2 liters of river sand; 1 liter of horse humus; expanded clay and perlite – 1 liter.
Ordinary pelargoniums are completely replanted every year. Remove the bush from the pot, remove the top layer of soil, the bottom 3-4 centimeters, shake off the soil around the edges and drainage. If the pot remains the same, it needs to be washed and dried. Then replace the drainage layer, fill the pot a few centimeters with soil, place the plant, add soil and compact it quite tightly.
Miniature and dwarf varieties are replanted in the same way, but less frequently, once every three years. Periodically, you can simply update the soil: remove the top layer (2-3 cm) and add fresh soil in its place.
Pelargonium is not picky about soil, but you need to know some recommendations. Geranium loves well-drained and loose soil. You can buy soil for a flower at a flower shop; any substrate for flowering indoor plants will do. Professionals usually use universal primer and add the necessary components to it.
To this mixture you need to add washed river sand, vermiculite and perlite. All ingredients should be mixed, and the soil for planting indoor pelargonium is ready.
When choosing an all-purpose soil, you need to make sure that it is free from insect mold. Also, such soil should not cake into a lump. The soil must contain peat, then your plant will develop and grow well. You can buy special soil for geraniums in the store.
You can also prepare soil for pelargonium yourself at home. To prepare it, you should use the following components:
- Sod land - 8;
- Humus - 2;
- Sand - 1.
The correct soil composition for indoor geraniums: what does the flower like and is a universal soil suitable?
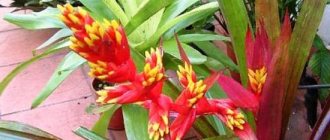
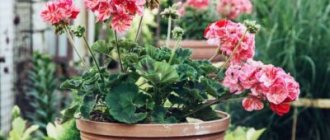
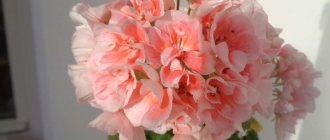
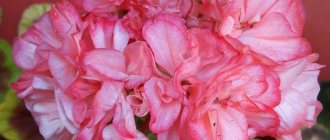
Pelargonium or geranium is an indoor plant that is popular among novice and professional gardeners. They buy pots with bushes, on which white or red flowers are visible, exuding a wonderful aroma. It is no coincidence that there are more than 100 species of plants.
Different varieties smell like lemon, apple, mint, nutmeg or rose. The royal pelargonium is especially beautiful, blooming with large flowers in bright colors. But for its lush flowering, not only the right growing conditions are necessary, but also the right soil. Let's find out what kind of soil this indoor plant likes.
What kind of houseplant is this?
Geranium is a flower that is very popular among gardeners. It is sure to be in the collection of an aristocrat or on the windowsill of an elderly person. Nowadays the interest in it is not the same as before, but people still appreciate it for its many advantages.
It grows well at home or in the garden. Numerous varieties and varieties have been discovered, thereby giving the right of choice to everyone who wants to acquire a pot of it. She has great potential in medicine.
Soil value
Why can’t you replant pelargonium into the first substrate you come across on the counter in a flower shop? The fact is that the fate of the plant depends on the composition of the soil , whether it will bloom at home or not.
- Turf. It is rich in nutrients that are so necessary for the growth of indoor plants: palm, dracaena, monstera, ficus.
- Leaf soil. It is obtained in a simple way: in the fall, leaves are collected and placed in a stack. In the summer they constantly spill it with water, not forgetting to shovel it at least twice. Even after 2-3 years, begonias, cyclamens, camellias, myrtle, etc. are planted in it.
- Peat is a mandatory mixture to increase soil acidity. It is collected from the swamp, placed in a stack, and shoveled from time to time to eliminate harmful substances.
- Heather soil , it is harvested from heather thickets, and then added to pots with azaleas, orchids, gloxinias, etc.
What soil composition is needed?
Geranium is a plant that is not picky about soil. But you shouldn’t buy just any one. It is advisable to follow certain recommendations when selecting it. So, what kind of soil should this houseplant be planted in?
Most often, gardeners buy universal soil, adding the necessary components to it . Vermiculite, river sand and perlite are suitable. All components are mixed and then poured into a pot of geranium. The main thing is to make sure that there is no mold or insects in the soil.
Sometimes peat is added to the universal soil, which promotes the growth and development of the crop.
Preparing the substrate for planting a flower
- Before preparing the land, select a container. You can use a pot that has been used. In this case, wash it the day before the scheduled procedure and disinfect it.
- At the next stage, a drainage layer is placed in the pot. It is sold in the store. In principle, you don’t have to buy it, but use pebbles, polystyrene foam, ceramic shards or broken bricks for drainage. If in the future they will water with hard tap water, put pieces of dried pine bark at the bottom. It will acidify the soil and remove excess moisture from it.
- 1/5-1/4 of the pot’s volume is allocated to the drainage layer. Then they put the soil. If you prepare it yourself, take the following components: turf, humus, sand (8:2:1). It is advisable to sprinkle it after transshipment of the transplanted plant, trying to remove all voids.
- All that remains is to water the geranium with settled water and wait for the excess to drain into the pan.
Choosing the right pot
Geranium is a flower that is successfully grown in warm countries directly in garden beds.
In southern countries the climate is favorable, and therefore it is a large spreading bush with a woody trunk. In the northern part of Russia, the plant is not planted in open ground. They grow it in a container on the windowsill, but is any suitable for this purpose? Experienced gardeners do not see the difference between a clay, ceramic or plastic container. You can choose it based on your own preferences. If you take plastic, then only white so that it does not get too hot in the sun and the roots do not rot. A ceramic pot is also suitable for transplanting geraniums. Its volume depends on the pelargonium variety. A small sprout is grown in a 0.25 mm container, gradually increasing it. By 2-3 years, the plant should “migrate” to a 2-liter pot.
Zonal pelargonium is planted immediately in a 1.5-liter pot. As soon as she grows out of it, it is better to transplant her immediately into a 10-liter one.
Read about how to choose and what kind of pot you need for geraniums in our material.
How to replant?
Geraniums are replanted when the root system grows strongly , when the flower is flooded and in the absence of buds. It is advisable to replant in the fall, before the plant enters the dormant stage. If you carry out the procedure in the spring, then only before its active growth.
- Before transplanting, prepare a tool (watering can, knife) and a pot. When using an old container, treat it with a chlorine-containing substance and then rinse it with water afterwards.
- Prepare high-quality drainage, positioning it so that ¼-1/5 of the pot is occupied.
- The geranium is taken out of the previous container, being careful not to damage the earthen ball. You can use a knife carefully if you need to separate the soil from the walls.
- After removing the geranium, inspect the roots, trying not to miss any traces of rot or strange spots. If they are present, remove them with scissors.
- Transfer the plant to a new pot, filling all the voids in it with soil.
- After watering, put the pelargonium in the shade for 7 days.
- After seven days, they place it on the windowsill, where there will be no bright light, drafts or heat from heating devices.
- Fertilizing is applied for the first time 2 months after transplantation.
Watering and fertilizing
It is advisable to water geraniums abundantly and regularly.
If you overfill it, water stagnation will occur, which will have a detrimental effect on the roots. Good drainage, prepared according to the scheme above, keeps the soil moist without stagnation. The plant is not fed immediately after transplantation . After two months, the geranium is fertilized without using fresh organic fertilizers. Non-blooming geraniums are fertilized with standard fertilizer, and those with buds are fertilized with special fertilizers. The frequency of fertilizing is 2 times a month.
Read more about what is best to feed and when to use fertilizers for geraniums here, and from this material you will learn how to properly use iodine with hydrogen peroxide to feed the plant.
Video on the topic
Below you can find out how to plant geraniums and choose soil for it.
Conclusion
The most unpretentious crop is geranium. By following simple rules of care, it will delight the eye and decorate a window sill in an apartment or a garden in a country house.
If you find an error, please select a piece of text and press Ctrl+Enter.
Watering
During the growing season and flowering, the plant requires abundant watering. In very hot weather it should be watered every day or every other day to prevent the soil from drying out. But you should avoid waterlogging and stagnation of moisture in the soil.
During wintering, watering geraniums is sharply limited. Moistening the clod of earth is carried out 2-3 times a month so that the top layer of soil in the pot becomes dry. This will prevent root rot at low temperatures.
Do not water geraniums with cold water. The water should be at room temperature and should be left to stand for 2-3 days before watering.
Royal pelargonium, unlike small-flowered geraniums, does not tolerate direct watering. If water gets on the soil surface, the soil becomes compacted and the root system of pelargonium begins to rot.
In summer, the plant needs abundant watering; in winter, when pelargonium enters a dormant period, watering is reduced. If you overwater a flower, its leaves will turn yellow. Watering should be reduced, and over time, the color of the leaves will be restored.
What are the benefits of geranium?
There are a huge number of flowers suitable for home growing. Why should you choose geranium? This plant has a number of advantages:
- Aromatic secretions from foliage and flowers, destroying painful microflora in the air. This applies to both bacteria and viruses, including the influenza virus;
- Insect repellent. Geranium secretions (its essential oils) are not tolerated by mosquitoes, flies, moths, bedbugs and other small pests;
- Beneficial effects on the nervous system. The aroma of geranium, intolerable to many insects, has a positive effect on human health and well-being. Thus, ethereal vapors relieve fatigue, improve mood and give a boost of vigor. In addition, the floral aroma is pleasant in itself and improves the overall microclimate in the premises.
Geranium is a plant with a strong aroma, which is given not only by flowers, but also by foliage. Therefore, before you bring it into your home, check to see if you (or your loved ones) are allergic to it.
Choosing the right pot
Periodically, the plant requires transplanting into a new pot, several cm larger in diameter than the previous one.
Pelargoniums of different types need pots of different sizes:
- Zonal pelargoniums – 1-1.8 l
- Tall varieties - 1.5-2.5 l
- Dwarf, miniature – 0.5-1 l
Dwarf varieties differ from others in having a small root system; it is quite weak, so such pelargoniums do not like replanting and do not tolerate transplantation well. Some varieties of miniature pelargoniums, after being transplanted into a large pot, grow large and lose their miniature size.
The plant can be grown at home in a pot and box. If you use boxes for growing pelargonium, then the distance between the bushes should be at least 20 centimeters. This is an important rule.
You need to select the size of the container depending on how much the roots have grown. If the diameter of the flowerpot is chosen incorrectly, then it will be quite difficult to control the growth.
It is best to purchase small pots, 2 cm larger than the previous one. In such a container, geranium will feel great and bloom beautifully with bright and beautiful flowers. The height of the tank should be about 12-15 cm.
If you correctly transplant indoor geraniums into fresh and nutritious soil, and then provide proper care, in this case the flower will bloom beautifully and delight the eyes of its household members.
What to do after the transplant?
- Pelargonium needs to be watered and placed in a shaded place for one week. Make sure there is no overflow.
- After 7 days, the plant should be installed in a warm and well-lit place. Pelargonium loves bright and diffused light.
- 2-3 months after transplantation, the plant is fed with superphosphate, which stimulates flowering.
Advice! Pelargonium loves space. At home, you should not place it very close to other plants, especially those that are larger in size.
Caring for pelargonium is not very difficult. When breeding it, it is necessary to form the correct soil, select a small flowerpot, and be careful during the planting process. By following the basic rules, you can get beautiful plants that will delight you with spectacular flowers and a pleasant aroma.
Humidity
The plant requires moderate air humidity. When it increases, the roots may rot, and when it decreases, the leaves dry out and fall off. It is advisable to regularly ventilate the room with pelargoniums, but the plants should not be in a draft.
For indoor geraniums, there is no need to create high humidity. It does not need spraying. On the contrary, getting water on pubescent leaves can cause rotting, and dried drops leave streaks on the leaves.
Temperature and feeding
After the end of the dormant period, pelargoniums actively grow, and flower buds form on the shoots. During this period, plants require fertilizing.
Feeding is introduced gradually, increasing it as new shoots grow.
Transplanted and pruned pelargoniums begin to be fed after a month, not earlier. If the plant has not been transplanted into fresh soil, then it can be fed once a week.
Fertilizers can be liquid, granular (the granules are mixed with the soil during transplantation, they gradually release nutrients), there are also stick fertilizers (similar to granular ones, they release nutrients gradually), and organic (for example, mullein). Organic matter is usually used not for indoor plants, but for ground plants. However, organic matter can be added to the bud when transplanting plants.
This DIY fertilizer, very simple, will allow your pelargoniums to bloom magnificently all year round! The plant will become healthier, more powerful, stronger, will be practically not susceptible to sunburn and disease, and will be easier to tolerate heat.
You will need a three-liter jar, 2.5 liters of settled water, 100 g of yeast, half a glass of sugar. We dilute all of the above in a jar, stir, cover with gauze and keep warm, shaking from time to time. When fermentation is over, the fertilizing is ready. The whole process lasts approximately 7-15 days, the duration of fermentation greatly depends on the temperature. Next, you can put the jar in the refrigerator and gradually use it up.
Remember:
- At temperatures below 10 C, fermentation stops.
- The optimal temperature for fermentation is 23 C.
- At temperatures from 10 C to 27 C, the fermentation rate increases in direct proportion, that is, the warmer, the faster. The quality of the resulting product deteriorates.
- At temperatures above 30 C, the yeast dies, sugar (poor quality) remains in the solution, and foreign bacteria immediately begin to multiply in this nutrient medium, and your fertilizing will be spoiled.
- The jar must be filled no more than 2/3 of the volume, otherwise it will run away.
Dilute a glass of the resulting mixture in 10 liters of water and water the pelargoniums 1 glass once every two weeks.
This product is great for fertilizing and other flowering plants!
If you have few plants, you can prepare a smaller amount of the product.
www.treeland.ru
If in winter the temperature in the room where the flower is located is about 24°C, then pelargonium will continue to form green mass and will not form flower buds. Royal pelargonium, unlike indoor geraniums, enters a dormant period in winter. At this time, the growth of green shoots stops, and pelargonium lays new buds, but for this it needs to create special conditions.
To increase the number of buds, royal geranium is fertilized with potassium and phosphorus fertilizers, and during the flowering period, pelargonium is fed with magnesium-containing fertilizers. Feeding should be done twice a month. During the spring period, four feedings are made with magnesium-containing fertilizers, then they need to be stopped.
www.glav-dacha.ru
Trimming / Support / Garter
Indoor geraniums need to be pruned to maintain their decorative appearance. Pelargonium is pruned in March before the start of active growing season.
Geraniums are formed in the following forms: standard and bush.
The standard form is not pinched from above, growing a straight trunk. All side branches on it are removed. As soon as its height reaches 70-80 cm, the top shoot is pinched, which first leads to the appearance of several new top shoots, and then to the formation of a pelargonium crown.
Bush plants are pinched after 5-6 leaves appear. With regular pruning, dry and diseased shoots are removed, and the rest are greatly shortened, leaving 3-4 buds on each of them.
Diseases and pests of geranium
Indoor geranium is susceptible to stem rot and root system rot. These fungal diseases develop when the soil is waterlogged, mainly in winter.
If the stem rots, it is better to destroy the geranium. You can cut off the top unaffected cuttings, root them and grow a new plant. If the roots rot, it is better to replant the plant in new soil and reduce watering.
Gray mold is a fungal disease. If plaque is detected on the leaves, it is necessary to remove all affected parts, and then treat the entire plant with fungicidal preparations.
Pelargoniums outdoors are often attacked by aphids, whiteflies and spider mites. Insecticidal preparations are excellent against these pests.
Improper care of pelargonium at home leads to a deterioration in its appearance, most often this is expressed in yellowing of the leaves. Main reasons:
- lack or excess of moisture, poor lighting;
- the pot became too cramped;
- if the plant has recently been replanted, then this is a natural manifestation of acclimatization and the plant will soon return to normal;
The most dangerous fungal diseases for pelargonium are those that appear from dampness and high humidity: black, gray or root rot. The disease is difficult to treat; you can try to save the plant with fungicides, but professionals recommend destroying the affected specimens to prevent the risk of infecting other flowers.
The most common pests are whiteflies, aphids, and spider mites. All of them are successfully destroyed by modern insecticides.
With good care, geranium can not only delight you with the beauty of its blooms, but also act as an air freshener. It is not for nothing that in the 18th century it was used as a room scenter; depending on the variety, it could exude the smell of apples, mint, pineapple and many others.
Video on how to care for geraniums
What do you need to know to grow geraniums?
The definition of “geranium” includes the whole family of plants Pelargorium (pelargonium), numbering up to 400 species. They are represented by both perennial plants and annual flowers that bloom only once. For home cultivation, only perennial types of geranium are of interest: common, meadow and flowering. If you want to have such a plant at home, you should clarify its features and requirements in advance.
So, the meaning is:
- Light level. Pelargonium is a light-loving plant, and it is best to grow it on windowsills facing the south side of the house;
- Air temperature. It should be within 20-40 degrees, and in winter (plant dormancy) - not fall below 15 degrees;
- Air humidity. It should not be too low, and vice versa - too high. In this regard, geranium is not very demanding, and the usual level of humidity in residential areas is quite suitable for it;
- Frequency and intensity of watering. Pelargonium needs to be watered abundantly only during the growing season. In winter (at rest) it does not need a lot of water, and watering can be reduced to a minimum - no more than once every 2 weeks, in small portions;
- Fertilizing the land. It is best to use a special mineral bait for house plants. You need to fertilize the soil in the pot once every 2 weeks - from the end of March to the beginning of November;
- Trimming. Geraniums need to be pruned from time to time, removing excess stems and leaves. The optimal time for this is autumn, before the plant goes into hibernation;
- Pest control. The main threats to pelargonium are spider mites, aphids and whiteflies. To prevent them from harming the plant, it must be sprayed with special chemicals from time to time;
- Fighting diseases. The Pelargonium family is susceptible to bacteriosis, root rot, botrytis, rust and other specific diseases. To reduce the risks of their occurrence, you need to strengthen the plant’s immune system - with proper feeding, regular care and watering;
- Fixing the shoots. In order for fresh geranium shoots to grow evenly and not overload the stems and rhizomes, they need to be secured with special clothespins - in the area of the 4th or 5th leaf blade;
- Replant as it grows. When the roots of the plant become cramped in the pot, it will need to be transplanted into a larger container. This operation should be carried out at the beginning of the growing season.
If you are ready to fulfill all these conditions, growing geraniums will not be a problem for you. Depending on the breed (variety), the plant will bloom for several months or all year round (except for the hibernation period). It needs to be watered and fed on time, maintaining optimal temperature, light and humidity conditions in the room. In this case, pelargonium will retain its decorative appearance for 4-5 years, maximum 9-10 years.
Problems
Indoor geranium is a very unpretentious plant. There are few problems when growing it. Usually this is: yellowing and falling of leaves, poor flowering, wilting of leaves and elongation of shoots.
Pelargonium leaves dry along the edges, turn yellow and fall off due to lack of moisture in the soil. Watering needs to be increased.
Sparse flowering or its absence may be due to the lack of a dormant period. Pelargonium often does not bloom due to lack of feeding or replanting.
When the geranium root rots, the leaves may wilt. The plant needs to be removed from the pot, inspect the roots, cut off the diseased parts and replant.
The stems of the plant become bare and become very elongated when there is insufficient lighting. We should not forget that pelargonium is a light-loving plant that requires bright lighting and backlighting in winter.