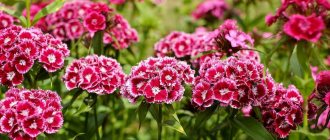
Sowing petunia according to the LUNAR CALENDAR in 2022
To begin with, we provide a list of favorable and unfavorable days in order to know when it is recommended to plant petunia seedlings in 2022 according to the lunar calendar, and when, on the contrary, you should refrain from sowing.
- Favorable days in 2022:
- January
– 3, 8, 9, 10, 11, 15, 16, 23, 24 - February
– 3, 4, 7, 8, 9, 10, 11, 12, 13, 14, 15, 22, 23 - March
– 3, 6, 7, 8, 10, 11, 12, 16, 17, 21, 22, 23, 29, 30 - April
– 3, 4, 5, 6, 7, 9, 12, 13, 14, 15, 26, 27
Unfavorable days for planting will fall, as usual, on new and full moons. Also, if possible, it is better to avoid those days when the moon is in the sign of Aquarius (one of the most barren periods).
- Unfavorable days in 2022:
- January – 2, 4, 5, 18
- February – 1, 2, 16, 28
- March – 1, 2, 18, 27, 28
- April – 1, 16, 23, 24, 25
For those who are used to navigating by the lunar calendar, a list of specific dates is certainly necessary information. However, it is worth little if you don’t know in what month it is better to plant petunia in your region, what is the difference between the planting times for hanging and bush varieties, when you need to plant these plants, based on the length of daylight hours and the required time for the start of flowering. It is this information that will help you start sowing on time, so that the plants will then develop normally and be able to bloom together. We recommend that you continue reading and learn more about planting dates, as well as how to organize the process itself as simply as possible.
Gatsania
A bright sunny gatsaniya, transplanted into a pot in time, will delight you with its flowering all winter. To do this, the bush is carefully dug up along with an earthen lump in which the roots are located. The size of this coma should be as large as possible so that the root system is not damaged during transfer.
For planting, use flowerpots with drainage and holes for water outflow. In winter, gatsaniya needs full light during the day and moderate watering. The optimal temperature regime is within +15…+18⁰С, but not lower than +10⁰С.
Related article:
The most unpretentious shrub - spirea
The bushes are returned to the flowerbed when the ground has warmed up well, having cut the stems in half before doing so. Gatsania that has overwintered indoors blooms earlier than those sown with seeds.
We choose the timing of when to plant petunia seedlings in different regions
It is important to understand when planting time is in your region. For different climatic conditions, the optimal periods will be quite different.
Middle zone (Moscow region)
The most suitable time throughout the middle zone will be:
February March
Southern regions
Here you can start planting earlier. It is perfectly acceptable to sow:
from the second half of January
North-West, Urals, Siberia, Far East
In these regions, the timing is quite extended and depends on additional lighting when growing seedlings (more on this later) and the location of further planting of seedlings. In general, it is better not to rush and plant during the following period:
end of February – beginning of April
How seedling planting conditions affect sowing dates
Now let's look at the important clarifications regarding the above deadlines.
From the moment of sowing petunia for seedlings until transplanting the seedlings to a permanent place, 11-13 weeks should pass.
Focus on these numbers. That is, if you plan to plant seedlings in open ground in early June, then you need to sow in early March. Petunia is a heat-loving plant, so be sober about when it can be moved to a permanent location. The landing conditions for it should be as follows:
- There is no threat of return frosts.
- The soil warmed up to +10-12 degrees.
Think about when this time comes in your area, and count back the indicated 11-13 weeks to determine the earliest sowing time. For example, in the middle zone (Moscow region), the planting time that meets the requirements is in the second half of May, which means that you can sow from approximately mid-February.
When making these calculations, keep in mind that petunia is also very light-loving. If you have phytolamps and the ability to supplement the seedlings literally from the moment of sowing, then you can safely plant the seeds in February or even January, but if not, then you should not sow them before March. With a lack of lighting, seedlings, unfortunately, easily stretch out and become thin and weak.
With additional lighting, petunia can be planted as seedlings much earlier; without additional lighting, it is better not to rush and sow no earlier than March, regardless of the region.
Additional lighting is required in winter
If for some reason you want to start planting earlier, but you won’t be able to provide additional light to the seedlings, then choose the brightest window to place them and in the future be sure to pinch the bushes so that they branch better and are denser, but know that the risk is still very high that young plants will be weakened.
If you plan to plant seedlings not in open ground, but place them, for example, on a warm glazed balcony or in another place where it will be comfortable regardless of the weather, and at the same time you have the opportunity to supplement the seedlings for a long time, then the sowing dates can be moved further the earlier side. In this case, it is possible to sow even at the beginning of January, and get well-developed plants already at the end of March - April. But this is still rather an exception, since mostly petunias, of course, are intended for planting in the open air.
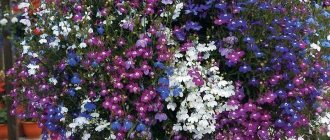
We sow ampelous and bush petunias at different times
Depending on what type of plant - hanging or bush - you plan to grow, the optimal planting time will be slightly different.
- Reference:
- Ampelous - have long (50-120 cm) flexible shoots. Ideal for hanging planters and vertical gardening.
- Bush - have erect shoots, either compact (up to 30 cm), or spreading and quite long (up to 60 cm). Used in various flower beds.
Ampelous varieties and hybrids require a little more time to grow and develop. They are sown earlier.
It is better to sow ampelous petunias 2 weeks earlier than bush petunias.
Hanging varieties are very effective in hanging flowerpots
Technology of sowing and planting indoor plants
When planning to plant a flower, first of all you need to decide on the shape and size of the pot. To do this, the size of the crop and the degree of development of its root system are taken into account: the longer and wider it is, the more spacious the pot should be.
You also need to consider where you are going to place the flower. Pots are suitable for an open terrace or balcony, but for an ordinary city apartment, traditional pots or containers are most often chosen.
Note: Regardless of the type of pot you plan to plant, there should be drainage holes in the bottom of the pot to drain excess moisture. Place a tray under the pot into which excess water will drain. Without this condition, water will begin to accumulate near the roots of the flower, and the crop may die.
Planting technology also includes the selection of suitable soil (Figure 1). Each type of flower requires its own special soil, which will reflect natural soil conditions. The easiest way is to buy a ready-made soil mixture in a special store, but it is much more fun to prepare it yourself.
Deciding when to sow in order to achieve flowering in the right month: April, May, June, July
Petunia seedlings, as a rule, are planted already flowering, which is due to the peculiarities of the growing season of this crop: from sowing to planting, as already mentioned, approximately 3 months pass, and less - about 2.5 months until the flowers appear (the first buds may appear even earlier, especially if the variety is early). So it turns out that young plants often bloom even before they are transplanted to a permanent place.
Therefore, if you need to get flowering bushes by a certain date, then subtract 2.5 - 3 months from it.
It turns out:
- To achieve flowering in mid-April, you need to sow in mid-late January (mandatory long-term additional lighting will be required)
- To achieve flowering in mid-May, you need to sow in mid-late February (at first you will need additional lighting)
- To achieve flowering in mid-June, you need to sow in mid-late March
- To achieve flowering in mid-July, you need to sow in mid-late April
Choosing suitable seeds
Further subtleties concern not the timing, but the preparation and the planting process itself. It must be said that there are quite a lot of nuances in this matter. First you need good seed material. After a certain time, it loses its viability, so you should avoid overdue ones that have been stale.
The shelf life of petunia seeds is up to 5 years.
But if possible, it is, of course, better not to keep them for that long - as practice shows, their optimal germination is within 3 years. However, during storage it is important that they are kept in suitable conditions: a dry and dark place. Best when cool. Sometimes there is a direct indication on the packages that it is recommended to store them in the refrigerator - at such temperatures, viability lasts longer. It follows that:
For better germination, we take fresh seeds - 1-3 years old.
Older (up to 5 years) planting material can also be used, but only if all storage conditions have been met, and then there are no guarantees in this case.
The bags are best stored in the refrigerator
Petunia seeds are very small (0.5 mm in diameter) and dark, merging with the color of the soil. Planting such crumbs is problematic, so manufacturers have now mainly switched to producing them in pelleted form: they are covered with a special colored nutritious shell, which makes them larger and more noticeable.
At the stage of selecting varieties and hybrids for planting, decide what type of seeds you will sow - regular or pelleted. Both have a number of advantages and disadvantages.
Regular seeds:
- Minuses
- very small
- poor assortment today
- indistinguishable on the ground
- pros
- cheap
- no additional dissolution of the shell is required
Dried seeds in capsule
Dried seeds:
- Minuses
- the shell sometimes dissolves with great difficulty
- expensive
- small quantity per package
- You may get empty pellets
- pros
- larger than normal size
- have a noticeable color
It is better to take planting material from trusted agricultural companies, since the germination of petunia seeds is a sore subject. Even fresh ones, alas, can sprout poorly.
Due to their extremely small size, petunia seeds are difficult to plant, and for the same reason they are not subjected to any pre-sowing treatment - this is simply unrealistic.
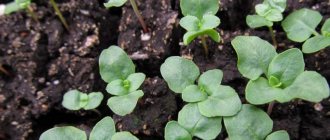
Plant care
As soon as the shoots appear, remove the film or glass and open them slightly for several hours, gradually accustoming the flowers to the light and surrounding atmosphere. Some plants require picking to strengthen the root system. Their number is also different for different plants - 2-3 or 4-5. During picking, flowers are transplanted into an earthen mixture. It is more nutritious and favorable for full development. Read about the number of picks and the composition of the soil on the bag of seeds or in specialized literature.
Remember that for the first 2-3 days, pruned seedlings should not be exposed to direct sunlight and should be kept cool.
Our online store "Seeds by mail" offers you a wide selection of flower seeds that can satisfy the most varied tastes and the most varied requirements for growing conditions. We will not only send you seed material, but also provide detailed instructions on agricultural technology for any plant.
Preparing the soil
Any high-quality commercial soil for seedlings or universal soil is suitable for planting petunias. In this regard, the plant, fortunately, is not overly capricious - the main thing is that the soil is loose, nutritious and can sufficiently retain moisture. The soil reaction should be neutral or slightly acidic.
If possible, the soil should be steamed (or calcined in the oven) for 40-60 minutes to prevent the seedlings from developing blacklegs.
Good soil is the key to success
Before pouring it into the container where planting will take place, all large foreign elements - roots, stones, lumps, etc. - are first removed from the soil. You can also sift it so that it has a uniform and loose structure. If possible, it is worth adding a little vermiculite.
It is also possible to independently prepare the soil mixture, although from the point of view of the ratio of results and labor costs, this option is not the most optimal. Nowadays, it is much easier to purchase ready-made soil for planting, especially since you only need a little of it at first. In general, we present the composition and proportions for the mixture with your own hands, rather just in case: 1 part humus, 1 part leaf soil, 1 part turf soil, 1 part lowland peat, ½ part sand.
How to properly plant flowers in pots
Do you know how to plant flowers in pots correctly? At first glance, it may seem that you don’t need any special knowledge to do this. But in fact, knowing how to do it in the right way is very important for the correct and good growth of plants.
Choosing the right pot
Here are some recommendations:
- A pot is usually chosen 2-5 cm larger in diameter than the previous one.
- It is better to choose a pot with straight walls, without a rounded top edge, otherwise it will be difficult to remove the plant from it during subsequent replanting. It is important to have a hole in the bottom of the pot. This will allow the soil to “breathe”, and excess moisture will come out of the pot without difficulty. All this will help protect against the proliferation of harmful microorganisms.
- Remember that there is a pallet. It is advisable that the bottom of the pot does not come into complete contact with the tray, but leaves a small space between them.
- If you want to choose a pot of the ideal shape, then remember that the diameter of its circumference (upper ring) should correspond in size to the very height of the pot. The diameter of the lower ring should be one third smaller than the diameter of the upper one.
It is also important what material the pot is made from. The best option is ceramics, as it is a natural material that will provide additional ventilation and natural thermoregulation. Ceramic material will also help protect the roots from overheating in extreme heat, and in case of strong unwanted watering (which sometimes happens) it will regulate humidity.
If you nevertheless purchased a plastic pot, then remember that the watering regime will be different. And the reason is that moisture is retained in a plastic container longer than in a ceramic one.
In addition, remember that not all plastic pots are made of high-quality material, and, therefore, can harm the plant.
Planting a plant in a pot
To plant a plant in a pot, it is also important to remember some rules. Here are some of them:
- Availability of drainage.
Drainage is very important. In addition to the fact that there must be at least one hole at the bottom, it is also necessary to put charcoal or expanded clay at the bottom of the pot to absorb excess moisture. You can take shards from a clay pot and place them on the bottom with the convex side up. You can put gravel at the top of the pot.
You should also consider where the pot or container will be located. If it is in a hanging position, for example, on a balcony, then the shards can be replaced with lighter material. Styrofoam is suitable for this.
It would also be a good idea to place some garden cover material over the drainage layer. To do this, cut out a size that will correspond to the size of the roundness of the pot. If necessary, make several holes in it for moisture drainage.
- Cleanliness of the pot.
If you are using a pot that has previously been used to grow another plant, wash it first with hot water and soap.
- Soil mixture.
Partially fill the pot with soil purchased from a store for container plants or prepared yourself. The soil is selected depending on the type of plant you are dealing with. Read the relevant literature and find out what composition and what acidity is suitable for the plant you are planting. In the store you can purchase specialized mixtures intended for specific groups of plants.
If you decide to prepare the mixture yourself, then do not forget about such procedures as sifting the soil and calcining it at high temperature.
Also, river sand is added to many mixtures, which will loosen the soil and make it more porous. The sand also needs to be disinfected by calcining it in the oven or microwave.
- Disembarkation.
After pouring a little soil into the bottom of the pot, make a small depression and push the soil towards the walls of the pot. Insert the plant evenly and add soil, compacting it a little. There should be a little more earth in the center near the trunk of the plant than at the edges. This will prevent the bulb or root collars from rotting if there is excess moisture. The distance between the soil and the edge of the pot should be about 2.5 cm. If the distance is too small, then when watering, water may spill over the edge of the pot. Also, before placing the plant in a new pot, soak the soil ball in water (dunk it in a bucket of water, not under running water). After planting, do not forget to water the plant.
You can read more about how to properly plant flowers in pots on thematic websites or forums. And remember that the health of the plant and the condition of the soil largely depend on the skillful selection of a pot and the correct planting of the plant in it. All of the above procedures will not take you much time, but the plant will feel comfortable, and therefore delight you with its healthy and beautiful appearance.
Selecting containers
Option 1. The classic method when sowing petunias is to plant a large number of seeds in common containers with further picking. To do this, it is optimal to use plastic containers with tight-fitting transparent lids. If there are no lids, think in advance how you will cover the containers at the initial stage, since they must be covered on top with something moisture-proof and transparent (glass, plexiglass, film).
Sowing in a common container
Regular food containers with lids are a great planting solution.
Container sizes need to be small, since petunia seedlings are very small.
Don't forget about drainage holes in containers - they can be made in thin plastic using a soldering iron or a hot awl.
Option 2. In addition, there is an alternative type of sowing: planting in individual containers without picking. Such individual containers can be individual small glasses, cassettes or peat tablets.
Sowing in cassettes
Which sowing option to choose is largely dictated by the type of seed. Usually:
Ordinary ones are sown in a common container, and panned ones are sown in individual containers.
At the same time, among the forms of individual sowing, the undisputed leader today is planting in peat tablets. Sowing in cassettes or cups is a little less common. The main subtleties of planting in peat tablets will be discussed a little further.
Sow in a common container: classic method
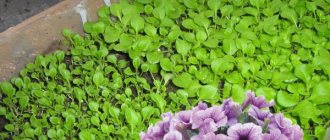
When planting in a common container, it is first filled with soil with a layer of 4-6 cm. There should be about 3 cm between the soil level and the upper edge of the container so that the seedlings have enough vertical space. The soil is leveled, compacted and watered abundantly. After this, they begin sowing. Regular (not coated) seeds are poured onto a light plate, and using a toothpick or wooden skewer, previously soaked in water, they are transferred one by one to the surface of the soil.
The seeds are laid out on the surface, not buried and not sprinkled with soil on top.
The peculiarity of sowing petunia is that the seeds should be placed ON the ground, and not in depth. If there is a layer of soil on top, they will not germinate.
After the required number of seeds have been spread out, they are sprinkled with water from a spray bottle on top, and then the container is closed with a lid and put in a warm place.
Useful tips for beginners
Beginners in floriculture often have no luck with growing their favorite flowers, so when planting and further caring for the plant, you should listen to the opinions of already experienced flower growers.
The main recommendations in this case will be the following:
- selection of the optimal pot size (it can be only a few centimeters larger than the previous one);
- choosing the most suitable period for planting seedlings (usually it should be in March);
- the need for careful handling of the root system, but with the obligatory removal of dried and dead roots;
- using a drainage layer for all types of indoor flowers;
- the use of only special soil, the composition of which will fully meet the needs of each individual species;
- absence of voids under and around the earthen lump of the plant;
- free space above the ground: the soil level should not reach the very edge of the pot, so that when watering the water does not flow onto the windowsill.
After planting flowers, they should be watered well so that the soil settles a little (this requirement does not apply to dry-loving varieties), and then you can place the pot in the most suitable place for it.
In general, the process of planting indoor vegetation will take no more than an hour, but only if you prepare everything you need in advance. And as a reward for his efforts, the florist will receive an excellent decorative element, which, moreover, can have a positive effect on the general emotional state of the household.
We sow in a common container: in the snow
Distributing microscopic seeds one after another is a tedious task, so various tricks are used to make the process easier and faster. The most common one is to use snow.
The soil is placed in the container in the same way as in the previous (classical) planting method. Then clean snow is laid out on top in a continuous layer (1.5-2 cm thick) over the entire surface, after which the seeds are carefully scattered over the snow, trying to do it as evenly as possible. Dark dots are clearly visible on a white background, and if desired, they can be redistributed over the surface using a toothpick. The snow is then allowed to melt and the seed appears on the ground as required.
Sowing in the snow
When using this method, the container must have drainage holes so that after the snow melts, excess moisture can drain.
The planting material is sufficiently moistened, so no additional spraying is needed. The container is covered with a lid, glass or film and placed in a warm place.
We use an alternative approach: we sow in peat tablets
For pelleted seeds, a good planting method is individual sowing in peat tablets.
To do this, place dry peat tablets in a plastic container and fill them with water. Wait for swelling, adding water if necessary. When it is clear that the tablets are already well soaked and have reached their maximum size, excess water is drained and sowing begins. Pelleted seeds are poured onto a saucer and, with a damp toothpick or skewer, transferred one at a time to the center of each peat tablet. Just as when sowing in a common container, the seeds should not be buried under any circumstances - they should lie on the surface of the substrate.
Peat tablets are very convenient for sowing pelleted seeds
It is very important, after the seeds are spread out, to generously spray each tablet on top using a spray bottle.
The pelleted seeds must be generously moistened, otherwise their shell may not dissolve and they will disappear without hatching.
After this, the container with the tablets is closed with a lid and placed in a warm place.
Indoor hydrangea flowers: planting seeds and care
Indoor hydrangea is a compact perennial shrub that is covered with numerous ball-shaped inflorescences (Figure 8). If suitable growing conditions have been created for the hydrangea, it will bloom profusely and for a long time every year.
Planting and caring for indoor hydrangeas includes the following important points:
- Intense but diffused lighting, for example, a pot can be placed a few meters from the south window.
- The comfortable temperature for hydrangea is +20 degrees, but it feels good even with a slight decrease or increase in indicators. The main thing is that there are no drafts or sudden temperature changes in the room.
- After flowering is completed, a dormant period begins, which lasts until approximately February. At this time, it is better to transfer the flower to a dark, cool place and store it until the buds awaken. After this, you can return the hydrangea to its usual conditions.
Figure 8. Growing indoor hydrangea
In addition, hydrangea requires fairly abundant and frequent watering. In summer it is carried out more often, in autumn it is gradually reduced, and in winter it will be enough to add moisture only once a week. Hydrangea also needs to be sprayed frequently to increase air humidity. Ordinary jars of water placed next to the flower pot will also help to cope with this task.