Life cycle of an orchid in autumn
Most orchids in the autumn prepare for flowering, which occurs in October and until December-January. Other types of phalaenopsis prepare for rest in the fall and shed their ground parts. Don’t be afraid if the leaves fall or the peduncle dries out. If the roots are green, then everything is fine, the plant is just resting.
Useful tips and tricks
Having found out whether it is possible to replant an orchid during flowering or not, the gardener should listen to the basic tips and rules for replanting flowering plants. Mandatory conditions are: drying the roots after treatment, boiling the drainage, and mandatory separation of the overgrown plant.
To help a blooming orchid recover faster, you should replant carefully and follow some tips.
The root system, after washing off the old soil, should dry out well. When processing the plant, you should also allow enough time for drying. This will take about 5-7 hours. Just the same amount of time will be required to prepare the soil and a new pot.
Typically, drainage materials are disinfected and treated at high temperatures before being placed in a container. This will serve as an excellent prevention of various diseases.
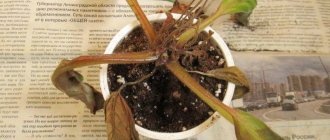
Dendrobium Nobile
If the flower has grown greatly, you will have to start dividing it. Experienced gardeners advise dividing the plant into bushes. Each one should contain one young bulb and two or three adult bulbs, which is the flower stalk. If, when pressed, the bulb turns out to be empty inside, then there is no point in saving it, there will be no benefit anyway.
Is it possible to replant an orchid in the fall?
The time to transplant an orchid largely depends not on seasonality, but on the stage of plant development. Therefore, the crop can be replanted at any time of the year, but experienced gardeners are still inclined to think that the best period to change the pot and soil is spring.
IMPORTANT! It is necessary to ensure that transplantation is not carried out during the same period as flowering.
When is an orchid transplant required?
Over time, the orchid's roots deplete the soil and it becomes unsuitable for the further development of the flower. It cakes without letting air through. In this case, they require a transplant.
How often can a flower be replanted?
It is already known that it is not necessary to replant often, approximately once every 2-3 years. It is better to replant in the spring, but it can also be done in the fall if the flower sends signals.
In summer it is better not to transplant. At high temperatures and dry air, this flower crop will take root less well.
The best guide for replanting is the appearance of the plant:
- Root rotting. In cramped conditions, lack of light, and excessive watering, the roots begin to rot, not nourishing the plant.
- Withering of foliage when photosynthesis is disrupted due to damage to the root mass.
- White or black mold on foliage. This happens due to excess watering.
- An abundance of aerial roots, more than 5 pieces, due to lack of light, dry air and high temperature. There is no need to cut them, it is better to replant the flower.
- Dense foliage, but no inflorescences. Plants have little light, a lot of nitrogen in the soil, a larger pot than required, abundant watering.
- Spots on leaves from pests.
Choose the time to replant when the plant is dormant, after flowering. If the orchid has not yet bloomed, then the procedure is carried out at the end of February or beginning of March. If the flower has a peduncle, then let it bloom first and then replant it, preferably on a waxing moon, before the full moon.
If it is necessary, for example, to prevent infection of others, or the flower is clearly dying, then an immediate transplant is required.
How to replant a blooming orchid?
If the flower is sick or a kitten knocked it over, an urgent transplant is required. How to replant a blooming orchid?
Actions for urgent transplantation:
- After carefully examining the plant, cut off the broken and damaged parts of the flower.
- After drying for 6-7 hours, sprinkle the sections with activated carbon aphids and cinnamon.
- If you cannot do without transplanting a flowering orchid, then the peduncle will have to be cut or shortened by 2-3 cm. After shortening, the growth of young peduncles will begin.
- To transplant a flowering bush, you need to prepare the soil: take 5 parts of pine bark, 2 parts of moss, 1 part of charcoal.
- Don't forget to prepare the drainage. These are pebbles, expanded clay or small crushed stone.
Next comes soil disinfection:
- Boil the bark for 5-7 minutes;
- Moss – keep in manganese solution for 24 hours.
- To ensure that the flowering orchid suffers less damage, before planting, keep the roots in a root stimulator for 12 hours. Next, planting is carried out according to the established procedure.
If the transplant had to be carried out due to an orchid disease, then it must be treated with drugs such as Hom, Strobi, Topz, Champion.
Disease or infection by ticks
All flower parasites can harm orchids: mealybugs, rootbugs, thrips, aphids, spider mites, scale insects and whiteflies.
If there are few parasites, then the leaves can be washed with a solution of laundry soap. If there are an abundance of parasites, you cannot do without chemical treatment.
Tightness of the pot
The aerial roots of the orchid grow so much that they begin to stick out from the flowerpot. Transplanting into a larger pot will allow the flower to grow normally.
The old pot has become cramped, the plant “jumps” out of it, and aerial roots have grown in large numbers. Transplanting the orchid into another, larger pot will allow it to develop further, grow and bloom normally.
Which method to choose
The florist himself determines a convenient option for himself:
- Transshipment. The method involves replanting the plant into a new pot, but with the old substrate, adding a new one exclusively around the edges. The least traumatic method, requiring a larger pot than the previous one.
- Imitation of natural conditions. Transplantation involves changing the pot and substrate, followed by providing high air humidity.
- Landing on a block. This method is implemented by winding the root system to a block using fishing line. To prevent the root system from drying out, moss is used to cover the roots and the block itself.
Moon phases
The lunar month lasts 29.5 days. During this period, the moon makes a full revolution around the Earth and goes through 4 phases:
- New moon
- First quarter or waxing moon
- Full moon
- Last quarter or waning moon
The influence of moon phases on plants
- The new moon is the worst time for gardening work. Do not plant or replant anything. This unfavorable period lasts three days, the day before the new moon, the new moon and the day after.
- Growing Moon - The Moon grows itself and pulls up the energy and juices of plants. This is the best time to work with plants whose fruits ripen above the ground (greens, herbs, fruits, vegetables, flowers). You can plant, replant, graft, and so on.
- Full moon - during this period it is also not recommended for planting and replanting plants, but it lasts one day. You can do weeding, fertilizing, and treating the garden from pests.
- Waning Moon - juices and energy are directed down to the roots, so try to work with root vegetables, bulbous ones.
What does “first quarter” and “third quarter” mean in the Lunar calendar
After the new moon, the Moon begins to grow, its crescent appears in the sky and gradually increases in size. At some point in the lunar month, it turns out that exactly half of the lunar disk appears illuminated to us, and the other half is not visible. This phase of the synodic lunar month is called the first quarter.
In the third quarter or last quarter, we again see exactly half of the Moon, but this is already a waning, aging Moon. It's like a mirror image of the first quarter.
Is it possible to visually determine what phase the Moon is in, whether it is waxing or waning?
Yes, you can. It's very easy to do.
Look at the Moon and mentally place a pencil near its “horns”. If you get the correct letter “P”, it means the Moon is waxing, but if you get “P” on the contrary, something similar to the letter “U”, it means waning.
There are some more rules and recommendations that should be followed:
- It is best to plant plants at dawn or before lunch.
- When the Moon is waxing, use mineral supplements.
- When decreasing - organic.
What plants can be planted on the waxing Moon?
The waxing moon is a favorable phase for the growth and reproduction of plants, the period of their most intensive growth.
During the waxing Moon phase, it is favorable to plant ground fruits, flowers, as well as medicinal and lawn herbs, fast-growing shrubs, vegetables, leaf crops, including roses.
During this period, it is good to sow the lawn and replant indoor flowers, plant garden flowers, and harvest.
What plants can be planted on the waning moon
During the waning Moon phase, it is recommended to care for plants, fight pests, sow and plant plants whose fruits ripen underground, various fruit bushes and trees.
Good for the waning moon:
- Planting and propagating strawberries
- Plant trees and seedlings
- Cuttings from plants
- Divide perennials
- Trim and shape trees and shrubs
- Harvest for long-term storage
- Collect seeds
What can be planted during the new and full moon?
These days the earth freezes and does not give its energy to plants, so it is better not to plant anything these days.
On full moon days it is good to collect fruits (except for root vegetables)
You can care for plants during a Lunar Eclipse
On the days of lunar eclipses, it is better NOT to carry out any work with plants!!!
Selection of pot and soil
The transplant is performed into a container that is larger in size than the previous one. The container should be transparent, preferably made of plastic (roots will grow into the clay surface). 4-5 drainage holes of 5 mm each must be made at the bottom of the pot. The soil is moistened in advance. You can buy it ready-made in the store (they sell a special one for phalaenopsis), or you can make it yourself.
To do this, take the following components in equal quantities:
- charcoal;
- sphagnum moss;
- expanded clay;
- crushed nut shells;
- fern roots;
- pine bark.
Reference! Moss and pine bark are soaked in plain water for 60 minutes.
If the pine was collected in the forest independently, it is crushed into pieces of 2-3 cm and boiled for a quarter of an hour. This will rid the components of harmful bacteria and larvae.
What to consider at home?
If there is no doubt whether the orchid needs to be replanted in the fall, then the procedure can be carried out after familiarizing itself in detail with the nuances.
Removal from pot
The first step is to carefully remove the plant from the old container . When performing these works, it is important not to injure the fragile roots of the flower.
You can do this carefully by squeezing the pot with your hands. Then the soil and roots will move away from the walls.
After this, you can proceed to removing the plant from the pot. If any difficulties arise, you can cut the container with scissors .
Flushing
When the root ball has been removed from the soil, carefully straighten it with your hands. In this way, you can clean the roots from lumps of substrate. Next, rinse them with warm water to remove any remaining soil.
Step-by-step instructions for transplantation
Orchid transplantation is carried out according to a certain algorithm.
Removal from pot
This is the first stage of transplantation, during which it is important to avoid trauma to the roots. If you gently squeeze the pot in your hands, the soil with the plant will come away on its own. You can slightly moisten the substrate for easy removal.
All the roots of an orchid have rotted, how to save the plant and give it a second chance
Flushing
When the clump of roots is removed from the flowerpot, it needs to be straightened out with gentle movements. This will clear the roots a little from the soil. Then the rhizome is washed under warm running water to completely remove the earthen clod.
Trimming roots and leaves
When the roots are cleared of the substrate, you can start pruning them. For the procedure, take sharp scissors and be sure to disinfect them.
Remove dried or damaged parts of the plant. The cut areas must be treated with crushed coal.
Reference! Healthy roots should never be touched. This may cause them to rot.
Preparing containers
Any new flowerpot must also be disinfected. A weak solution of potassium permanganate is suitable for processing - all surfaces of the pot are washed with it.
Placement in a new “home”
Algorithm for placing an orchid in a new pot:
- Place a drainage layer in the pot. Install culture from above.
- Then fill the soil. There should be no empty space between the spines.
- To compact the soil, you need to knock on the walls of the flowerpot.
- You cannot press or push on the substrate, otherwise there is a risk of injuring the rhizome.
- Long roots that do not fit into the flowerpot should be left outside.
First watering
Immediately after transplantation, the crop is not watered for 5 hours. This period is necessary for the healing of plant wounds. The only thing you can do is spray the leaf blades to prevent them from drying out.
How to replant a blooming orchid, if possible: technology + photo
Preparation
Before you begin the transplant procedure, you should thoroughly prepare. Particular attention is paid to the soil. It is preferable to choose a medium fraction substrate. Some gardeners prepare the soil themselves. For this you will need: peat, moss, pine bark, crushed coal. These components produce airy soil, which the orchid loves so much, both during flowering and during the dormant period: growing leaves and roots.
If the air in the room with the plants is dry, then the soil is moistened more, since the right soil tends to dry out in less than a week.
A suitable size pot plays an important role in the development of an orchid. The ideal option would be a plastic transparent pot with holes for water drainage and ventilation ducts. It will allow the roots to take part in photosynthesis and monitor the condition of the root system.
A pot that is too spacious will be a reason for increasing the mass of the flower, but it is unlikely to please you with flower stalks.
If the choice falls on ceramic products, gardeners advise covering the inner walls with glaze, since pots of this type cause roots to grow to the walls of the container. Glass containers will provide access to light, but will save on oxygen. If possible, you should take a closer look at other containers, for example, wicker baskets and flowerpots, pots with small legs, and stands. Such containers are perfect for orchids, as they have well-thought-out water drainage and well-ventilated walls.
It's worth stocking up on some tools. The following will not be superfluous: watering cans, scissors and a knife, as well as a sufficient number of auxiliary containers and drainage.
Removing (picking) a plant from an old pot
Before removing an orchid from an old pot during flowering, you should thoroughly moisten the soil; this will make the process easier and help preserve the roots. Next, tap the container; if the pot is soft, then just knead it with your hands; if it is made of glass or ceramics, then it is better to break it. If adherent roots are found, they are planted in a new container along with the remains of the old ceramics.
Inspection of the root system and pruning of rotten roots
It is necessary to remove the old soil. To do this, the roots of a blooming orchid are dipped in water for a while and then washed with clean water; if the roots are damaged, they are removed, and they are also examined for rotten areas and the damage is removed with a sterile knife. Don't forget to remove dead roots.
Processing slices
All cuts should be carefully processed and rubbed with charcoal. If there are too many damaged areas, then it is better to remove the peduncle so that the plant recovers faster.
Planting in a new container
Drainage is placed in a sterilized and well-dried pot, and then the orchid roots are carefully placed. It is necessary to place the plant in the center, since the orchid has one growth point. The final stage will be pouring out the prepared soil. Shortened in advance by 2-3 centimeters, the peduncles can be tied to a vertically installed support. This pruning method will have a beneficial effect on the formation of new shoots.
After all manipulations are completed, the orchid is left in a warm room with sufficient light, protected from direct sunlight and drafts. It is better not to water for two or three days, but you can spray the leaves daily for a whole month.
Care after autumn transplant
In order for the orchid to take root and survive the winter period, it needs to be provided with proper care.
Do I need to rearrange
In the first 8-10 days, the crop is protected from the scorching sun. You can even install the culture in a slightly shaded place. Then the orchid can be returned to a well-lit place.
Is special feeding required?
After the autumn transplant, the orchid begins its winter rest, so it does not need feeding at all. In October-November, fertilizers are applied with every second watering. Ready-made complex fertilizers are used for feeding. At this time, fertilizing based on potassium and phosphorus is especially important for the orchid.
Temperature and lighting
In autumn and winter, it is recommended to maintain daytime temperatures at +20-+23 degrees, and night temperatures at +15. To ensure favorable conditions for the growth of orchids, differences of 5-7 degrees must be observed. From mid-autumn the sun is already burning so hot, so the crop can be placed on the windowsill.
Humidity
During this period, heating devices are usually turned on, due to which the humidity in the room is reduced to 20-30%. Optimal humidity levels are 40-50%. To increase humidity, place a container filled with water near the orchid or irrigate the leaf plates.
Watering
In October, the air temperature drops, so the watering regime also changes. The substrate dries out more slowly, so it is watered less often. Excessive spraying and bathing of the orchid in the fall is not allowed. In the autumn, watering is carried out once every 7-10 days. In winter, the soil is moistened 2-3 times a month.
Reasons for transplantation
An orchid has certain requirements for its growing environment. For a given crop, it is determined mainly by the characteristics of the substrate, which deteriorate over time. Therefore, the first reason for a planned orchid transplant is the need to update it to restore the following parameters:
- Degree of breathability. It is provided by the pine bark present in the composition. Over time, its pieces break down and crumble, which leads to soil compaction and poor air flow to the roots, causing them to find themselves in a constantly damp environment and quickly rot.
- pH level. The normal value is considered to be 5.5–6.5. With an increase in acidity, which occurs under the influence of water and fertilizers, the absorption of beneficial elements by the roots decreases, which leads to yellowing and falling of the leaves.
- Salt concentration. Regular watering and fertilizing gradually increase not only the acidity, but also the amount of salts in the soil, which is also undesirable for the root system. In a salty environment, their development becomes impaired, and with excessive salinity, the risk of burns increases. In any case, the plant weakens and may die.
The second reason for a planned replantation of an orchid is the discrepancy between the size of the pot and the volume of overgrown roots or foliage. If the dimensions of the container were selected correctly, then it usually becomes too crowded 2–3 years after planting. A sign of lack of space for the root system is the displacement of the substrate from the pot. A larger container is also required when the total size of the leaves begins to exceed its dimensions by 2 times.
In addition to periodic transplants performed for natural reasons, the orchid may need emergency help. The bush must be urgently replanted if pests or signs of disease appear on it, or if the roots begin to rot due to excessive moisture or the use of low-quality substrate.
Possible problems and difficulties
- Pests. It can be solved by preventive measures: regular examinations, wiping the leaves (every 5 days) and replanting if affected.
- Lack of flowering. The problem often occurs in the autumn. For flowering, provide abundant diffused lighting and the application of potassium-phosphorus fertilizers, as well as daily temperature changes.
The effect of transplantation on growth and development for different varieties of orchids
- Cattleya
It is better to replant this variety during the period of active growth, since the plant is quite capricious about this kind of action. For this orchid, a couple of days before transplanting, the small and medium-sized bark is soaked, and after it the roots of the flower are sprinkled.
- Wanda
This orchid is very difficult to recover after transplantation, so it is worth refraining during the flowering period.
- Dendrobium
It is recommended to transplant only after flowering, this happens in the spring, during the period of active growth. This variety of plant is replanted less often than others.
- Miltassia
This procedure is best carried out once every four years, at the end of the flowering period.
How to transfer an orchid to cold weather
If you need to transport an orchid in cold weather, you should consider the following:
- If the air temperature drops to zero, it is enough to wrap the plant in two layers of paper. When the temperature drops to -5 degrees, additional polyethylene is worn. If it gets cold down to -10 degrees, use a linoleum backing.
- You can protect your orchid from severe frosts using synthetic padding and a plastic bag.
- It is impossible to open the plant immediately after it is warm. You need to give half an hour to adapt.
Aftercare
After transplantation, the plant needs special care: partial shade and no watering. In such conditions, the orchid should spend 3-4 days, during which it adapts to the new pot. At this time, it is necessary to closely monitor her condition.
If the plant does not grow for a long time after transplantation, then the air humidity should be increased, bringing the conditions closer to natural for it. This is done simply - the pot along with the flower is placed in a plastic bag. The air is humidified using a sprayer, but without water droplets falling on the plant itself. During the spraying process, ventilation also occurs. Keep the orchid in this state until it begins to grow.
By fulfilling all the conditions for replanting, you can avoid many problems that often lead to the death of the plant. Therefore, it is very important to be careful and attentive - the more careful the transplantation process is, the less stress the orchid will receive.
Unfavorable days in 2022
- March - 1-3, 13-18, 30-31;
- April - 1, 9-11, 15-16, 29-30;
- May - 1, 7-8, 14-15, 28-31;
- June - 3-5, 12-14, 27-30.
- September - 8-10, 20-22, 24-26;
- October - 8-9, 17-19, 23-25;
- November - 6-8, 14-15, 22-24.
Preparing orchid rhizomes
When purchasing garden orchids, preference was given to hybrids, because... they are maximally adapted to garden conditions
. This is an important difference between hybrids and species (natural) Shoes, which need to select and create special conditions that are as close as possible to their natural habitat.
Choosing a place to plant an orchid
Everyone dreams of decorating their garden plot with marvelous orchids. The simplest and most reliable way to get an orchid for your garden plot is to purchase healthy orchid rhizomes with flower buds from a nursery. You need to know that the season for planting orchids in the ground is different for different representatives of the orchid family. For example, the lady's slipper orchid is planted in the soil in the fall, and bletilla - only in the spring.
You can purchase planting material in nurseries only during the season, but if you buy a plant from amateur gardeners, immediately become familiar with the breeding characteristics of a certain type of garden orchid.
The success of growing garden orchids depends largely on the correct location for planting them. Most garden varieties of orchids love light areas with slight shading - direct rays should not fall on the orchids. It is optimal for garden orchids to be on the north side of buildings.
The quality of the soil is also very important. Garden orchids love alkaline soils, so the substrate must be prepared in advance by adding dolomite flour or limestone chips. After planting garden orchids, the ground around them is mulched with ceramic granules or brown peat; the slippers do not require mulching.
Planting an orchid
Garden orchids, or as they are also called Lady's slippers, love well-aerated, loose soil with average humidity, with an acidity of 6.5-7.5. When planting, ordinary soil and peat should be replaced with crushed clay minerals, pumice, expanded clay with the addition of sand and soil with a predominance of such.
We choose a cozy place in our garden for a flower bed with orchids - in the “gliding” shade of fir trees. There are no large trees and shrubs that could take away the water and nutrients necessary for normal growth and development from the Lady's Slippers.
To plant plants, a hole 40 cm deep was dug according to the dimensions of the future flower garden. A layer of expanded clay (10 cm) is placed at the bottom of the pit as drainage. Light garden soil is poured on top of the expanded clay in a layer of 20 cm.
Above the garden soil there is another, thinner layer of soil (10 cm). Here I used the universal primer “Exo” (from Seliger-Agro, because it is very light). Instead of purchased soil, you can collect fertile soil from the forest (the top layer of soil under birch trees, oaks and conifers).
I planted Venus's Shoes orchids shallowly (the bud should be underground at a depth of only 1-2 cm).
I straightened the roots of the plants, placing them horizontally. She carefully sprinkled it with soil, without compacting the soil when planting orchids. I mulched the entire flower garden on top with pine litter, a layer of 5 cm.
When garden orchids are planted correctly in a favorable place, they take root successfully.
After planting, it is ideal to sprinkle the planting site with fallen pine needles.
Orchid care after planting
Caring for flowers is not difficult: sometimes you need to remove weeds, water only in severe drought, and feed them once a year with any fertilizer for orchids.