If you love baking cakes, then this article is especially for you! In this article we will look at a wide variety of ways to decorate cakes with your own hands at home. You can transform an ordinary cake with mastic, marzipan, icing, waffles, chocolate, glaze, cream, cream, meringue, fruit, jelly, sweets, marmalade and sprinkles. We will look at each ingredient of the decoration separately, get acquainted with the recipe for making it, and, of course, be inspired by a huge number of ideas.
For some cake decorating options, you will need special materials such as: a pastry syringe with nozzles, parchment paper, a sharp thin knife, spatulas of different thicknesses.
Decorating cakes with fondant
Mastic is a special dough for decorating a cake. You can roll it out and cover the top of the cake, you can also create various animal figures, letters, numbers, flowers, leaves, openwork patterns and whatever your imagination desires.
The basic rule for working with mastic is that you have to work with it very quickly, since it hardens instantly. But there is a way out! When you form the decoration, pinch off the desired piece and wrap the rest of the mastic in film. Large figures may crack when drying.
Mastic recipe No. 1
Ingredients: condensed milk, powdered milk or cream, powdered sugar, food coloring (optional). The amount of ingredients directly depends on the size of the cake.
Preparation process: take a deep bowl and mix milk powder or cream with powdered sugar. Gradually add condensed milk and mix well. You should get an elastic dough that does not stick to your hands. Add food coloring drop by drop and mix into the dough. After cooking, immediately wrap the mastic in film.
Mastic recipe No. 2
Ingredients: water, lemon juice or citric acid, butter, powdered sugar, starch, marshmallows (white chewy marshmallows), food coloring (optional).
Preparation process: melt the marshmallows for a couple, add drops of food coloring if desired. Then add water and just a little lemon juice or citric acid. Mix the mixture well and then add 50 grams of butter. Separately mix powdered sugar and starch in a ratio of 1:3. Gradually add the powdered starch mixture to the marshmallow mixture and knead the dough well for about 10 minutes. After cooking, immediately wrap the mastic in film.
I recommend watching the video master class!
How to decorate a #cake for a girl's 17th birthday
I recommend a photo gallery of mastic cakes!
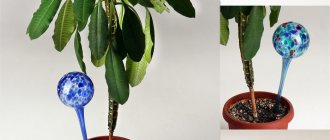
Flower care
Real and artificial flowers require certain care. Floral arrangements also use dried plants and require different care than live and artificial flowers.
Caring for fresh flowers
Since plants inevitably begin to decompose in water through the process of rotting, which ultimately leads to the proliferation of bacteria, the water in which the flowers are placed must be as clean as possible. This approach will slow down the wilting process and the flowers will last longer.
We must not forget that substances contained in tap water can also negatively affect the life of a flower, so it is better to use water from a filter. The use of sprayers to cool and moisten flowers is not prohibited.
Rules for caring for fresh flowers:
- It is necessary to remove all shoots and leaves located on the stem, which will be immersed in water. After this, the stems should be washed.
- The stem should be cut at an angle and pour as much water into the vase as possible, then the flowers will last longer. The optimal water temperature in this case is 7°C.
- It is highly not recommended to place a vase of flowers next to heating appliances, this will shorten their life. Flowers will last longer in a well-ventilated room with dim lighting, away from direct sunlight.
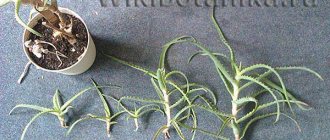
Caring for dried flowers
On average, dried flowers and plants can be stored for up to a year without harming their subsequent use in floral arrangements.
Bunches of dried flowers are stored in a suspended state
There are rules that allow you to extend this period:
- Dried flowers can be treated with a special fixative for floral arrangements.
- Dried material should be kept away from light, especially direct exposure to the sun.
- To blow off dust from compositions made of dry material, you can use a hairdryer, but only at low power, otherwise there is a risk of ruining the composition.
- Rooms with high humidity should be avoided.
- The best option for storing dried plants is to create bunches and then hang them on hooks.
- Dried flower heads can be stored in a cardboard box, after pouring a small amount of silica gel onto the bottom and covering the top with wrapping paper.
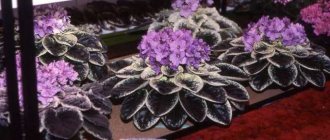
Caring for artificial flowers
Artificial flowers require less care to remain in good condition.
The leaves of artificial flowers can be gently wiped with a soft cloth.
Here are the rules that will help avoid damage to such material:
- To remove dust, you can use a hair dryer at low power and a soft cloth;
- Direct exposure of the material to sunlight should be avoided;
- Artificial flowers should be stored in a cardboard box, packed in a vertical position to avoid dents and deformations.
Decorating cakes with marzipan
Marzipan is a nut mass that consists of almond flour and sugar paste. Its advantages are that it holds its shape perfectly, is quite elastic and has an amazing delicate taste. It is convenient to create all decoration elements from it - small figures, cake covering and voluminous decorations.
Marzipan recipe
Ingredients: 200 grams of sugar, a quarter glass of water, 1 glass of lightly roasted almonds, butter.
Preparation process: peel the almonds and finely chop them in a blender or on a grater. Make syrup from sugar and water. The consistency of the syrup should be thick. Pour the ground almonds into the syrup, stir and cook for 3 minutes. Take a bowl and grease it well with butter. Pour the marzipan into a bowl. Cool the marzipan and pass through a meat grinder. Marzipan is ready! If it turns out liquid, add powdered sugar. If the marzipan is very thick, add a little boiled water.
I recommend watching this video!
Marzipan - Grandma Emma's Recipe
I recommend a photo gallery of marzipan cakes!
Decorating cakes with icing
Icing is an ice pattern that looks like a winter pattern on a window and tastes like crispy ice. The advantages of icing are that it is quite durable, does not spread, and adheres well to the surface of the confectionery product. It can be applied on top of hard chocolate glaze, mastic, fondant. It is worth noting that the surface on which icing can be applied should not spread or be sticky. The icing is applied with a pastry syringe, then the finished product is placed in the refrigerator for further hardening. Lace, inscriptions and patterns turn out very beautiful.
Icing recipe
Ingredients: 3 eggs, 500-600 grams of powdered sugar, 15 grams of lemon juice, 1 teaspoon of glycerin.
Manufacturing process: cool all ingredients, degrease the dishes and wipe them dry. Take the eggs, separate the whites from the yolks. Beat the egg whites, add glycerin, lemon juice and powdered sugar. Beat the mixture well with a whisk until it turns white. Cover the mixture with film and place in the refrigerator for 1 hour to burst the air bubbles. The icing is ready, you can safely decorate the cake!
I recommend watching 2 amazing master classes! The first shows in detail how to paint a cake with icing. The second tells in detail how to make gorgeous roses from icing.
Royal Icing Recipe for Brush Embroidery Cake – Decorando con GLASA REAL by CakesStepbyStep
How to make Roses from Icing (Royal Icing / Protein Icing / Royal Icing)
I recommend a photo gallery of cakes decorated with icing!
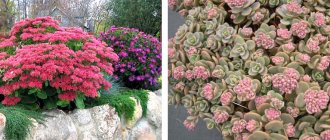
Pink beet bud
If you need to beautifully decorate a dish with roses, then the most beautiful rose comes from table beets. The root crop has a bright color that smoothly changes shades.
You will need:
- 1 large beetroot;
- small kitchen knife with a thin blade.
Manufacturing process:
- First, let's prepare the vegetable for work. Wash the beets thoroughly and clean them. Now we give it the desired shape. On one side we outline the base of the bud. We give it a conical forum, cutting off all excess. The petals will be cut along the cone, the second part remains round.
- We outline the place where the first lower petal will be located. Holding the root vegetable firmly, we cut off the first petal, not cutting 1-0.5 cm to the end. Moving from the center along the wall of the cone to its base. Closer to the base, the petal should thicken, and we try to make the edge very thin.
- We cut out all the excess from under the petal. To do this, place the knife at an acute angle to the inside of the cut petal and cut off what is unnecessary. This way we create additional space between the rows of petals. We go around the circle, cutting off the petals - the first row is ready.
- Now we begin to cut the second row, only forming the petals in a checkerboard pattern relative to the first row. We also remove excess pulp. If necessary, trim and round the edges of the petals.
- We make the third level in the same way, only gradually reducing the size of the petals and changing their angle of inclination, because the cone will become increasingly truncated. The petals must be handled with extreme caution, because... They are very fragile and can break off with one careless movement.
- Having made 4 levels, we proceed to making the center of the bud. We also cut out petals from it, only they turn out to be quite small.
- We inspect the bud for the last time and straighten the petals. The pink beet bud is ready.
Decorating cakes with waffles
Waffles are materials for decorating flowers, various figures, and numbers. They are made from crispy waffle dough. Ready-made edible pictures based on waffle crust are also popular. You can purchase this decoration in confectionery stores, supermarkets or on the Internet. You won’t be able to make waffles with an image on your own, as you will need edible ink and special equipment. The advantages of waffles are that they do not crack, keep their shape perfectly and do not melt. However, they can only be used on a light-colored surface of the cake, since when soaked, the picture may become saturated with dark cream.
Waffle design rules
- The surface of the cake should be perfectly flat.
- The base can be thick butter cream, mastic, glaze.
- The picture is applied to the unfrozen surface of the cake.
- Place the picture on the table with the back side up, brush it with a thin layer of liquid honey, light jam or sugar syrup. Carry out the process using a silicone brush.
- Place the image on the cake.
- Press down a little with your hands to let the air out, then smooth with a napkin.
- Hide the edges of the picture using whipped cream tucked into a pastry syringe.
- Decorate the cake with waffle figures in this way: place the figures on the table with the back side up, brush with a thin layer of liquid honey, light jam or sugar syrup and glue to the cake. Or coat only the center and form an open flower or raised butterfly wings.
I recommend watching the video master class!
How to put a waffle picture on a cake. PAW Patrol Cake
Decorating cakes with chocolate
Decorating with chocolate is considered a classic decoration for cakes. This ingredient goes well with biscuits, souffles, mousse, puff pastry and various creams. The advantages of chocolate are that, once melted, it can be given any possible shape, and when the chocolate hardens, it will not crack or spread. To decorate cakes, you can use any chocolate - black, white, milk, porous.
Methods for decorating cakes with chocolate
- To decorate a cake with chocolate chips, simply grate a chocolate bar and sprinkle it over the cake.
- To decorate the cake with curls, lightly warm the chocolate bar, then take a thin knife, or better yet, a vegetable cutter and cut thin strips, they will immediately begin to curl. You can create gorgeous patterns from them.
- Here is another way to decorate a cake with openwork patterns, inscriptions and drawings. Melt the chocolate bar in a steam bath. Place the chocolate into a pastry syringe. Take parchment paper and draw patterns. Use a pastry syringe to draw patterns onto the parchment paper. Place the parchment in the refrigerator to allow the chocolate to set. Carefully remove the chocolate from the parchment and decorate the cake. If you are not good at drawing, find a beautiful pattern on the Internet, print it out, attach transparent parchment paper to the drawing and simply copy it.
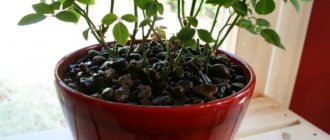
- To decorate the cake with chocolate leaves, you will need real tree leaves or houseplants. Wash and dry the leaves. Melt the chocolate in a steam bath and place it on the inside of the sheet with a silicone brush. Place in the refrigerator, and when it hardens, carefully remove the chocolate from the leaf and decorate the cake.
- Another creative way to decorate a cake is to use cherries and chocolate. Discard the pits, place each cherry in the melted chocolate and decorate the cake.
I recommend watching this video!
Chocolate decors
I recommend a photo gallery of cakes decorated with chocolate!
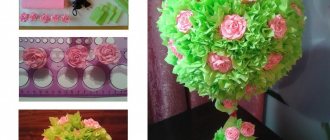
How to make a bouquet of chocolate flowers with your own hands - important tips
A bouquet of chocolate flowers for those with a sweet tooth is a super nice gift that is very easy to make with your own hands. Chocolate roses, tulips, peonies or daisies are perfect as a sweet gift for almost any holiday.
To make a bouquet of chocolate flowers, you need to place each flower on a skewer. Cross the skewers at the bottom and glue them with tape. Distribute the flowers beautifully and level the surface of the bouquet. Wrap the bouquet in wrapping paper, tie it with a ribbon, and the sweet gift is ready.
It will turn out very original if you arrange multi-colored flowers in uniform circles or rays. You can also place ready-made flowers in a chocolate basket, complementing the bouquet with chocolate blades of grass, leaves, buds and beads.
Thin petals and blades of grass should be made from regular melted chocolate without adding sweet syrup. This will make them more durable.
Decorating cakes with icing
At the moment there are chocolate, mirror, marmalade, caramel, multi-colored, soft, milk and creamy glazes.
Chocolate frosting recipe
Ingredients: 1.5 tablespoons of milk, 2 teaspoons of cocoa powder, 1.5 tablespoons of sugar, 40 grams of butter.
Preparation process: take a bowl, put cocoa, sugar, pieces of butter, and pour milk. Place on fire, melt and boil for 5-7 minutes. Cover the cake with chocolate glaze using a wide knife and place in the refrigerator to further harden.
I recommend watching the video master class!
Mirror Chocolate Glaze - Grandma Emma's Recipe
Caramel frosting recipe
Ingredients: 150 grams warm water, 180 grams fine-grained sugar, 2 teaspoons cornstarch, 150 grams heavy cream, 5 grams leaf gelatin.
Preparation process: soak gelatin in water, mix cream with starch, melt sugar in a frying pan until light brown. Add cream with starch and sugar to warm water. Boil until the caramel dissolves. Don't forget to stir the mixture constantly. Then pour it into the cream, stir, cool and add the swollen gelatin. Cover the cake with caramel icing using a wide knife and place in the refrigerator to further harden.
I recommend watching the video master class!
Mirror caramel glaze ☆ Caramel mirror glaze
Marmalade glaze recipe
Ingredients: 200 grams of marmalade of the same color, 50 grams of butter, 2 tablespoons of fat sour cream, 120 grams of sugar.
Preparation process: melt the marmalade in a steam bath or in the microwave, add sour cream, butter and sugar. Mix the mixture well and put on fire. Cook the glaze for 10 minutes, stirring constantly. Cool the glaze slightly. Cover the cake with marmalade icing using a wide knife and refrigerate for 3-4 hours to further harden.
I recommend a photo gallery of cakes decorated with icing!
Edible carrot flower
The blanks for this fabulous flower are cut out very simply. Then they are collected with a toothpick and the decoration is ready. And to make the flower tasty to eat, the petals are kept in a marinade.
You will need:
- 1 large thick carrot;
- salt and vinegar to taste;
- water;
- sharp knife;
- toothpick;
- vegetable peeler;
- 1 small onion.
Manufacturing process:
- Wash the carrots, peel them, and make an oblique cut. Using a vegetable peeler, cut thin petals along this cut.
- Cut each petal in half from one edge to the center of the workpiece. At this point, the petal will fold and prick onto a toothpick during assembly.
- From the opposite side along the edge to the center of the workpiece, we cut off narrow strips on both sides of the top of the petal. For one flower we make 4 large petals and 4 slightly smaller ones.
- So, let's start collecting the flower. First we put the large petals on the edge of the toothpick. To do this, take the first piece, string first one half of the part cut in half onto the edge of a toothpick, and then the other. Thanks to this, the petal takes on the shape of a boat. The cut off antennae stick out. We string all 4 large petals, placing them opposite each other.
- Now we also put on smaller petals, but we arrange them in a checkerboard pattern. Place a piece of white onion on the end of a toothpick to imitate the core of a flower.
- To make the flowers tastier, add table vinegar and salt to taste to boiled chilled water. Mix everything well, put our flowers in there for an hour. Decorations marinated in this way can be stored in the refrigerator for several days.
Decorating cakes with buttercream
Cream is a universal decoration for cakes. It is very convenient for them to write congratulations, make openwork frames, lush roses. Food coloring is often added to cream.
Buttercream recipe
Ingredients: 100 grams of butter, 5 tablespoons of condensed milk, food coloring.
Preparation process: melt the butter in a steam bath or in the microwave. Whip it until it becomes white and fluffy. Add condensed milk, mix well and divide the cream into portions. Add dye of the desired color to each portion of cream. Place the cream in a pastry syringe and create beauty, then send the cake into the cold so that the cream hardens.
I recommend watching the video master class!
CAKE DESIGN WITH BUTTER CREAM #1#
I recommend a photo gallery of cakes decorated with buttercream!
Decorating cakes with whipped cream
Whipped cream is an original airy, voluminous and delicate decoration. Their preparation does not require special products. To beautifully decorate the cake with whipped cream, you will need a pastry syringe. You need to work with cream fairly quickly. Make sure all ingredients and tools are prepared. The surface of the cake should be smooth and not too sticky.
Whipped Cream Recipe
Ingredients: half a liter of high fat cream from 33%, a bag of vanilla, 100-200 grams of powdered sugar, 1 bag of instant gelatin, food coloring (optional).
Preparation process: place the cream in the refrigerator for 12 hours. Pour chilled cream into a deep container. Take another deep container and pour ice water into it. Place the container of cream in a container of ice water. Dissolve gelatin in the manner indicated on the package. Beat the cream with a mixer (do not use a blender, as it will not create foam). Beat them until the foam becomes strong enough. Add the powdered sugar and vanilla, then whisk to combine. Add dissolved gelatin in a thin stream. Place the cream in a syringe and decorate the cake.
I recommend watching the video master class!
Heart-shaped cake “BOUQUET OF ROSES” FOR VALENTINE’S DAY, cake decoration with cream, cake decoration
I recommend a photo gallery of cakes decorated with whipped cream!
Features of creating delicious bouquets for women
An edible gift for a woman is an ideal option for those who want to stand out and make a memorable move.
However, to create such a bouquet you need to take care of some features, they should be thought out in advance:
- decide on the main ingredients (fruits, chocolate, berries);
- choose the location of the bouquet components (vase, box, paper packaging);
- determine the main idea (romantic, friendly, corporate);
- buy ripe and whole fruits and berries; rinse them well and dry them;
- purchase decorative elements (ribbons, beads, stones, figurines);
- buy fasteners for the bouquet - skewers.
An edible bouquet for a woman can be assembled as a mono-composition, that is, use only 1 type of fruit or berry. Most often it is strawberries or grapes.
Such options are created with a romantic twist, because a bright red gift always looks passionate and eloquent. For neutral occasions, it is recommended to choose a variety of bouquets, using several types of fruits, chocolate and berries.
Young girls will definitely appreciate an assortment of sweets or ripe fruits. You should alternate between dark and light chocolate for a more contrasting look. Decorating this option with bright blueberries or blueberries is a good idea for making bouquets for your boss or colleague.
Arranging a delicious bouquet is a separate component that requires special attention. After all, correctly selected details will indicate the sense of style and taste of the giver.
Preference should be given to high-quality materials in the form of expensive braid or ribbon and good craft paper. If it is a box, it must be strong and durable. Baskets should be chosen with fine and hard weaving to eliminate the possibility of deformation.
The decor of a delicious bouquet can be quite varied:
- figurines of animals and birds made of edible and inedible materials;
- tinsel;
- confetti;
- sparkles, rhinestones, stones on packaging;
- small candies, mini chocolate;
- branches of berries.
Meringue cake decoration
Meringue is a snow-white, crispy and very tasty decoration. It is laid out on a layer of chocolate, jam, or cream.
Meringue recipe
Ingredients: a glass of powdered sugar, 5 chilled eggs, a bag of vanilla (optional).
Preparation process: separate the whites from the yolks, pour the whites into a dry, fat-free deep container. Beat the whites until fluffy (10-15 minutes). Gradually add powder (1-2 teaspoons) and immediately dissolve it. Add vanilla and dissolve it well. Preheat the oven to 100 degrees, cover a baking sheet with parchment paper and transfer the protein foam into a pastry syringe. Pipe the egg white mixture onto the baking sheet, creating beautiful balls or other shapes. The meringue is dried, not baked; the time the future meringue stays in the oven depends on the size of the pieces. Approximate drying time is 1.5-2 hours.
I recommend watching the video master class!
MERINGUE (MERINGUE)