Houseplant lovers know how difficult it can be to place all the flowers because window sills and tables are not enough to create a beautiful home greenhouse.
Those for whom growing indoor flowers becomes a real hobby always have a rich collection of various plants that require a lot of space. Each of them must be provided with enough well-lit space to ensure comfortable conditions.
To make them look impressive, it is important to place them well in the interior of the room. Floor, wall, and hanging flower shelves, which are made in any, even the most unusual design, are ideal for this.
Advantages of self-made shelves
There are products on sale that can be used to quickly solve the problem of placing a home flower garden. But they are not very diverse; they are the same type of standard designs.
When you make flower shelves yourself, you can create your own unique room design, choose the best option for each plant, and how to present it more effectively.
When you make shelves yourself, you can choose the materials for them yourself, calculate their dimensions, the required number of stands, and develop your own original design.
The cost of a shelf or several shelves will be much cheaper than store-bought products. And if you make such structures from waste materials, unnecessary old furniture or other suitable items stored in the house, then the only costs will be time and labor.
How to place violets correctly?
Saintpaulias should not be arranged tightly on shelves and racks so that the plants are comfortable and there is also room for the growth of flowers and leaves. In order to make the conditions for keeping violets as comfortable as possible, it is recommended to place them no more than four flowers on a shelf.
Of course, a house can have not one, but several racks at once.
In this case, it is important to follow the rules for their location:
- distances from each other and from walls;
- the size of the aisle between the racks and the like.
Distance
- distance from the structure to the wall – 1.5 meters;
- distance from the rack to the ceiling – 45 centimeters;
- the passage between the racks is at least 1.2 meters.
The optimal dimensions of the rack will be discussed further.
Optimal sizes
The question of the optimal size of shelving is one of the most controversial. The main thing in this matter is to observe the parameters of the distance from the floor to the bottom shelf, from the top shelf to the ceiling, as well as the distance of the shelves from each other and maintaining a distance sufficient for passage between flower pots.
Types of shelves for flowers
According to their designs and placement methods, flower shelves are divided into several types:
- Floor-standing. The most durable, reliable products that are especially suitable for large plants in large, heavy pots. They come in various designs - in the form of racks, whatnots, single stands, spacers, pyramids, A-shapes, ladders, etc. They require a lot of free space to accommodate them.
- Wall-mounted. Can be hung on walls using various fasteners. They allow you to save more space, especially corner ones. The most common types are shelves, racks, compositions of several separately placed single shelves or various original configurations (triangles, squares, honeycombs, etc.).
- Hanging. An excellent solution for saving space. Such structures are attached to ceilings, window openings, and are designed for light, small flower pots. For reliability, strong anchor hooks are used as fastenings to ceiling surfaces, onto which hanging shelves are then attached. Rope, leather belts, chains, cables and other suitable materials are used as hangers to which the shelves are attached.
- For window sills. Shelves for flowers on the windowsill are made in the form of small figured stands or in the form of multi-level racks that are attached to window openings.
All these structures can be installed not only indoors, but also used to decorate balconies, loggias, verandas, and some even open areas in summer cottages.
Compositions of several, made in the same style, different types of shelves - floor, wall, hanging - look beautiful. You can choose homogeneous materials for them (wood, plastic, metal) or combine different ones.
The following materials are used to make shelves:
- Wood. Shelves made of this durable, eco-friendly material, when assembled correctly, can withstand heavy loads. Wood is easy to process; even beginners can handle making shelves of simple designs. Experienced craftsmen make wooden shelves decorated with carvings, inlays, and paintings. Without professional training, you can beautifully decorate a shelf using the decoupage technique.
- Plywood. This material is even easier to work with, but it is no longer as durable as wood. Various shaped products can be easily cut from plywood. The original design can be made using the technique of painting with paints, decoupage, decorated with rhinestones, beads, other decor, and also covered with self-adhesive film with an imitation of any texture. Plywood shelves can be combined with other materials.
- MDF boards, chipboards. From the waste of these cheap, but durable and neat materials, with the help of a set of simple tools you can make cute original shelves. Cuts of all parts must be treated with a special adhesive tape, selected by color.
- Metal. This material is used in the form of profiles or chrome tubes for the frame, as well as metal grids or solid sheets for shelves. Beautiful exclusive products are made from forged metal.
- Plastic. To make shelves, plastic pipes, sheet plastic (transparent, colored, smooth, textured) and even PVC window sills are used.
- Strained glass. Transparent shelves visually save space. But they are only suitable for light, small flower pots. The glass should be no thinner than 0.5 cm. They are attached to metal frames with special clamps. Slots are made for them in the wooden frames, into which the glass is then inserted.
Making a shelving unit for the windowsill
Having initially calculated the number of floors of the rack (in our case there will be 4) and its parameters, we proceed to construction. For simplicity and convenience, we take ready-made furniture panels in the size of the window sill, 1200 mm by 200 mm long. For the side racks we install furniture panels 1500 by 200 mm long. We fix it using the format. The height of the shelf in our case is 350 mm. If desired, for greater stability, the structure can be additionally secured to the slope or frame. You can make a rack for seedlings with lighting by attaching lighting to a ready-made structure.
Why do seedlings need lighting?
In winter, plants especially lack natural light. As a result, photosynthesis proceeds sluggishly, normal development and biomass growth slows down. The lack of light is compensated by installing artificial lighting. In stores you can buy lamps of various designs and powers. But how many lamps and what power is suitable for growing plants? First, let's decide which lamps are suitable for lighting.
Choosing the right lamp for seedlings
Suitable for illuminating seedlings:
- Incandescent lamps (17 Lm/W) are a simple, affordable, but not the most effective way of lighting. They provide little light and heat up a lot.
- Fluorescent lamps (70 - 100 Lm/W) type LBT or LB daylight with low power. Provide cold light. Have a low proportion of red light.
- LED (80 – 110 Lm/W) – durable, economical lamps. With them it is easy to select the required spectrum and intensity.
- Sodium metal halide lamps (up to 100 Lm/W) are easy to use, economical, efficient, but they lack the blue spectrum.
- Domestic sodium gas-discharge lamps (200 lumens per watt) emit a yellow-orange glow that does not cause eye irritation. Requires additional installation of a control device.
- Mercury. They have the largest “cross section” in the area of daylight.
- Phytolamps are economical, environmentally friendly, efficient, compact and durable. The most popular for lighting seedlings. Even close proximity of such lighting will not lead to leaf burns.
- Others: halogen (25 Lm/W), linear (47 – 93 Lm/W), xenon gas-discharge lamps (100 Lm/W), neodymium.
In order to illuminate a shelf 50 cm wide and 140 cm long, it will be enough to install a “warm” lamp and a “cold” spectrum lamp with a power of 36 W. And it is best to make up for the lack of sunlight with fluorescent lamps or special phytolamps. Reliable and efficient sodium gas-discharge lamps will also help illuminate racks for growing seedlings.
Recommendations for organizing lighting
Regardless of the type of lighting chosen, try to place the seedlings on a south-facing window. For greater effect, you can install additional reflective screens on the sides and back of the seedlings. The lighting intensity is selected individually for each plant. Depending on the requirements of the plant, the intensity can be adjusted by increasing or decreasing the distance from the lamps to the plant.
Plywood wall shelf
To manufacture such a product with a structure assembled only from sheets, you will need plywood and veneer for processing cuts. If the plywood shelves will be attached to a wooden frame, then another beam is prepared.
Tools and additional materials you will need:
- a manual (or electric) jigsaw for cutting plywood along curly lines;
- circular saw - to obtain more even straight cuts;
- a set of figured files for processing edges;
- sandpaper for sanding surfaces;
- screwdriver;
- self-tapping screws;
- fastening elements, awnings;
- scissors, pencil, paper;
- PVA glue (or carpentry glue);
- stain, paints and varnishes for surface finishing.
How to make a shelf for flowers from plywood, sequence of work:
- draw a sketch and make patterns from paper;
- according to the patterns and calculations made, cut parts from plywood (timber);
- align the edges using needle files;
- sand the surfaces with sandpaper;
- assemble the entire structure using glue and screws,
- treat with stain;
- stick edge veneer tape onto the open sections of the parts;
- varnish;
- After the varnish has dried, secure the canopies.
Corner flower shelves
You can save space using a corner shelf. These products are floor-mounted and wall-mounted, placed on internal or external corners. They are made from any materials.
They can be compositions of several single shelves or full-fledged spacious racks. The assembly and fixation of such structures depends on their types and materials.
Wooden shelves
The preparation of wood parts and the assembly of shelves from them is done using almost the same technology as from plywood. The resulting wooden flower shelves are stronger and have a greater variety of designs. They use timber and boards.
Even from the remaining scraps you can make beautiful original products. Interesting designs of flower shelves are made from ordinary containers - boxes, pallets.
Flower shelf made of wood and metal
Combined products with metal frames made of profiles or pipes and wooden shelves are assembled in the form of volumetric racks, small shelves, or hanging shelves.
Holders for pots are made from metal, which are then attached to wooden planks.
Multi-level shelves with holes
What you will need:
- wooden plank;
- several flowerpots in the shape of a cylinder or with an extension at the top;
- rope;
- metal ring;
- drill and drill bit 10mm;
- saw;
- sandpaper and paint and/or stain (optional).
Turn the pots over and place them on the board, trace them, then measure 2.5-3 cm along the sides and draw squares around the circles. It is on them that you need to cut the board with a saw, so it is more convenient to start closer to the edge/corner. Already on the sawn-off planks, draw a smaller circle inside the circles already existing there. It would be optimal to step back 6-7mm from the edge or play it safe and measure the diameter of the flowerpot in the part that should be above the shelf.
Using a drill, make holes inside the small circle until the hole is large enough for the saw to fit through. Use a saw to cut out the entire circle. Then drill a hole in each corner for the ropes. Thread the ropes, tying a knot under each shelf, and tie everything to the metal ring on top. The pendant is ready! You can further decorate it before threading the ropes: sand the boards and saturate them with stain, paint the flowerpots.
Important: if your flowerpots have a hole at the bottom, it is better to make the bottom shelf without a hole, placing the flowerpots there on a saucer (glue the saucer for reliability): the fact is that water from the upper flowerpots will flow down
Forged metal shelf
Products made by artistic forging create a classic, luxurious environment. Such shelves can be made only of metal or combined with wood or glass. The results are very impressive interior details.
Most of these shelves are made to be floor-mounted due to their heavy weight. Forged shelves for flowers on the wall are made in small and medium sizes, and special fasteners with increased strength are installed for them. The walls must also be strong enough to support this weight.
Variety of shapes of floor flower stands
When choosing a floor stand for flowers, you should take into account the list of criteria and requirements. Most often, floor flower stands are purchased taking into account:
- number of plants;
- their need for lighting;
- diameter and weight of pots;
- direction of growth (vertically, bush-like to the sides, hanging vines).
Plants should not shade each other; the planes of the stand should be proportionate to the tray and the volume of the flower in order to provide sufficient stable support. You should not give preference to designs with many angles; it is better to choose rounded bases. This way you will avoid accidental injuries when caring for flowers.
Singles
There are selfish flowers that do not like the proximity of other plants and need separate placement. Also, single stands may be needed if you want to make a bright interior accent out of a plant. Single stands for indoor flowers can be simple round or oval, less often square planes, equipped with wheels for easy movement of a large plant on the floor. There are options in the form of tall, vertically oriented consoles or tripods with a small plane for a medium or small sized plant. In such cases, weaving, hanging plants - for example, tradescantia - look especially impressive. Wooden flower stands on a high, gracefully carved leg can occupy an empty corner, visually making the space more harmonious, with smooth lines.
Multi-sectional shelves
Designs with the possibility of vertical installation of pots are called whatnots. They can be in the form of a column, when the shelves are located strictly under each other, or stepladders - in this case, the shelves will be arranged like a ladder. Such designs allow plants with lush crowns to be placed at the top so that those entering the room can see the beauty, while smaller flowers are not blocked from light and receive conditions favorable for photosynthesis. Homemade flower stands and flower stands are popular not only on terraces and bay windows, but also in a simple city apartment. They are ergonomic and save space.
Tabletops
If the room has a lot of space in front of the window, then the tabletop of a coffee or coffee table often acts as a wooden stand for flowers. Sometimes you can see designs that specifically imitate a compact table. Beautifully arranged plants of approximately the same height do not shade each other; they can be examined in detail and the characteristics of different species can be assessed. With small dimensions, this arrangement does not interfere with watering and spraying. A convenient option for compact Saintpaulias, cacti, and succulents.
A tabletop is a bad choice if the room is small and there is a shortage of usable space. A compromise could be a narrow, small option. It will allow you to line up flower pots, but will not take up space in the room.
Towers
Vertically oriented stands with multi-level planes or rings for pots. Ideal solution for compact placement of up to 12 plants. The shelves are arranged in a spiral or in several groups in tiers. This arrangement allows the plants not to shade each other, while significantly saving space. To install the tower, you need to select pots of approximately the same weight so as not to upset the balance. For “towers,” the base can be made in the form of a large-diameter platform, or a “tripod,” or its analogues. A plant that is too large or a massive pot can topple the structure.
Gorki
The decorative slide stand is a horizontally oriented structure with multi-level shelves. Unlike a rack, bases for pots can be placed on vertical posts or edges of the structure. This wooden product looks light and airy, allowing you to place green spaces in front of a window or along a lighted wall, saving usable space. Not suitable for apartments with small children, as a child can easily steal the pot by pulling the stems.
Shelf made of laminated chipboard and chrome tubes
To make such structures, you can use scraps from new laminated chipboards or parts of disassembled used furniture. To process cuts, you will need an adhesive edge or T-shaped (U-shaped) edges.
For chrome-plated tubes, you need to select flanges corresponding to their sizes, which are needed as supports for fastening the shelves. If the structure is floor-mounted, then you can install wheels to conveniently move the shelf with plants to another place, if necessary.
Work order:
- cut the required number of shelves;
- process the edges with an adhesive edge or edging (the U-shaped one is filled with a rubber mallet, for the T-shaped one you need to make grooves in the edges on a milling machine);
- Using a Forstner drill or a milling cutter, make holes in the prepared slabs that correspond to the size of the tubes; in the upper shelf they should not be through;
- insert the tubes into the holes and secure them with flanges on both sides of the plates (the top one with the bottom one);
- attach furniture wheels or legs to the bottom of the tubes.
Backlight Features
One of the most common problems that violet lovers have to face is the lack of sunlight. Lack of lighting can lead to the following consequences:
- growth slowdown;
- lack of flowering;
- poor development.
To avoid the above potential problems, it is necessary to resort to additional illumination of the plant. LED strips are perfect for this function. It is recommended to choose a tape whose color spectrum will be cool shades, and the power will not exceed 25 watts per 1 meter.
Consider also the fact that for the rapid development of violets, up to 14 hours of daylight are needed. The LED should be turned on several hours before sunset. This feature allows you to use additional light if your plants are located on a window sill. This type of lighting will not cause discomfort to the eyes and will create comfort in the home.
Another type of lamp that could serve as additional lighting is a fluorescent lamp. If your plants are located not on the windowsill, but on a shelf, then just such a lamp will be convenient to use. The strength of such a lamp is its ability to evenly distribute light over a fairly large radius, which other types of lamps cannot boast of. As a rule, fluorescent lamps are placed above the flowers at a short distance. Most often, most people choose this option.
Glass shelf on the window
Glass shelves look light and airy and transmit light well, which is beneficial for plants. They choose strong tempered glass with an optimal thickness of 0.5 cm. They are made in the form of racks with wooden or metal frames that are attached to window openings.
The structures can be solid with vertical and horizontal supports, as well as without vertical supports, when only horizontal supports are attached to the window frame, on which glass shelves are then laid.
Flower beds on brackets
Flower beds on brackets most often mean twisted stands with holes for flower pots. They are often made in the form of decorative compositions, and thus are a good addition.
Using self-tapping screws, you can also attach several brackets to the facade of the house and place decorative flower pots on them.
One of the most obvious disadvantages of a flower bed on brackets is its massiveness. That is, such a design will look decent in the garden and complement the exterior, but in a confined space such a composition will look too bulky and inappropriate.
Ideas for making unusual shelves with your own hands
To make original designs for flower shelves, you can use the following ideas:
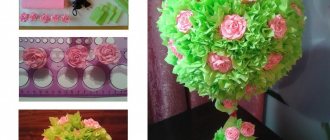
- the shelf is made in the form of a tree trunk; liana plants, reminiscent of tree branches with leaves, are placed on the stands;
- an arch in the shape of a heart is made, on the stands of which flowering plants are placed;
- The floor structure can be made in the form of a pyramid, house, bicycle, and the wall structure can be made in the form of a honeycomb, stairs, waves.
Simple rules for arranging shelves
When placing flower shelves, take into account the illumination that is necessary for plants. Shelves are installed further from the window for shade-tolerant plants, and those that love bright light are placed in well-lit places, but not in direct sunlight.
Some plants cannot tolerate drafts, especially when ventilated during the cold season. When arranging shelves, it is important to create a healthy environment for all plants.
All designs in color and shape must fit harmoniously into the interior of the room.
Illumination for violets, what to use
There are many different lighting options for indoor plants. The most suitable lamps for violets are fluorescent.
It is most practical to choose such lamps of standard sizes: 26 mm in diameter and 59 cm in length. The average power is suitable - 30 W. Although for young plants you can use 18 W.
The radiation of one standard fluorescent lamp is enough for an area of approximately 1 m². Hang the lamp at a height of 20-25 cm from the violet bushes. It is advisable that the lamp shines from above, and not from the side.
You need to turn on the artificial light source for violets for 12 hours. Some people use special switches with a timer, when the lamp goes out and comes on at the same time automatically, which is very convenient.
LED strips are also effective. They are convenient to attach to any surface in any position. In addition, they are very energy efficient. The only negative is their cost, which is quite high.
If you are seriously passionate about growing Saintpaulias and grow them not only for yourself, but also for sale, then backlit racks for violets would be an excellent solution. The lamps are immediately mounted on the shelves on which the pots are placed.
If you know little about electricity and carpentry, it is better to order such a rack from professionals. Design, size, number of shelves - all this is done at your discretion
When assembling such a structure, it is important to take into account electrical insulation, because the plant will be regularly watered
Tips for placing violets on racks with lamps
- The optimal height between shelves is 45 cm.
- For varieties of violets that bloom with red flowers, there are special phytolamps that have a specific emission spectrum that allows you to obtain many shades of red. Such lamps are installed as additional ones.
- You need to gradually transfer violets to artificial light: first turn on the lamps for an hour, then increase this time by 15-20 minutes day after day.
- Types of violets whose leaves are dark and denser are best placed in the center of the shelf; they need a little more light.
- The temperature on the upper shelves is always slightly higher than on the lower ones. Place young bushes on top, they will be more comfortable in the warmth.
Do not forget that lighting for violets is the most important condition for their existence. Without light, many processes in the plant will go out, it will not bloom and may soon die. If you have a fairly free meta on the window sills, then try to place Saintpaulia on the server or eastern side.
A rack for violets with lighting is the best solution for all lovers of these wonderful flowers. After all, indoor violets, no less than other plants, need good lighting, but cannot tolerate direct sunlight, so natural window lighting is extremely rarely suitable for them. More or less, a northern, northwestern or northeastern window sill, which is illuminated mainly by diffused sunlight, may be suitable for them. Of course, there are some tricks for placing plants on south-facing window sills. For example, curtaining it to the middle with a cloth is not scary if the rays of the setting sun fall on the flowers, but it is best to protect the fragile leaves and flowers of Saintpaulia from the burning rays of the day, which means you will have to block the access of sunlight to the room. Which is not very comfortable.
Daylight hours for a homemade violet should last 13-14 hours, and if you manage to organize additional lighting for it in winter, it will bloom tirelessly even in the February cold. This is why you should buy a shelving unit with lighting. Even distribution of light will make the plant more neat, symmetrical and attractive. It will also significantly increase the number of flowers and the duration of flowering of the plant.
We have prepared racks with automatic lighting for you. In the light of which your violets will feel great! With lighting power: 300 W per 1 m2.
In our online store you can choose a rack for violets.
Conclusion
You can make beautiful flower shelves yourself without any special preparation. First you need to come up with your own original design or find a ready-made one suitable for the interior of the room where the plants will be placed.
Available materials make excellent products that create an unusual atmosphere in the room and become bright decorative elements.