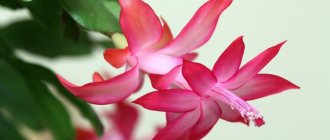
Varieties and types of petunias
Garden or hybrid petunia grows in our parks and gardens. The first terry varieties of petunias were bred in 1855, and in 1881, large-flowered ones. In the middle of the last century, the result of cell hybridization was the ampelous petunia.
Petunias can be divided into two groups based on flower size:
- large-flowered (flower diameter - 7-13 centimeters);
- multi-flowered (flowers – 5-8 centimeters).
Today, plants with small flowers (diameter - 2-4 centimeters) have become extremely popular, which form the third group - small-flowered.
Petunia is divided into the following varieties:
- bush;
- floribunda;
- calibrachoa;
- cascade;
- ampelous.
Bush petunia
Has three subspecies:
- milliflora (miniature flowers, the diameter of which is 2-4 centimeters) - Picobella Blue variety;
- multiflora (low-growing plant with flowers 5-7 centimeters in diameter) - Mirage Orchid variety;
- grandiflora (has flowers in the shape of a large gramophone).
Cascade petunia
The most popular subspecies are:
- Rose;
- Typhoon;
- Ramblin;
- Cherry.
Ampelous petunia
This species forms shoots that tend downward. The best subspecies of this variety is Surfinia. Most gardeners prefer to grow this particular variety because of the variety of colors, resistance to bad weather conditions and fast growing season.
Surfinias are divided into 3 series:
- light wave;
- pearl surf;
- waterfall.
Terry variety
This variety can be found in bush petunia (multiflora, milliflora and grandiflora). There are cases that it is found in cascade and ampelous.
Double flowers require more careful care than other varieties. These flowers are much heavier, so they cannot withstand strong gusts of wind. To plant them, it is necessary to select a protected place. It is worth highlighting the Double Cascade Mix variety.
Timing for planting petunias for seedlings
Sowing takes place in mid-January. Young shoots need a lot of light. It can be provided with phytolamps. In the absence of the necessary lighting, the bushes will be thin and weak and will not be able to withstand various diseases.
If it is not possible to install lighting fixtures, wait until the daylight hours are long enough for planting (March-April). It is important not to delay it so that the appearance of flowers is not too late. Petunia will begin to form buds after 2.5-3 months.
Breeding conditions
Beginning flower growers are often faced with the question of how to decorate their balcony with beautiful flowers? There are only two options: buy ready-made seedlings or grow planting material yourself.
Almost all varieties and hybrids of petunias reproduce through seeds. But there is also propagation by cuttings (for this method it is necessary to preserve the mother plants). Growth and flowering from cuttings occurs faster. But endurance and abundant flowering are the strengths of propagation from seeds.
Caring for growing bushes on the balcony
Many people do the first watering after picking with a 0.1% previcur solution, and subsequent waterings with water. The soil should not be allowed to dry out (the seedlings will die) or become waterlogged (blackleg infection is likely). The optimal frequency of watering is once every 3 days.
Feeding is possible no earlier than the bushes begin to grow. Complex fertilizers are used once a week; the green parts are sprayed with growth stimulants every few days.
In the second week after picking, you need to start hardening the bushes by opening the window in the room for 10 minutes. At the same time, drafts and direct contact with cold air on the seedlings should not be allowed. If possible, seedlings should be illuminated even at night, since they require a very large amount of light.
Transplantation into permanent containers is possible approximately 3 weeks after picking. You can place containers on the balcony only when the likelihood of night frosts is minimal.
Petunia: growing from seeds
These plants need to be sown on the surface of the soil without sprinkling them, otherwise the seeds will not germinate. Sowing is not as simple as it seems. This is due to the very small seeds. If the seeds do not fall into the seedling container, you need to use a toothpick to pick up a small seed and transfer it to the right place.
Important! It is advisable to use a second toothpick to mark the place where the seeds are sown, since they are almost impossible to see on dark soil. This method will help to sow evenly.
Using food containers will also make seeding easier. Such containers are easily ventilated, and the transparent lid can let in a sufficient amount of light rays. The use of even small-volume containers is possible before picking the sprouts.
After sowing the seeds on the surface of the soil, it is necessary to water them with water from a spray bottle. The sowing site must be covered with a plastic bag or film. They need to be ventilated periodically to avoid the accumulation of condensation, and also monitor soil moisture.
The first shoots will appear in 14-15 days (if the seeds are good, they will all appear at once). But this doesn't always happen. Many gardeners argue that if sprouts have not appeared after a 2-week period, then waiting for their further appearance is pointless. There have been cases where sprouts appeared after a month, but there will be no joy from this. These sprouts will be weak and must be constantly monitored, and the result will be unpredictable.
Sowing seeds correctly
Petunia seeds germinate only in the presence of light. If they are buried in the soil, or sprinkled even with a very thin layer, they will die.
It is best to put snow in a container and sow petunia directly into this layer. The snow will gradually melt, and eventually the seeds will end up in the substrate. If snow is not available, then the grains are placed on the surface of the substrate and watered with a spray bottle. This must be done carefully so that the seeds do not end up inside the soil. The box with seedlings must be covered with film. The container is placed in a warm (at least 25 ° C) and bright place.
To germinate coated seeds, it is best to use individual tablets. First of all, the tablets are placed in water and waited until they are soaked. After this, they are taken out of the water and placed in a container with high sides. One grain is placed in each tablet. For this purpose, use a toothpick or match. Water is dripped onto the surface of the seeds (using a pipette). The shell will soften and will need to be removed. The sprout will begin to develop faster. After sowing, the containers are covered with cling film or glass.
10 shade-tolerant flowers to decorate “dark” corners of the site
Growing petunia in tablets has a higher germination rate. The tablets are also easy to care for and replant.
Diving sprouts
Diving must be done with grown sprouts; for this they are seated in different containers.
Containers can be different - from small pots to plastic cups and yogurt containers.
There are secrets to growing! Petunias have a very branched and extensive root system. At home, until it gets warm outside, it will grow for about two months - this is at best.
In order to get strong and healthy seedlings, it is necessary to provide the plant with a sufficient amount of soil. In cramped conditions, the roots will not receive sufficient nutrition and no results will be seen.
Watch the video! How to sow a large number of petunias at home
There are two ways:
- instant dumping of sprouts into large containers (but this is inconvenient);
- At first, use small containers, and after 3-4 weeks, transplant into larger containers. During the entire germination period, this procedure must be carried out twice. The result will be quite strong seedlings with a very branched root system and formed buds. These seedlings will easily tolerate transplantation and quickly adapt after planting in open ground.
How to save surfinia for next year. How to save surfinia until next year
Fragrant hanging plants strewn with cascades of flowers are the dream of many gardeners and owners of loggias and balconies. Often, flower growers who once bought hanging flowerpots have a desire to grow surfinia in a pot left over from last season. How to do this professionally, says Yaroslavl plant collector Igor ARTEMCHIK.
Surfinia is a petunia hybrid that first appeared in Japan and quickly spread throughout all countries, including Russia.
Today, it is impossible to imagine either a garden or an urban landscape without this plant. Surfinia grows quickly, its hanging shoots can grow up to two meters in length! The flowering is so abundant that leaves are often not visible under the waterfall of its flowers. Surfinia differs from its relatives in petunias in its resistance to bad weather and strong winds. Of course, each time spending a tidy sum - about 300 rubles - for a ready-made hanging flowerpot, often with plants that have outgrown the volume allotted to them, is simply unreasonable, while a rooted cutting of the same surfinia costs only from 30 to 70 rubles. In addition, producers, in order to achieve visibility of the flower volume in a shorter time and, therefore, earlier sales, use a little trick by planting three to five plants in a pot.
It is clear that if there is less than one liter of soil in a pot per plant, then it will very soon begin to starve. If you decide to replant, a plant with a large volume of green mass may lose its decorative effect, since it is more sensitive to such an operation compared to young planting material .
I recommend growing surfinias in hanging pots yourself. To prepare the substrate, I usually use 70% high-moor peat, 20% well-rotted humus and 10% agroperlite, which can be replaced with vermiculite. Everything should be mixed thoroughly. After the mixture has been prepared, you need to fill the pot with it, moisten it and plant the rooted cuttings in the very center. The growing process can be accelerated by placing the pots in the greenhouse. At first, it may seem as if the plant is slowing down in growth, as if standing still. Don’t be alarmed - it’s just that the root system is developing at this time, and believe me, when it reaches its optimal state, in about 10-14 days, surfinia will begin to grow very quickly.
In order for the ampelous surfinia to grow more evenly, do not forget about constantly pinching the tips of the shoot.
If you do this, then in a few days new shoots will grow from the axils of the leaves, which should be pinched again after 2-3 internodes have developed on them. Repeat the procedure 2-4 more times, and in 30-40 days you will get a plant, not inferior in decorativeness to store-bought ones. But, unlike the latter, this decorativeness will be ensured not by imitation of abundant flowering, but thanks to a really strong plant that will feel great and delight you with its beauty until late autumn.
Care
Petunia loves light. At the end of winter, when sowing seedlings, it is necessary to organize additional lighting from the moment the sprouts appear. With little light, the sprouts will stretch and become too weak.
Temperature is very important. Before the first greens germinate, the temperature should be 23-25 degrees. When the first sprouts appear, the container is ventilated, thereby increasing the time the sprouts spend in the open air. A sudden change in conditions can negatively affect young seedlings.
After picking, when the seedlings have become stronger, you can continue to reduce the temperature . At night it should be about +15 degrees, and during the day - +18...+20 degrees.
You need to water carefully, without getting on the leaves. Measures when watering are also important: petunia does not like either drying out or excess moisture (rot may appear).
Like every fast-growing plant, petunia loves feeding. When planting seedlings on a mixture of soil with hydrogel, which is soaked in a solution of fertilizers, fertilizing should be done less frequently and later. Any complex flower fertilizer can be suitable for feeding.
To obtain a compact, branched and neat bush, growing shoots need to be pinched. This will not work with an ampelous variety; although it needs to be pinched, it will still grow in length. Such step-by-step cultivation will give the desired results and the seedlings can be transplanted into open ground, flower pots, and flower beds.
Necessary soil for petunia seedlings
A low pH or neutral soil is required. Choose a substrate that is loose, nutritious, and holds water well.
The soil mixture can be purchased at the store. For example, the universal primer Stender. Before planting, you must add to the purchased substrate (dosage for half a bucket of soil):
- 500 g of ash;
- 250 g perlite;
- 1 tbsp. potassium sulfate.
The soil mixture can also be prepared independently. Mix the following in a 2:2:1:2 ratio:
- humus;
- turf;
- sand;
- peat.
You can use sand, garden soil, peat substrate (1:1:2).
After preparing the soil, you need to pass it through a sieve 2 times (first through a large one, then through a fine one). Before sowing, water with Previkur or potassium permanganate for disinfection.
Petunia cuttings
For vegetative propagation, well-developed and healthy uterine shoots are collected in the fall. The most difficult thing is to preserve these queen cells during winter when there is a lack of light.
The cuttings themselves should begin from the end of February - beginning of March. To do this, the required temperature should be 12-15 degrees, the room should have good lighting.
For cuttings, take the tops of shoots, the length of which is 4-6 centimeters. For large-leaf varieties, it is advisable to remove the bottom leaf and make the rest shorter. The cut cuttings must be placed in a light and moisture-absorbing substrate. Covering with lutrasil will help keep the cuttings moist.
When rooting, the temperature should be from 20 to 22 degrees. The formation of roots will occur in 6-10 days, and after 10-12 days the cuttings must be transplanted into pots, pinching the tops in advance.
Cuttings as a simple option for propagating petunia
Petunia takes cuttings well. Many times in the summer I stuck a broken flowering shoot into the soil, and it continued to live. This property is used by professionals and flower lovers, collecting “tribute” from queen cells in order to then propagate the variety they like. Cuttings are cut with and without a heel. The minimum cutting size is 2 - 3 pairs of leaves.
There are no special tricks when rooting cuttings. They are planted to a depth of about 1.5 - 2 cm in a container filled with loose fertile soil, covered with a jar and kept in the light. In order for the cuttings to lose less moisture, it is enough to leave just a couple of leaves. The lower pair of leaves should be completely removed, the upper leaves should be shortened by ½.
Care comes down to watering and ventilation. Do not allow condensation to form. A convenient mini-greenhouse is made from the top of a transparent plastic bottle, in the lid of which holes are made with a hot nail or drill. Tall transparent plastic glasses with holes at the bottom can also be used as caps. But spraying cuttings with water should be treated with caution. This procedure often results in excessive dampness, rot and mold. Some amateur gardeners root petunia cuttings in jars of water.
The temperature at which rooting occurs is about 22 - 23°C. It's good if there is bottom heating. For example, a battery located close to the windowsill. The first leaves of young shoots appear very quickly. Without additional lighting or sunlight, they grow weak. Rooted cuttings are pinched, which causes further tillering. Over the winter, the cuttings, which began to be rooted in August - September, turn into a beautiful flowering bush. It is cared for as a light-loving houseplant.
You can try another way of keeping petunias in winter. I learned it completely by accident. It turned out that by August my petunia had grown into such huge bushes that they covered the other flowers and took up too much space in the flower garden. I shortened them, and “stuck” a bouquet of tops into a flower pot with garden soil. She placed the pot near the house and from time to time watered the “bouquet” from a watering can. Petunia quickly rose, began to grow and continued to bloom. In September I placed the pot on the glassed-in loggia. In winter, I sprayed petunia several times with a highly diluted solution of cheap (!) washing powder. It can be replaced with soda ash. I didn't want to use chemicals. This preventive measure made it possible to avoid powdery mildew, the coating of which often appears in the autumn-winter period and destroys petunias. I cut off most of the buds so as not to weaken the plant. Individual flowers were left “for beauty.” It would be possible to leave all the flowers and buds, but for this it would be necessary to organize stronger lighting.
In May, I shortened some of the elongated shoots of the “bouquet”, receiving a lot of fresh cuttings. The overgrown petunia (the former “bouquet”) was divided into several parts and transplanted into a flower garden. Petunia grows quickly and does not like crowded conditions, so it is better to plant its rooted cuttings “for growth.”
Conditions for growing petunia
In hot and dry summers, petunia flower beds will turn out to be the most beautiful. Hybrids tolerate cool and damp weather, as well as frost, better. Because of this, their flowering lasts longer in the fall.
Varieties with small flowers can tolerate frosts of up to 4 degrees, so they can be planted in the soil earlier than other varieties (mid-May). Large-flowered varieties prefer warmth and should be planted in late spring.
Fertilizer for petunias
In order for plants to bloom profusely, they need sufficient nutrients.
Nitrogen fertilizers must be applied after planting in open ground. If the leaves turn yellow, fertilizing is repeated after 1 week. To avoid disturbing the balance between growth and flowering, petunia is fertilized with complex fertilizers with a high concentration of potassium.
Petunia is fertilized regularly until August. During drought, it is necessary to combine watering and fertilizing. In wet weather, fertilizers are scattered under the plants without affecting the leaves.
Loosening
For abundant flowering of petunias, the soil must be fertile and loose. In addition to fertilizers, loosening the soil should be periodic and regular. This will allow the roots to absorb more oxygen, and watering will be more effective.
Correct pinching
Novice gardeners do not know how to properly care for these plants. In order for lush bushes to form, they need to be pinched, while removing the upper parts of the shoots. This method is done only when the plant is actively growing. To form a new growth point for several shoots, the stem above 5-6 leaves is cut with pruners. Thus, new shoots will begin to grow from this place in different directions. In this phase, the seedlings will slow down their development, but at the same time they will be able to get a little stronger. When side shoots appear, the bush takes on a rounded appearance.
Pinching after rooting is carried out only if the seedlings are planted in open ground. The sprout must adapt, and for this it needs a couple of days. It is during this period of time that it is necessary to create favorable conditions for plants so that they take root.
Diseases and pests of seedlings
As a rule, diseases and insects affect petunia seedlings only when there are errors in care:
| Problem | Causes | Corrective measures |
| Chlorosis |
|
|
| Spider mite |
|
|
| Blackleg |
|
|
Replanting indoor petunias, picking
You need to pick indoor petunia as follows:
- Prepare a pot for replanting. It is filled with soil mixture in advance, after which the soil is moistened.
- Dig up the sprouts. The plant is carefully removed from the old pot along with the soil.
- Transplant into a new container. Before this, you need to dig a spacious hole so that the root system of the flower can completely fit into it.
- The planted petunia is sprinkled with soil and watered with warm water.
Variety selection
In principle, any variety of petunia is suitable for growing in a pot in a room, on a balcony or on an enclosed terrace.
Bush petunia is better suited for a windowsill.
Ampelous petunia is grown in pots.
The choice will depend on several factors:
- Flowerpot location . Bushy plants are more suitable for window sills, and hanging plants are more suitable for flower slides, stands and flowerpots. It is worth paying attention to dwarf varieties. Despite their very miniature size, they delight with huge flowers.
- Desired flowering period . Indoors it makes sense to plant those varieties that are characterized by continuous flowering. As a rule, these include new F1 hybrids .
It is important to remember that petunia is not able to produce buds all 12 months of the year . From mid-November to mid-January (or February - depending on the circumstances) she has a “vacation”. During this time, the plant gains strength for the next growing season.
The only way to get petunia to bloom “ out of season ” is to sow the seeds 70–80 days before the desired date of bud appearance.
Legend from the cuttings
Flowers grown not from a seed, but from a cutting, produce fewer buds. Nevertheless, petunia is cut from cuttings very often, especially since some of its varieties do not produce seeds at all.
In August, a cutting is cut from a flowering bush, where there are at least two internodes, cleared of flowers and leaves and planted in a glass with soil. The glass is placed in a shaded place for 2-3 weeks. During this time, the cuttings give roots.
A glass with a cutting can be overwintered on a windowsill, but it is better to find a cooler place with a temperature of about +14 0C. Watering should be moderate; once a month - potassium fertilizing. Bushes grown from cuttings bloom much earlier.
