Gloxinia is very popular among floriculture lovers, as it does not require special care and pleases the eyes with unusually beautiful inflorescences. However, beginners who decide to have this decorative miracle on their windowsill are probably wondering how gloxinia reproduces. Planting a tuber, cuttings and seeds - in all these ways you can get a beautiful plant.
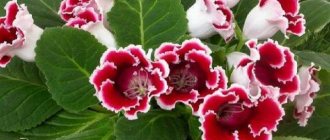
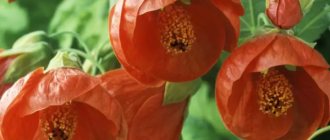
Flowers are the decoration of any room. Gloxinia, the planting of which requires special care, will rightfully take pride of place on the windowsill. Another name for this plant appears in botanical reference books - beautiful siningia. The representative of the flora received its name for its very beautiful appearance: green leaves, pubescent with fibers, and flowers in the form of large bells of bright red, blue, pink and purple.
Quite simple care gives inexperienced gardeners a chance to have this beauty in their room. Let's talk in detail about how to grow gloxinia from a tuber.
Features of choice
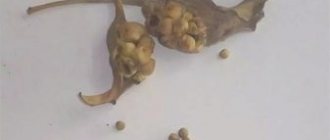
Appearance and size are the main criteria when purchasing. Tubers must be free of rot and mold. Elastic, dense to the touch, up to 5 cm in diameter - these are the most suitable for planting in the soil. At the top of the tuber there is a depression where the buds are located. They look like small tubercles. It happens that the nodules put up for sale have already sprouted, and then the buds look like furry little sprouts.
Time to plant
There is no need to delay landing. This can be done immediately after the dormant period, at the awakening stage, until the sprout has grown large. If you miss time, the shoots will stretch and turn pale due to a lack of chlorophyll. The time of bud appearance depends on the conditions under which the tubers are kept in winter. Gloxinia wakes up in February-March. Sometimes a flower can awaken in May. If by this time the tubers have not come out of hibernation, then they can be “awakened”. This is necessary when the flower has been in a pot all winter. Placed in a warm place, with good lighting and watered soil, siningia will sprout. It is important not to overwater the tubers, otherwise they may rot.
Preparing the ground, container
The diameter of the pot should be 5-6 cm larger than the tuber diameter. This size will allow the root system to develop to the required volume, and the amount of foliage on the surface will be optimal. A pot selected for “growth” can “distract” the plant from producing new buds, because all efforts will be aimed at growing the root system.
The depth of the container is selected taking into account that the nodule top should not reach 4-5 cm to the edge. In this case, a drainage layer of 1-3 cm should be located below.
A peat-based soil mixture works well. The soil should be light, well permeable to air and moisture.
Too dense soil contributes to the rotting of young buds.
After preparing everything you need, you can start growing gloxinia from a tuber at home.
Video about planting tuberous gloxinia in a pot:
Preparing for landing
Gloxinia babies are stored in shavings and sawdust in winter. Often the tubers are covered with old dried roots. Therefore, before planting, they need to be cleaned as much as possible - carefully tear them off or cut off all the threads of the roots with nail scissors, leaving the largest ones. The tuber should be as bare as possible. And new ones will grow from the largest roots.
It is necessary to determine where the bottom of the tuber is and where the top is, so as not to plant it upside down. In the place of future sprouts there is a small depression. There is a bulge on the opposite side of the tuber, which needs to be buried in the soil. You should make sure that there are no rotten spots, rot, or various damage on the seedling. If there are any, you need to carefully cut them out and sprinkle these places with charcoal. As an option, it is appropriate to treat the cut with fungicide and Kornevin powder, having previously mixed them. After such treatment, it is advisable to dry the tubers for about a day. These operations will allow you to revive damaged seedlings.
When to remove gloxinia from dormancy after winter
Even if a tuber spends the winter in darkness, dryness and at low temperatures, after a certain period of time the culture usually wakes up without the participation of its hosts - a small sprout appears. Does this mean that you can take gloxinia out of storage, or is it too early? What to do if new shoots have appeared, but no one is going to replant the nodules?
When does growth begin?
After about 2-4 months of staying in a cool basement or refrigerator, gloxinia can be brought out of hibernation. But the owners are usually in no hurry to do this, since there is still not enough warmth and natural light. But creating acceptable conditions when there are no shelves with artificial lighting is problematic.
If we assume that the flower retired in November and survived the winter safely, new shoots should grow by January-March.
What to do if gloxinia wakes up at the wrong time
When you take a plant out of storage and plant it too early, but the tuber has sprouted, you have to take action. Otherwise, the stem will stretch out, be weak and produce few flowers.
The emerging shoot is broken off or twisted out, and the tuber is again sent to a cool, dark place. Watering is not done, since it was high humidity that could provoke an early awakening in winter.
A large, not whitish, but with green leaves, a sprout of a valuable variety is placed for rooting.
When to wake up gloxinia
Gloxinia can be removed from dormancy after winter when it is convenient for the owners, but not before the tuber has rested for at least 60 days. They are guided by the fact that the first wave of flowering will begin approximately 3-4 months after the following conditions are met:
- a sprout has sprouted;
- the pot was moved to a bright, warm place;
- watering was resumed.
Restoring a dried tuber
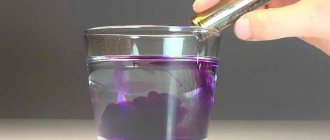
There are drugs that help stimulate the immune system of plants. They are also able to eliminate the stress of flowers and start their root system to grow. You should prepare a solution from the drug “Epin” or “Zircon” in this way: add 10 drops of the product to 200 ml of boiled and settled water. The tubers need to be soaked in the resulting solution for a day. After this treatment, the flowers can be safely planted in the soil.
Another way to revive gloxinia babies is appropriate. Vermiculite (a layered mineral), often used in floriculture, should be moistened with water. Place the whole tuber in it if there are no sprouts yet. If shoots appear, you need to carefully dig them in, but so that the sprout remains on the surface. You should not pour the mineral with plenty of water; it is enough to keep the vermiculite moist, otherwise the tubers may rot. A couple of days will be enough for the seedlings to restore their elasticity by absorbing water from pebbles saturated with useful substances. By using these techniques, you can avoid the risk that gloxinia will die - planting a tuber will end in failure. Now let's talk about soil requirements.
Transplanting gloxinia after hibernation
This is an important element of care. The soil should be changed annually. Most gardeners carry out the operation in the spring, some - before the dormant period. If the tuber survives the winter normally and safely emerges from hibernation at the beginning of the season, the owners are doing everything right.
How to prepare a tuber for planting
First, they remove it from the substrate and inspect the underground part of the gloxinia. When they were stored correctly, and before winter they received enough nutrients (potassium and phosphorus during the last feeding), they are in satisfactory condition - smooth, elastic.
But problems may arise, often solvable:
- If the underground part is wrinkled, it is placed in a damp, clean cloth for 3 days. They are not wrapped in cellophane.
- Rotten or dry areas are cleaned as described in the previous chapter.
- When there are a lot of dried roots, they are simply removed. Living, flexible ones do not touch.
All you have to do is throw away the planting material:
- the affected area occupies 50% of the nodule or more;
- A dark vascular network stands out on white tissues.
If the sprouts have already hatched, begin replanting. When they are not there, it is better to postpone the operation, place the tuber in a bag with slightly damp peat, and keep it in the light at a temperature of 18-24 ° C until germination.
Sometimes gardeners plant gloxinia tubers without sprouts after winter. This is acceptable, but less reliable.
How many sprouts should I leave?
When gloxinias wake up after resting, even a small tuber can produce several stems. Beginner gardeners rejoice, experienced gardeners understand that the underground part cannot feed more than one full-fledged shoot.
Just like a tulip bulb that has sent out two arrows, a gloxinia with several shoots will not produce full flowering. The nodule will have to maintain too much green mass; there will be few buds.
After winter you need to leave one sprout. But it is correct to break out “extra” shoots not immediately upon awakening, but some time after transplantation - some may dry out on their own.
How to determine the top and bottom of a nodule
The underground part of gloxinia, the tuber, is a short shoot modified during the process of evolution. Its shape is almost regular, round, flattened at the poles, with roots extending from the bottom.
It is difficult to figure out which side to point up in the following cases:
- there are no sprouts or sucking roots - this usually happens if the tuber has just been bought, or taken out early after winter;
- the young shoot was reaching towards the light, clearly bent, it was difficult to understand where it was growing from;
- the entire surface is overgrown with tangled sucking roots.
One side of the flattened gloxinia nodule is convex - this is the bottom. The other has a recess, which should be directed upward.
Container and substrate
To plant gloxinia, use pots of regular shape, with drainage holes, with a maximum diameter of 12 cm. The upper section should be 4-6 cm larger than the tuber.
The best material is plastic. It is less permeable than unglazed clay, but such pots are produced with several holes; if desired, they can be expanded or new ones made.
To transplant gloxinia, you need a light, moderately nutritious, loose, slightly acidic substrate with a stable structure. Can be used:
- a mixture of peat (1.5 parts), leaf soil (3), sand (1);
- take store-bought soil “Violet” or “Begonia”, add baking powder;
- For wick irrigation, use high-moor peat with perlite.
How to replant gloxinia
The process of transplanting gloxinia after winter step by step:
- The pot is filled a quarter full with drainage - small expanded clay or pieces of polystyrene foam.
- The substrate is poured on top, lightly compacted, and a small hole is made in the center.
- Prepare the tuber as described above.
- Insert it into the recess so that 1/3 or 1/2 of the height remains above the surface.
- Water carefully. A little, just to ensure adhesion of the bottom or roots (if any) to the ground.
Oh, these flowers! Gloxinia: planting and care
To grow a healthy plant, the soil must be light, loose, permeable and well saturated with air. And it should be based on peat. Such soil will reliably protect the flower from excess water and rotting. You can purchase ready-made soil or make it yourself. The substrate consists of peat, sand and leaf soil (proportion 2:1:2). Before planting gloxinia as a tuber, the earth mixture must be calcined in a dry frying pan or baking tray in an oven. If you have the desire and opportunity, you can irrigate the soil with the “Maxim” preparation, making a solution at the rate of 2 ml per 1 liter of water. After processing, you need to let the soil dry.
Planting gloxinia with seeds
When gloxinia is sown with seeds, the plant germinates without any problems. But for this you need to meet some conditions:
- prepare the correct substrate;
- prepare seeds;
- correctly lay the planting material;
- create conditions for the growth and development of sprouts.
If everything is done correctly, the seedlings will be ready for planting at the right time.
How to prepare the soil for planting
It is possible to grow high-quality seedlings from seeds provided that a suitable substrate is available. Features of container preparation:
- Take a box 5-8 cm high and a piece of glass that will cover the entire area of the container.
- Place a layer of expanded clay on the bottom of the box. It is enough to fill the container with this material to 1 cm.
- You need to pour a peat mixture on top of the expanded clay. Its layer should be about 2 cm.
- Then the soil is well moistened with a spray bottle.
Soil preparation
Step by step landing procedure
Proper planting of seeds guarantees good germination. Step-by-step sowing algorithm:
- Seeds need to be soaked in a special solution to accelerate growth.
- Transfer the material to a paper towel and wait until it dries completely.
- Place the seed on a sheet of paper. Fold the canvas in half lengthwise and distribute the seeds evenly over the surface of the substrate.
- There is no need to sprinkle them with soil. It is enough to spray the surface well with water again. Each seed will fall into the ground on its own to the required depth.
- The top of the container must be covered with glass and provided with round-the-clock illumination. Growing is carried out without ventilation, so you should not lift the glass.
Note! If purchased seeds are sown in a shell, they can be laid out manually
Planting seeds
Watering rules and humidity
After about 1 week, the first gloxinia shoots will begin to appear. You can remove the glass and put away the phytolamp. Now the main task is to constantly spray the sprouts with a spray bottle. For normal cultivation, it is enough to do such irrigation every 3 days. This will maintain the humidity suitable for the plant.
Fertilizing and soil quality
Initially, you need to sow the seeds in a peat mixture that is rich in nutrients. Then the plant is picked 3-4 times (and the container is changed the same number of times). Each time a new substrate is used, so there is no need to feed the plants. The first feeding is done 40 days after the last transplant. To do this, you can use complex fertilizers in the amount specified in the instructions.
Choosing a pot
The root system of a plant is formed in such a way that the roots grow in breadth rather than in depth. Therefore, when choosing a container for growing a flower, you need to pay attention to wide and shallow pots. It is in them that gloxinia will grow correctly. Planting a tuber in such a container is the key to successful breeding. Containers are selected depending on the size of the seedling: the more nodules, the larger the pot. But even here you need to know when to stop, otherwise the foliage system will develop to its maximum in a huge pot.
Do you want to know how to plant gloxinia as a tuber so that the flowers are large and bright? To do this, you should not place a small seedling in a container that is not the right size. Otherwise, there is a danger of flooding with excess water. The flower will develop a root and leaf system, and the bells themselves will be small. Large tubers can be placed in containers from 10 to 15 cm in diameter. For little ones, 8-9 cm is enough.
Preparation: soil and pot
Gloxinia must always be replanted into fresh substrate. It must be sterile, allow moisture and air to pass through well, and also have nutritional properties. For this, either a ready-made soil composition or one selected independently is suitable.
As a ready-made substrate, you can take a composition for violets and begonias , since they are related plants. Expanded clay or pebbles can be used as drainage.
To prepare the soil yourself, you need to take:
- One part of leafy soil.
- One part of peat.
- Half of one part of sand.
Second option for soil composition:
- Four parts of leafy soil.
- Two parts of turf land.
- Two parts of humus.
- One part sand.
The acidity of the soil should not exceed 7 pH, otherwise gloxinia will grow slowly and buds will form poorly on it. If the soil was made independently, it must be disinfected by thoroughly steaming or a solution of potassium permanganate.
Advice : You can also use the ready-made “Maxim” preparation, strictly following the included instructions. Otherwise, there is a risk of infecting the plant through the soil.
The pot for gloxinia should be shallow and wide . When choosing a pot, you need to take into account the size of the tuber itself:
- If the tuber is small, no more than 2 centimeters in diameter, then 100-gram plastic cups are perfect.
- If the tuber has a diameter of 2 to 4 centimeters, then you need to choose a pot with a diameter of up to 9 centimeters.
- If the diameter of the tuber is more than 4-5 centimeters, then the diameter of the pot should exceed the size of the tuber by at least 4 centimeters.
It is also worth considering that gloxinia will bloom faster in a cramped pot.
Gloxinia: propagation by tubers
If you follow the recommendations and advice of experienced craftsmen, lush gloxinia will grow, and planting the tuber will be successful. First of all, drainage made of expanded clay or polystyrene is laid on the bottom of the flowerpot. The layer height is 1-2 cm, this is enough for small pot depths. Soil is poured on top, which must be left uncompacted and rather loose (so that gloxinia grows better). Planting a tuber is as follows: you need to make a depression in the center of the ground and place it there with the convex side into the ground, carefully sprinkle with soil. It is necessary to do this so that 1/3 of the tuber remains above the soil. The earth needs to be moistened.
In order for gloxinia to grow faster, the tuber must be planted in a suitable microclimate. You need to create a greenhouse effect; to do this, put a plastic bag on the pot and place the container in a warm, lit place. This will maintain soil moisture and no watering will be required. The bag must be removed every day for 20 minutes to ventilate the soil. When the first leaves appear, the bag should be left only in the dark, and then, after a few days, the pot with gloxinia should not be covered at all.
Watering the future flower at first should be very careful, literally drop by drop. Be sure to ensure that water does not get on the plant. In this simple way, gloxinia grows lush from a tuber and produces beautiful flowers in the first year. With good and proper care, there is a chance that soon there will be a large flower garden on the windowsill.
Some experienced gardeners believe that propagating a flower from a tuber is the least attractive method of propagation, especially if the seedling is large and has to be cut in half. In this case, the cut areas are sprinkled with crushed activated carbon. But due to the fact that watering is done through the top, high humidity is created. At the same time, the cut points quickly rot, the plant children deteriorate, and gloxinia does not germinate for a long time. For this reason, you can lose not only part of the flower, but also the whole thing.
Step-by-step instructions for growing gloxinia from seeds
Gloxinia from seeds at home grows no worse than adult plants that are sold in flower shops.
But one of the main problems is that not all seeds usually germinate. How to prepare the soil for planting
The first thing to do is select the soil. Seeds can be sown in ready-made soil mixture, or you can prepare it yourself.
The right soil for gloxinia:
- earth (it is best if it is collected from an area under a birch or pine tree);
- peat soil;
- fine drainage (expanded clay or small pebbles are suitable)
Mix all ingredients to obtain a homogeneous mass. Pour drainage into the bottom of the container, and then fill with soil. Before planting the planting material, the soil is calcined in the microwave or oven for 1 hour. Thanks to this measure, all harmful microorganisms will be destroyed. Instead of the usual substrate, you can grow seedlings in peat tablets.
Advice! To make the soil more nutritious, you need to add a little wood ash to the soil mixture.
Step by step landing procedure
The most important part of growing gloxinia at home is sowing the seeds. Before gloxinia is planted with seeds, the soil is sprayed with a spray bottle. It should be a little damp.
Sowing seeds
Then the seeds are scattered on the surface. You can sprinkle them with a thin layer of soil. The main condition is that the planting material cannot be buried.
Important! Cover the containers with cling film or glass and put them in a warm, sunny place. The glass must be removed regularly to allow the soil to breathe.
If you don’t do this, the soil will begin to become moldy, and then nothing will grow. As the soil dries, water it with warm, settled water. When the first sprouts appear, the glass is immediately removed. If you do not remove it and leave the container in the sun, the sprouts will get burned and die immediately
The glass must be removed regularly to allow the soil to breathe. If you don’t do this, the soil will begin to become moldy, and then nothing will grow. As the soil dries, water it with warm, settled water. When the first sprouts appear, the glass is immediately removed. If you do not remove it and leave the container in the sun, the sprouts will get burned and die immediately.
Sprouts should appear 14-90 days after sowing. If more than three months have passed and the seeds have not yet hatched, then the planting material has been spoiled and nothing will sprout.
Watering rules and humidity
When growing gloxinia at home, special attention should be paid to humidity and watering. Frequent overdrying of the soil, as well as its constant waterlogging, negatively affects seedlings
It either may not rise at all, or will quickly die.
In order to properly grow seedlings, you must always monitor the soil. As soon as it dries, you need to water it again, but do not allow it to become waterlogged. It is enough that the top layer of the substrate is moistened.
What do seedlings look like?
Fertilizing and soil quality
In order for the flower to bloom, gloxinia seedlings are regularly fed. The first time fertilizing is done after the third picking. You can fertilize with Kemira Lux. 1 tbsp. l. Dilute fertilizers in 2 liters of warm water. You can also use the preparations Baikal-1M, Stimovit, Energen as a top dressing.
There is no need to feed the seedlings until the last picking, since fresh nutrient soil is used for replanting.
Important! Seedlings need to be watered every 10 days. Gloxinia is picky about the composition and quality of the soil.
Loose, oxygen-saturated soil is best suited for planting. It should also be sufficiently breathable. The plant prefers nutrient-rich soils
Gloxinia is picky about the composition and quality of the soil. Loose, oxygen-saturated soil is best suited for planting. It should also be sufficiently breathable. The plant prefers nutrient-rich soils.
Particular attention should be paid to acidity. Optimal values – 5.5 – 6.5 pH
If the acidity level is higher, the plant will die.
Other types of reproduction
In addition to dividing by tubers, there are also ways to propagate Syningia beautiful: by seeds or cuttings. Rooting with leaves can be done during spring and until autumn. This can be done before, during and after flowering. Moreover, young leaves cut in the spring take root faster and easier than those that were separated in the fall.
Before the procedure, a special device is made. A hole is cut in the lid or piece of cardboard. A leaf is inserted there carefully so as not to damage the tender shoot, and the cardboard/lid is placed on a glass of water. The liquid level should be up to the tip of the cutting. As water evaporates, water is added. During the rooting period, 1 tablet of activated carbon is added to the liquid so that the process of rotting of the sprout does not begin. Within a month, small roots appear at the end of the cutting and a tuber is formed.
Often gardeners divide the edge of the cutting lengthwise so that the greatest division of the gloxinia tuber occurs. It is better to immediately plant the cuttings in the ground, at the first signs of roots appearing. Before winter, the first hazelnut-sized embryos form on it. Rooting with flower stalks is done from an already blossoming plant. The buds should be carefully removed, and the flower stalks should be placed in the same structure as in the case of leaf cuttings. The water level should reach the tip of the plant so that 1 cm of it is immersed in liquid. A month later, when the roots appear, the peduncle needs to be planted in the soil. After another 30 days, the leaves that appear will signal that nodules have already formed. Young plants must be placed in a cool but bright place for the winter to give the flower rest. Watering during the dormant period must be reduced, otherwise the gloxinia flooded with water will die.
Caring for gloxinia at home
To ensure normal plant growth, you must strictly follow all the rules and features of caring for gloxinia at home.
Lighting
The gloxinia flower needs high-quality lighting, which should be sufficient, but not direct, but diffused.
You can keep a flower on the windowsill until the sun gets hot. To avoid burns, it is better to move it to another place or darken it.
Temperature
Gloxinia is a heat-loving plant, so the optimal temperature for it is at least +18-+20 degrees. During the period of emergence from dormancy, it needs to create warmer conditions - up to +25 degrees.
During the period of flowering and development, the temperature should not be allowed to rise above +28 degrees, otherwise the plant becomes lethargic, the buds freeze and do not open, and the flowers do not bloom for long.
With sudden cooling, the root system quickly rots, the leaves turn yellow, and the buds turn black and fall off.
State of rest
Gloxinia blooms from March to June, and some species even until October. When the plant stops blooming, it enters a dormant period, which is expressed in a peculiar way.
After the foliage begins to dry out, it is necessary to reduce watering, and when the entire exposed part of the plant dries out, watering should be stopped completely.
The tuber remaining in the soil can be stored at a temperature of +10 degrees without digging it up. In the future, it is watered only occasionally so that it does not dry out and rot. You can do without watering at all, but the pot must be filled with sand and placed in a cool place.
If you store the tuber separately, then it is first dug up and cleared of soil. The tuber should be sprinkled with shavings or sand, and then placed in the refrigerator, in the vegetable compartment, for further storage.
It is not necessary to send young plants to rest so that they do not stretch over the winter; it is necessary to cut off the entire green part of the flower and leave only the first pair of leaves from the ground. In the future, a rosette will appear from the axils of these leaves.
Watering gloxinia
At the beginning of growth, the plant must be watered carefully so that there is no stagnation of water, gradually increasing the volume of liquid. The water should settle well and be at room temperature. It is important not to flood the center of the tuber and leaves with water.
At the end of flowering, watering must be reduced, and in a state of winter dormancy, gloxinia may not be watered at all.
During the period of growth and flowering, the plant needs moisture. Its deficiency affects the life of gloxinia: the leaves curl and the buds fall off without opening.
You cannot spray this flower, because the plant’s leaves are drooping, and this will harm it, but you can humidify the air around it. It would be correct to place the pot in a deep tray on damp expanded clay or pebbles.
Gloxinia.
How to feed gloxinia?
It is impossible to feed new plants, only rooted cuttings and weak bushes. There is no need to feed gloxinia during hibernation, before transitioning to a state of rest and immediately after awakening.
During the period of active growth and flowering, it is advisable to feed the plant weekly. It is important not to overfeed it, so it is necessary to use half the amount specified in the instructions for the product used.
Here you should take fertilizer specially prepared for gloxinia, or you can use a universal fertilizer for all flowering plants. Pay attention to the composition of the fertilizer, since excess nitrogen will lead to excessive growth of foliage, and excess phosphorus will help lush but short-lived flowering.
The best option for gloxinia would be an equal amount of potassium and phosphorus, as well as a small amount of nitrogen. Do not apply fertilizer to dry soil, as this can burn the roots. It is better to feed the plant 2 hours after watering.
Gloxinia, home care, video:
Gloxinia home care / Perennial flowers
Watering
Constantly abundant, but only in the soil. Do not allow water to get on the leaves and flower stalks. It is better to place the pot on pebbles or wet peat so that the humidity is high. The air around gloxinia is sprayed periodically. And water it well with melt water. You should take care of the drainage system, since the flower does not tolerate stagnant water as well as dry soil.
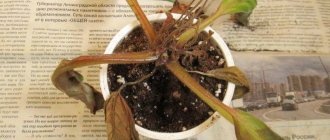
We leave the gloxinia to grow in the same pot
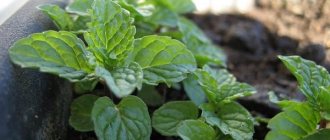
In front of me is a pot in which a young gloxinia sprout has appeared. This indicates that the tuber overwintered safely and began to sprout.
The velvety leaves of young shoots seem perfect. It is important not to spoil them by pampering them in the warmth and pampering them with feeding. It is more correct to create spartan conditions for them by moving the pot on the windowsill closer to the glass. And in order to prevent the plant from getting too cold, I place the pot with it on a foam stand (for example, on a packaging trough or on any foam block).
Here are pictures that clearly show how a young shoot of gloxinia grows. Until recently (in winter), the tuber was not even visible. I wrote about how it feels during the dormant period in the article “How to preserve a gloxinia tuber in winter?” At the end of February (sometimes later) his awakening begins, which cannot be missed. The price of a mistake is frail, elongated shoots (at best) or the death of the plant from drying out of the tuber (at worst).
Some tips
- Gloxinia loves feeding very much. It should be produced when the young foliage is fully developed. 60 minutes after watering, a solution of mineral fertilizer should be introduced into the soil. The procedure must be performed once every 10 days.
- Caring for the leaves of the plant is simple - you should wipe off the dust with a soft brush or wash them with warm water, avoiding moisture getting into the outlet.
- If you do not intend to collect seeds, faded flower stalks must be removed. Thanks to this, the flowering period will noticeably prolong.
- After full flowering, before the dormant period, watering is reduced and fertilizer is stopped altogether.
These simple tips and recommendations will help you understand how gloxinia reproduces; planting a tuber will not seem so complicated. A beautiful ornamental plant will bloom with lush bells as a sign of gratitude.
Cooking the tuber
How to process, wake up
Before planting the tuber in a new pot, you should wash the remains of the previous soil with warm water, let it dry naturally for 24 hours, remove all dry roots, and cut off dead parts. The cuts can be left untreated, or they can be sprinkled with coal to prevent rotting. A weak solution of potassium permanganate is suitable for processing. 15-20 minutes in the solution will help protect the plant from various diseases in the future.
Sometimes after storage the nodules become soft. Such specimens are not suitable for transplantation; they should be brought to a viable state. To do this, you can wrap the wrinkled samples in a damp cloth for several days. The procedure should restore elasticity and strength.
How to split
When the tuber is already old and is not suitable for planting after winter dormancy, but it is a shame to throw it away, then you can use division. In other cases, the division process should be avoided, because the stronger and larger the tuber, the more magnificent and beautiful the flowering.
Having divided the planting material into parts, the cut area should be treated with charcoal to dry the surface. Each “division” must have a sprout, otherwise there is no point in replanting. Some enterprising gardeners are trying to “merge” cuttings from different types of gloxinia in order to get several individuals of different colors in one pot.