When is it better to choose this kind of method?
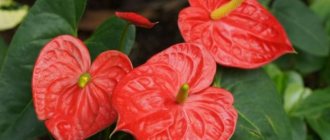
This method of orchid propagation is used when, instead of a flower, the orchid produces one or more children on the peduncle. They can be placed either at the end of the peduncle or in the center.
Before separating the baby from the original plant, it is preferable to let it grow 3-4 leaves, at least 5 cm long. It is possible to help the baby grow roots by creating the required conditions for it.
HELP: More often, a baby can occur at the roots of an orchid. In this case, it is more difficult to separate it, since it is possible to damage the roots of the older plant. However, if everything is done correctly, such a baby will take root and begin to grow very quickly.
How to prepare an infusion for watering your baby?
Since the bark is almost dry, after planting a young orchid it needs to be watered. To ensure that it takes root well and quickly produces new roots, you can add special preparations purchased at a flower shop to the water. Folk remedies such as garlic infusion have also proven themselves well. With regular use, it strengthens the general condition of the plant, stimulates abundant flowering and increases immunity to diseases.
To prepare it you will need:
- 1 liter of settled water;
- 2 small cloves of garlic, passed through a garlic press.
Place the prepared garlic in the water, close the jar with a lid and leave for 20 minutes. Strain the finished infusion through a sieve.
Place the pot in a deep tray and pour the prepared infusion directly into the substrate. Leave the orchid for 30 minutes. For adult plants, it is recommended to increase the exposure time to 3 hours. Then remove the pot and allow excess liquid to drain.
Breeding and caring for the shoot
There is no need to wait for roots to appear in the children living directly on the flower arrow of the original rosette.
And with the appearance of 4 leaves on the child, it is easy to separate it (since it is believed that in hybrid phalaenopsis the children do not send out roots in this state and are saturated only by the original bush). The cuts on the peduncle and on the baby should be sprinkled with crushed charcoal or cinnamon. It is advised to dry the baby for 24 hours , then plant it in a fine-grained substrate, where they wait for roots to appear. The lower pair of baby phalaenopsis leaves turn yellow over time.
It is better to root the baby phalaenopsis in a small greenhouse; the best temperature for the baby is 22...25 degrees. The emergence of roots takes a very long time; in some cases, phytohormones are used to stimulate them, spraying the substrate with epin or heteroauxin. There is no need to spray the baby leaves themselves with hormones, otherwise the emergence of roots will be delayed and the formation of leaves will begin.
IMPORTANT: It is not recommended to pick them; they will fall off on their own when the supply of calorie elements decreases, by which time the original roots may have already developed.
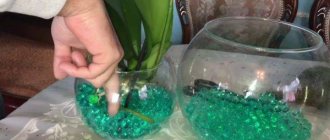
Another method used to stimulate root growth on children is placing them close to water. They take colorless plastic boxes, a flat piece of foam plastic, in which they make a slight depression, and fix the baby phalaenopsis rosette in it motionlessly and thoroughly.
Next, water is poured into the box, a foam “boat” with the baby is lowered, and covered. More moisture and warmth stimulate the emergence of roots faster . With the appearance of roots, domestic phalaenopsis is transplanted directly into the bark and grown as a mature plant.
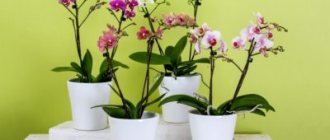
The best way to propagate phalaenopsis
Someone makes breeding phalaenopsis a commercial activity, someone wants to breed their favorite type of orchid - one way or another, questions about how to propagate phalaenopsis and how to raise baby orchids arise quite often. Phalaenopsis orchids can be propagated at home in different ways. Reproduction by children, cuttings, or division of the plant is possible, but only if an absolutely healthy phalaenopsis receives sufficient care at home for a comfortable life, and its age allows it to reproduce. The most difficult and rarely used method of propagation at home is propagation of orchids by seeds.
By division
Phalaenopsis can be propagated by division if the plant is already 4 years old, if it has 6, or preferably 8 leaves, and several aerial roots growing from the axils of the leaves. Of course, the plant must be completely healthy, because this method is quite risky, it will require a lot of effort and will be a lot of stress for the flower.
You need to take a very sharp knife (or pruning shears) and cut the plant stem into two parts, so that the upper part contains leaves and aerial roots. The cut areas must be treated with finely ground charcoal or activated carbon (you can use cinnamon or chalk). The upper part is planted in a transparent container filled with a fine substrate; it should consist of crushed pine bark and chopped sphagnum moss. There is no need to water the plant, the cut should dry thoroughly, and transparent dishes will help monitor the condition of the roots. When they need moisture (shown by whitening), you will need to spray the substrate using a solution diluted in water to stimulate root growth.
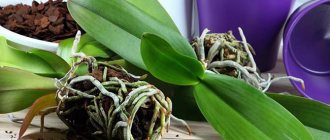
Children
The easiest way to propagate phalaenopsis is by separating the baby orchid. Children grow from growth buds, which are located in the axils of leaves or on peduncles. They are formed on plants that are at least two years old and have at least 4 leaves. Typically this occurs between mid-February and mid-July.
The appearance of children can be provoked by changes in living conditions. This can scare the plant, making it thirsty. To do this, stop watering for about 2 weeks, when the roots have already turned white, leave for another 2-3 days. In this case, you need to ensure that the light is bright enough, but diffused.
With high air humidity (70%) and normal daylight hours for indoor orchids (12 hours), a difference between day and night temperatures of 10 degrees (18–28) is ensured.
The orchid is exposed to direct sunlight for an hour every day. Carefully remove the integumentary scales from the bud, cover it with cytokinin ointment or attach a little damp sphagnum moss and wrap it in polyethylene.
The resulting baby phalaenopsis is separated from the mother plant for independent life. You can wait until its roots grow and plant it in a substrate for young plants, but an adult orchid will lose a lot of strength during this time. You can separate the baby without roots, and then grow them in a substrate or above water.
Cuttings
The phalaenopsis orchid practices propagation by cuttings, and this is how it reproduces most often and easiest. There is no need to rush to cut off the peduncle after flowering, dormant buds may wake up after a while, the result will be another branch of flowers, although not as lush as the first, but still beautiful, or children. If the buds do not develop 2.5 months after the end of flowering, but the peduncle does not dry out, then you can cut it into cuttings.
The peduncle is cut off at the very base, cut into pieces of 5–7 cm so that each part has at least one dormant bud. A shallow flat dish is filled with finely chopped sphagnum moss, sprayed with a solution of a biostimulator (root growth stimulator), the cuttings are laid out, and covered with glass or polyethylene on top to create a greenhouse effect.
The cuttings need to be provided with a stable temperature of +25–28 degrees, humidity 70%, bright diffused light for at least 12 hours. They need to be periodically ventilated and sprayed with a solution of “Kornevin” or a similar preparation. The sections of the peduncle will gradually fade; they can be separated when they give up all the nutrients and dry out completely. After 2 pairs of leaves and roots at least 5 cm long appear, new plants can be transplanted into a substrate for adult orchids. The lower buds are considered the strongest.
Or you can simply put the peduncle in warm water, add potassium permanganate, coal, succinic acid, biostimulant, maintain the desired temperature and humidity - after a while the babies should appear.
How to propagate: step-by-step instructions
The separation process will be as follows:
- Very carefully separate the shoot from the native stem . The shoot is cut off using a sharp knife. Before replanting the baby, you need to make sure that the new plant is completely ready to live separately and has a root system.
- When the seedling has already been removed, there is no need to rush to bury it in the ground . First, the cut area needs to dry a little, preferably in the sun. The drying process cannot last more than half an hour. Next you will need coal, which is finely crushed. They need to sprinkle the cut area for disinfection.
- A transparent plastic pot should have clear volumes . You need to drill special holes in it, which are also called drainage holes. Now you can begin the landing process. Planting must be done so that the neck of the root type is only at the level of the surface of the pot. At the time of transplantation, you need to carefully monitor the roots so that they do not get injured. In this case, the pot cannot be huge; it should be a little small for the orchid. Directly in this case, the possibility that it will take root is greater.
- The pot should be filled with soil , which must contain minerals. It is necessary to carefully observe the roots. They must be completely covered with the so-called substrate. If some difficulties arise and the roots do not fit into the pot, then they can be placed on top, but in this case they will need to be covered with a certain amount of moss. As a general rule, when you first add soil, you should shake the pot to allow the soil to settle. It is strictly forbidden to press the ground with your fingers.
- After transplanting, you should place the flower near the window . However, it is strictly forbidden to water in the first days. The orchid should be watered on the third day after this process. It takes time for the cut that was made to become extremely dry. Due to this, the orchid is protected from the possibility of contracting any disease due to the influence of humidity or moss microorganisms.
After transplantation, the flower should stand for a certain time in a room where the humidity is slightly increased.
Check out the video showing the reproduction of orchids by children:
How to plant Phalaenopsis at home?
Basic Rules
For your intention to be crowned with success, it is necessary to provide the orchid with proper care long before attempting to plant it.
An important aspect in the development of exotic plants is the temperature regime - for the comfortable existence of the plant, a constant temperature in the range of 16-32 C is required. To stimulate flowering, the temperature is reduced to 13-16 C for several weeks.
As for air humidity, ideally it should be in the range of 50-80%. Low air humidity, spraying, and the presence of drafts negatively affect the flowering of Phalaenopsis.
IMPORTANT! To plant Phalaenopsis, you must choose an adult, healthy plant with at least four large leaves, as well as a developed root system. The age of the plant must be at least 2 - 3 years
The frequency of seating should also not exceed 1 time in 2 years. Spring is considered the most favorable time, and the plant should have time to bloom and rest for at least 2 months.
Practical advice
To determine the most comfortable habitat for a plant in an apartment, experiment! If the apartment has 3-4 windows, try leaving a flower pot on each of the window sills one by one, while paying attention to the change in the orchid’s condition. The plant's permanent habitat will depend on where it blooms most quickly; If you still have little experience in growing orchids, then try to keep a diary
Write down any little things you noticed during the experiments there, this will help you avoid mistakes in breeding Phalaenopsis in the future;
To stimulate orchid reproduction, organize a “drought”. To do this, water the plants no more than once every 2 weeks. The frequency of water procedures is determined by the color of the root system; if handled correctly, it should change from bright green after watering to light gray. The silvery tint of the roots indicates that after a few days it is necessary to saturate the plant with water. There is a very important point: during poor watering, Phalaenopsis must be protected from direct sunlight, otherwise the exotic plant may be seriously damaged;
The color of dried roots.
Extend the plant's daylight hours to 12-15 hours a day; light plays an important role in the propagation of orchids.
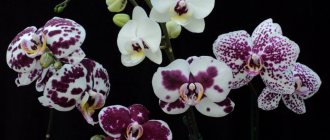
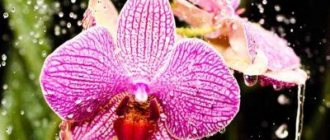
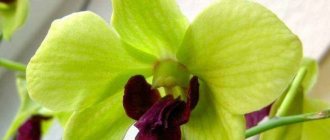
Photo
Check out the reproduction process in the photo:
Further care of the plant
After the final transplant, you need to take care of the baby like an adult plant. It is important to water the plant properly so that it has enough moisture, but not a very large amount. After the first watering, this plant should be watered again only after the substrate has completely dried.
For a certain time, it is possible to add a small amount of growth stimulants and fertilizers to the irrigation water. Be sure to guarantee the young plant optimal lighting and a comfortable temperature .
It is important to know that there are other ways to propagate an orchid, namely by peduncles, roots, cuttings, and information about propagating the Dendrobium nobile orchid at home may also be useful.
Breeding conditions
In their natural habitat, most species of this orchid grow as epiphytes under the canopy of large trees, and some of them adapt to rocky surfaces
Their internal clock is focused on optimal conditions for growth, so when breeding it is important to accurately imitate the environment. Phalaenopsis orchid blooms beautifully and reproduces at home
The plant prefers to grow in partial shade, as in its natural habitat. Low light intensity or filtered light is optimal for this variety of flowering plants.
It is easy to determine the level of illumination; it is enough to avoid exposure to direct sunlight and it is better to place the flower on a windowsill where the rays do not fall. If this condition is not met, then burns appear on the leaves. You need to give a lot of natural light, but without direct sunlight from 11 a.m. to 4 p.m. The best position is east or west. Plants also grow well on the north side.
The orchid loves high humidity in the room, where it should be at least 60-70%. This requirement is a prerequisite for the healthy growth of phalaenopsis. If the room has a low level of humidity, then you should take marble or decorative stones and place them in a shallow tray, pour water and place an orchid in a pot above the stones. This will help increase humidity while preventing other media from absorbing water.
The favorable temperature for indoor propagation is between 25 and 35 degrees Celsius. To keep the air moving inside, you can set the ceiling fan on low speed for a few hours every day. Proper watering is the most important condition when germinating any planting material. Water the flower with warm tap water; the soil should remain slightly moist, but under no circumstances be wet. Overwatering will cause rot rather than germination.
Insufficient watering is also harmful, since in this case neither the seeds nor the cuttings will have anywhere to get moisture for the development of the root system. After planting, it is necessary to create greenhouse conditions, that is, cover the plant with film. You can then moisten the soil with a spray bottle. It is best to take cuttings for planting after the end of the flowering period.