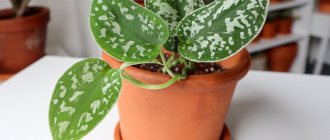
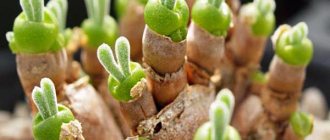
Castanospermum is a very spectacular plant that inspires surprise and attracts the attention of all visitors to the house. The most recognizable parts are the two large seed cones, resembling two halves of a chestnut, with the main shoot growing between them. This crop is often called chestnut seed or chestnut sapling, and is known to some as chestnut tree. Those who want to have this plant at home must know how to care for it at home.
general description
Despite the familiar name, it is not related to the real chestnut tree. Castanospermum is a leguminous plant.
In the wild, the plant is found on the east coast of Australia, from where it came to Europe as a greenhouse specimen and then spread throughout the world as a houseplant. Its habitat is the tropics with high humidity. In the wild it always grows as a tree and its growth rate is astonishing, usually reaching 10 m in height in a few years.
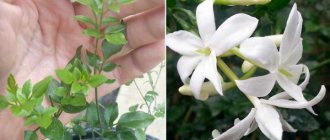
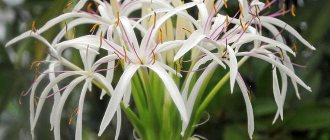
From the third year it blooms with yellow or red inflorescences, which open from May to August. After flowering, long, pod-like fruits with ripe seeds inside ripen.
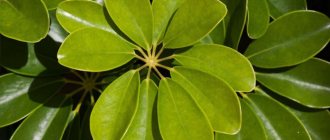
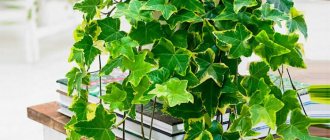
Castanospermum is a tree with a thick, openwork crown. The branches are covered with narrow long leaves that flutter beautifully in the wind. The edge of the leaf blade is wavy, and the entire surface is glossy, making the chestnut look very decorative. In the wild, the lifespan of a tree is 50-150 years.
The Aborigines used chestnut bark as food after boiling it, but today eating any part of the chestnut tree is not practiced.
Home care type
Only one type is always used in home care - southern chestnut spermum. It is not able to achieve the same parameters as in nature. Most often, the flower grows up to 70-80 cm. Its size is limited by the volume of the pot, so if it is planted in a huge tub, then in a greenhouse it can grow up to 3.5 m.
Even with very good care, the chestnut tree cannot be expected to bloom. Flowering is hampered by the lack of volume for the root system, so the appearance of flowers at home is considered a rare occurrence.
It is important to note that chestnut seeds should not be kept in homes where there are small children, since the juice from all parts of this plant causes rashes, allergies, chemical burns, and the most severe consequences can occur after ingestion of its leaves or pieces of branches. Negative effects are due to the presence of saponins, which are aggressive to the human body.
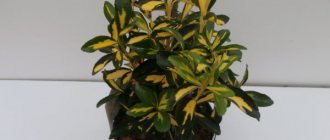
Why do chestnut leaves turn yellow?
It happens that spots appear on both sides of the foliage. At the same time, there is so much that it is easy to notice how the spotting merges into a single whole. If you do not keep track of the problem, then there comes a moment after which the leaves fall off. The reason is that pycnidia are formed - the fruiting body of sporulation of fungi.
The common causative agent of the disease is Cylindrosporium castanicola. This fungus produces angular patches of yellow flowers.
Some gardeners mistakenly believe that once the leaves have fallen, the disease has gone away. Actually this is not true. The infection continues to progress in already fallen leaves.
How to deal with yellowing:
- First, remove the affected parts of the plant. If the affected parts have already fallen off, then collect them from the ground so that the leaves cease to be a source of spread of the disease.
- As soon as the buds open, spray with a one percent solution of Bordeaux mixture.
- Use, for example, a product such as Pure Flower.
Growing rules
Growing and caring for castanospermum is simple and can be done by the most inexperienced gardeners. The most important thing is to make the flower as close to its natural habitat as possible.
Temperature
The chestnut flower is a flower whose temperature regime is seasonal. This means that temperatures should vary from season to season, although in general this crop is heat-loving.
During active growth, when castanospermum is actively growing, the temperature should be maintained at 20-25°C. At higher temperatures, the plant suffers from heat and may respond by suddenly stopping growth, dropping leaves, and generally deteriorating. The period of active growth usually begins in March-April and lasts until August-September.
By the end of summer, the temperature should be gradually reduced to 14-16°C. At the same time, there is a gradual transition to a dormant period, when new leaves and branches are not formed. It is important that the room temperature does not fall below 12°C, as such low temperatures are fatal for this heat-loving plant. For this reason, do not leave them on unheated porches or hallways.
Lighting
Xanthospermum is a light-loving flower. It needs enough light to grow, otherwise it will have thin branches and long internodes. To properly care for the plant, place it on an east or west windowsill where there will be plenty of light but where the leaves will not be exposed to direct sunlight. If the only space available is on the sill of a south-facing window, use an artificial cover to prevent thermal burn of the crown.
During the winter months, chestnut spermaceti may lack light due to short daylight hours. This will be understandable due to the gradual loss of leaves. To stop the loss of leaves, care can be supplemented with phytolamps or fluorescent lamps. Daylight hours for this crop should be at least 12-16 hours.
Place
It is very important to provide the plant with a suitable place where there are no drafts and winds that damage the root system. During the summer months it is a good idea to place the pot outside. In the garden, Castanospermum shows a very good growth rate and behaves very well. The only thing you need to watch out for is to avoid direct sunlight.
Watering
Use only softened water without hardness. Use settled water, but preferably rain or melt water.
The method of watering also depends on the time of year. In summer, moisture evaporates faster due to higher temperatures, so water more often. The topsoil may provide a clue. Proper care means that the next watering should be done when the top layer of soil has dried out 3-4 cm. You can check this by plunging your finger into the soil.
In winter, when they are kept in a cooler environment, the need for moisture and the frequency of watering decrease sharply. During this season, you can allow the soil to dry out more. As a general rule, systematic overwatering is more harmful than slight dryness.
After watering, wait until water appears in the saucer and then leave the pot to allow the soil to soak. After 20-30 minutes, remove any remaining moisture.
Air humidity
The parameter that causes the most errors when caring for chestnuts at home is humidity. In the wild, this plant prefers places near natural bodies of water, so it needs high humidity.
To recreate the same conditions at home, you can choose the most suitable method. Spraying with a fine spray nozzle provides excellent results. A shower can be arranged, but only if the surface of the pot is covered with a film that will protect the soil from excessive moisture. Another method is to place the pot of castanospermum in a tray with damp moss or stones in water. It is important to ensure that the water level in the pan does not touch the bottom of the pan. In all these cases, the water should be at room temperature or a few degrees warmer, but do not use cold or hot water.
In winter, if the plant is kept in a cool room, spraying cannot be carried out, since there is practically no evaporation from the leaves.
Feeding
Castanospermum at home is very sensitive to fertilizer, but certain rules must be followed. Fertilizer application should begin no earlier than a month after transplanting the plant into new soil. Before adding the nutrient solution, the soil should be moistened so that the root system is not subject to chemical burns. Fertilization should be carried out the day before.
Fertilizing castanospermum with organic complexes for decorative deciduous indoor plants. During the active period, the frequency of fertilizer application is once every two weeks, but in the autumn this frequency gradually decreases. During the rest period, the dose is halved, and the frequency of use should not exceed once a month.
For this flower, not only root feeding is suitable, but also spraying the solution on the leaf. The intervals will remain the same.
Transfer
The transplant is carried out immediately after the flower is brought from the store, if it was planted in a transport medium. Then pay attention to the condition of the cotyledons. Once they are dry and dry, the soil in the pot should be replaced. The embryos should not be pulled out; they should fall off on their own.
Then repot the plant approximately every 2-3 years, depending on the plant's growth rate and the size of the root system. If the home container in which Cassanospermum is growing is too large and a complete replanting is not possible, it is recommended to replace 2/3 of the old soil with new one. Both replanting and replacement of one layer should be carried out at the beginning of spring activity, in late March - early April.
The soil
A slightly acidic substrate is ideal for growing this plant at home. The best pH is in the range of 5.5-5.9. You can use commercially available fig tree soil.
Those who want to give the flower the perfect composition should prepare their own substrate from the following ingredients:
- 1 part leaf soil;
- 1 part of turf land;
- 1 part coarse river sand.
- 1 part finely ground peat;
To increase soil permeability, you can add some crushed pine bark.
An important nuance is that every year the need for castanospermum in organic substances increases, so the proportion of turf soil should increase each time in order to ensure normal care at home and preserve the decorative appearance of the flower.
Diseases and pests
Fatsia is a fairly strong flower with good immunity, which is rarely affected by various diseases and pests, but if you often violate the rules of care and do not follow maintenance recommendations, the following problems may arise:
- Root rot. With high humidity and excessive watering, the roots of the plant soften and darken, and the flower itself withers. Then you should remove it from the ground, clean the roots, remove damaged parts and replant the plant in a fresh substrate. After transplantation, Fatsia is watered with a fungicide solution and placed in a well-lit place.
- The tips of the leaves dry out. This may indicate poor or infrequent watering. If the problem is not solved in time, the entire moisture-loving plant will dry out and die.
- Leaves become brittle and wrinkled - dry indoor climate. Frequent spraying, wiping the leaves, humidifying the air and a warm shower will help avoid the problem. At the beginning of the heating season, the radiators are covered with damp towels or the flower is removed away.
- Leaves become soft and yellow - overwatering. The soil in the pot is moistened as the top layer dries, and the remaining water is drained.
- Falling leaves - too low temperature in the room or excessive watering.
- Gray rot. A sign of the disease may be gray or brown spots on the lower part of the trunk. Replanting with a complete replacement of the substrate and subsequent treatment with fungicides will help.
- Stopping growth - it is worth making sure that the plant does not require replanting. Also, the reason often lies in soil depletion and lack of nutrients, then it is better to feed the flower with special fertilizers.
- Variegated leaves become monochromatic - poor lighting or depletion of the substrate.
The most dangerous pests for Fatsia are scale insects, spider mites, thrips, mealybugs and whiteflies. You can get rid of parasites using traditional methods, for example, garlic water or soap solution, as well as chemicals such as Actellik or Aktara.
Reproduction
There are two main methods of propagation: seeds and cuttings. Almost anyone can propagate by seeds, while propagation by cuttings requires certain skills.
Seminal
The seeds are difficult to obtain at a flower shop, but can be ordered online. Before sowing, it is necessary to prepare the material for planting. Soak the seeds for one day in warm water, and after cooling, change the water periodically.
Planting is carried out in the first half of spring. Seeds are sown in a slightly moistened mixture of sand and peat. The planting box is covered with transparent polyethylene. Place the box in a warm, bright place for germination.
Ventilate the room daily and remove drops of condensation, and water the soil if necessary. It will take almost a year for seeds to germinate at home, so you will see the first shoots only next spring. As soon as the first shoots appear, remove the plastic film so that the shoots become accustomed to the conditions in the house.
When the young sprouts have three full leaves, they are transplanted into separate containers, and after some time they are transferred to permanent pots.