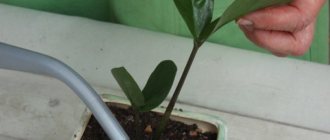
Formation step by step
To carry out work at home, you need to prepare the following tools and materials:
- sharp instrument;
- cotton pads or napkins;
- latex gloves;
- special balm or blocking paste;
- pruning shears or sharpened knife.
Crowns
When forming the crown, you need to pay attention to the following nuances:
- It is recommended to carry out work wearing protective gloves, which will not only protect against the poisonous sap of the plant, but also create sterile conditions for the process;
- When pruning an adult plant, you need to find a dormant bud growing on the outer part of the branch;
- a correctly made cut should be half a centimeter above such a bud;
- before pruning, it is necessary to imagine the grown branch, since it will change the entire image of the adenium, and also evaluate all the risks;
- You should not leave branches of the plant crown that are twisted or growing inside the plant;
- if there are weak shoots, you shouldn’t feel sorry for them and take care of them, they will dry out anyway; timely pruning will help to form a chic crown, provoke new side shoots and branching;
- the juice flowing down the plant leaves unsightly marks; to prevent stains, you must immediately remove them with a napkin or cotton pad;
- when the shoot is removed, juice begins to be released abundantly, gradually its amount decreases, and then stops altogether. It is worth purchasing a special product or balm in advance, which is sold in a flower shop, because it acts like a garden varnish - it is used to close the cut and prevent leakage, which will help prevent not only avoid sloppy marks, but also retain moisture in the plant;
- Do not throw away the cut part of the trunk - the cutting takes root easily;
- if the cuts of the second and next order are observed in progression, you can provoke the adenium to begin branching and create an exceptional crown.
Caudex
Caudex requires increased attention from the grower.
This process is carried out in several stages and is combined with transplanting and pruning branches. There are ways to create a caudex such as:
- pruning the central root, during which the lateral roots are actively growing; if you additionally cut off all the roots growing downwards, you get a caudex shape called an octopus;
- a widely known method is in which the caudex is not cut, but various planting techniques are used; With each transplant, the root is pulled out slightly above ground level, thereby achieving the interesting effect of a bare root;
- it is possible to plant adenium on a disk or stone;
- you can gradually roll up the softened caudex, creating a ring from the stem, or weave several stems into a braid or intricate knot.
Another interesting technique is the combination of two or more young shoots. It is done as follows:
- young seedlings are connected to each other and secured with film;
- in this form they are placed in a moistened earthen substrate and placed in a warm, illuminated place;
- spray periodically; watering is limited - once every 5-7 days, do not moisten the soil too much;
- after 1–1.5 months it is worth removing the film to assess the pet’s condition;
- in places of close contact, it is necessary to make shallow cuts and reconnect the trunks using film;
- The succulent is again placed in the substrate for about a month, during which time the plant not only has time to grow roots, but also to grow together.
Beautiful examples
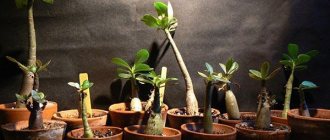
Desert flowers or an unknown forest thicket will look very stylish in any interior. It’s easy to do – just plant the young seedlings in one flat bowl. A few months after transplantation, you need to pinch at the same height. After a year, you need to slightly raise the roots of the succulent above ground level.
Arabian adenium is grown and used as a bonsai - this is due to the characteristics of this type of plant, which has a long dormant period. The plant blooms in the spring, then sheds its flowers and plunges into pronounced hibernation;
An interesting shaped succulent will cause constant interest and surprise even during the dormant period. This appearance is achieved by clever techniques of connecting several caudexes during planting.
Adenium multiflora is distinguished by a lush crown with fleshy, dense leaves and bright double inflorescences. The diameter of the flowers usually does not exceed 5 cm, rarely reaching 8 cm.
Adenium flowers come in various colors: white, yellow, red, almost black. Their diversity surprises and fascinates. The combination of amazing flowering and unusual caudex makes adenium a favorite.
Causes
Adenium transplantation can be performed for various reasons:
- After the purchase.
As soon as a specimen has been purchased and brought home, it must be replanted immediately. The reason for such hasty actions is that in flower shops the soil is basically standard for all flowers. Adenium needs a special soil composition (what kind of soil should I choose for adenium so that the flower pleases the eye?). - Diseases of roots and caudex.
If the caudex and root system have rotted, there may be several reasons: mechanical damage and the presence of a wound, penetration of moisture into it, excessive waterlogging and hypothermia. To save the flower, you need to remove it from the container, shake off excess soil and use a sharp, disinfected knife to cut off the affected areas. Next, sprinkle the cut area with an antiseptic or fungicide. As soon as the roots dry out, they can be transplanted into a new substrate and wait for the plant to come to life. - Incorrectly selected soil.
This situation arises if the adenium was donated by someone and the composition of the soil is unknown. Transplantation should be carried out before the beginning of the growing season. - Spacious pot.
Due to inexperience, gardeners use a container that is too spacious for planting adenium. In this case, it is necessary to replace the container with a suitable one as quickly as possible. If the pot is too spacious or deep, water stagnation will occur, which leads to the death of the root system and the flower itself. - Small pot.
It is easy to notice that adenium is crowded in a container, since the pressure of its roots will simply burst the flowerpot. Neither the pot nor the soil can support the root system of the crop.
How to create conditions at home
General rules for caring for adenium at home in a pot for beginners can be described as follows:
moderate watering;
a lot of light;
loose soil;
lighting in winter.
If you follow these instructions, the plant will feel good and gain strength to bloom.
One of the important conditions for planting and caring for adenium at home is the quality of the soil. It must be breathable so that the roots receive enough oxygen. pH neutral or slightly acidic.
Light
Lighting is the main factor in growth and photosynthesis. Since indoor adenium has little foliage, it needs to be maintained. The place on the windowsill should be the sunniest. A south-eastern window sill is suitable for this. It is not scary if the plant is exposed to direct sunlight.
If it is possible to put the adenium outside, then there is no need to look for shade under the trees - you can simply put it in the sun (of course, having previously prepared it for the scorching rays). He should be in the sun for 4 – 5 hours every day.
In winter, when the shortest daylight hours arrive by the standards of the middle zone, artificial lighting will allow you to preserve the buds and wait for flowering. During this period, the lamps must be turned on at least 14 hours a day.
If there is not enough light and heat, there may be no flowering at all or there may be few buds. Sometimes, when changing location from a lighter to a more shaded one, the succulent drops buds and flowers. It is not recommended to disturb it during the flowering period.
Temperature
The normal natural temperature for adenium in its natural environment is 42 degrees, so if it drops, the plant may go into hibernation, especially if watering and lighting levels are simultaneously reduced.
In an apartment in the summer, when the heat outside reaches 35 degrees, adenium will feel very good.
Those species that are adapted to flower in summer go dormant in winter. At this time, it is imperative to reduce the room temperature to 16 degrees. Cold for the plant means restoration of strength and the formation of vegetative buds for flowering.
This is one of the reasons why adenium does not bloom - in winter, radiators work in apartments and the plant is not able to prepare for flowering as it does in the wild.
Video: Growing adenium from seeds
Humidity and watering
One of the conditions for the survival of adenium in an apartment in summer is high humidity at 80%. To control the amount of moisture in the air, it is recommended to purchase a hygrometer, as well as a household humidifier with an automatic control function.
The hotter the room, the higher the humidity must be set on the devices, otherwise the plant will slow down its growth.
Since the leaves and trunk of adenium cannot be sprayed, you can increase the humidity in the following ways:
- Place a wide container of water nearby to evaporate.
- Hang wet towels near the plant.
- In winter, radiators are also covered with towels dampened with water.
In winter, when the room temperature is maintained at 16 degrees, humidification is not required. The succulent can overwinter in dry air. The danger comes from overwatering during wintering in the cold.
If there is no evaporation, water stagnates in the root area, which can lead to rot. To act correctly during the winter months, you need to wait until the soil is completely dry. This is determined by the weight of the pot - it becomes lighter.
Carefully! You cannot spray adenium on the street during the day. Drops of water that remain on the leaves act as magnifying glasses for the sun's rays, which can cause multiple burns on tissues.
You can only rain on a succulent in the evening.
Feeding
The succulent loves feeding and responds well to the application of complex mineral fertilizers, which include nitrogen, potassium, phosphorus and some microelements. Cactus-like crops are thought to like calcium supplements. You can sometimes mix in a tablespoon of wood ash, which is obtained from firewood - leaf ash contains more potassium.
Mineral fertilizers are added during transplantation and during the period of active growth. If you choose the right mixture and provide the plant with a hot summer under scorching rays, it will grow quickly.
Possible problems
The appearance of longitudinal wrinkles on the trunk of adenium is not a problem in itself, since it can occur due to natural forces: in winter during the dormant period, when all the vital forces of the plant are used up, or in summer, in the heat due to lack of water. Such wrinkles disappear over time when the adenium is filled with moisture. In this case, it is enough to create conditions for restoring trunk turgor: timely watering and spraying of the caudex.
But this can also be a harbinger of the death of the plant if it is accompanied by the appearance of single yellow leaves, falling off one after another, again and again. Or, perhaps, with a healthy, lush crown of adenium, when the caudex suddenly becomes soft to the touch and loses its elasticity and hardness.
To make sure that your pet is not suffering, you need to check the condition of the trunk by slightly cutting the top layer of the trunk.
If dark tissue is found under the skin instead of light tissue, then the caudex is suffering from rotting. When a brown liquid flows out when pressed, things are really bad, and the adenium dies. Caudex rotting can occur with the onset of cool weather in the fall, when night temperatures drop markedly, but watering remains the same. Cold, wet soil can provoke the appearance of inflammatory diseases of the trunk and roots.
There is no need to despair. It is much easier for an adult plant to cope with possible putrefactive manifestations. It is enough to give the succulent a grand drying process, of course, monitoring its condition. It is necessary to wait until the earthen clod dries completely, eliminating watering and spraying altogether. It is possible even at the height of the heating season to install adenium closer to the battery.
After drying, take the plant out of the pot along with a dry lump of earth, shake off or wash the roots, and the rot may be easily removed from the healthy roots of the plant. If the matter has taken a more serious turn and it was not possible to get rid of rot on the roots in this way, it is necessary to cut the stem roots down to healthy tissue, after which they are replanted in new moistened soil with a high perlite content.
If a young plant has rotted, it must be removed from the pot, rinsed from the wet substrate and the problem areas thoroughly examined. It’s good if you can limit yourself to just removing the rotten roots. If the putrefactive process has affected the caudex, you will have to cut off the damaged part. You need to cut it carefully, with thin plastics, to healthy tissue. Such a cleaned stem must be dried for 20–24 hours. After drying, the adenium should have a clean, dry stem.
If rot appears again, you will have to repeat the entire operation again.
How to propagate adenium at home
You can propagate adenium at home in three ways: cuttings, seeds, layering. Layering is a less popular method due to its complexity. Everything is simple with the seeds; first you need to soak them in a solution of potassium permanganate to disinfect them, and then germinate them in peat tablets or gauze. The seeds will soon begin to grow and can be placed in a pot. In the future, you will need to pinch off the central root if you want to speed up the development of the plant a little.
Pruning succulents produces viable cuttings. They are planted directly into the substrate. After 4 days, the soil is sprayed to moisten it. That’s all, the cutting begins to develop and will soon become a full-fledged plant.
Layering is the most interesting and complex way of propagating adenium. It is worth dwelling on it in detail. It is effective enough to immediately make a new plant that will be strong. So:
- Take a stem at least 2 cm thick and cut it, immediately pour a growth stimulator onto the cut site.
- Wrap in sphagnum moss and cover with cling film.
- After the first roots appear (this takes at least 30 days), the cuttings are separated from the parent and planted in the ground.
Thus, the owner receives a finished plant that immediately begins active development.
Rooting
After pruning or treating for rot, a succulent cutting takes root easily. For planting, only adenium with a dried cut of the caudex is used. You will also need a pot of a suitable size, a prepared earthen mixture and a little perlite. The soil should be moist, but not wet. Such a seedling is placed in a pot filled with substrate.
The bowl with adenium must be placed in a warm place - this is a prerequisite for rooting. The temperature should not be below +20 degrees.
To avoid rot, you do not need to water, just spray, taking into account the temperature and humidity in the room.
Rooting occurs within a month, around this time the adenium produces new leaves and roots, after which you can transplant the succulent into a larger pot. Now that it has become a full-fledged plant with roots and leaves, more frequent watering is required - once every 3-5 days.
Trimming roots when replanting
Impatient gardeners try to begin to form an unusual root system in adenium from the seedling stage at the age of 1–3 months, cutting off the central root. Experienced owners of succulents consider this idea to be in vain, because the development of the plant slows down too much, and the main root still grows, formed from the side one located nearby.
Experts recommend starting the formation of the root system in adult specimens by removing unnecessary lateral roots, braiding them, tying them in a knot, twisting them in a spiral, in a word, showing your imagination depending on your desires, taking into account your love for the plant.
They also try to use simple devices like a disk or planting on a stone for mature plants. The technology for growing adenium octopuses, which arrived in temperate latitudes from Thailand, has become very popular among domestic flower growers.
Its essence is to trim the root system of a grown seedling along with part of the caudex and then plant it on a disk. Thai experts plant directly in the soil mixture, however, for a temperate climate with the absence of high temperatures, it turned out to be more acceptable to root adenium with a cut root system and caudex in water, and then plant it on a disk.
Formation of caudex in adenium
Flower growers have different opinions about how to form the original caudex. Some believe that every 5–8 months it is necessary to remove the plant from the soil mixture and plant it, raising it above its level and directing the roots in different directions.
Others, on the contrary, argue that the most beautiful and plump caudex is formed underground, and if you bury the plant under the very cotyledon leaves, the process will go faster and more actively. In addition, more secondary roots are formed, which are also used to give the caudex an unusual shape.
Both methods are successfully used by gardeners, and it is difficult to determine for sure which is correct or better. Everyone chooses for themselves those manipulations that they consider acceptable and give the expected result.
It is important for the owner of adenium to remember that pinching and pruning will not directly affect the enlargement of the caudex or the formation of unusual shapes from it. Its growth rather depends on the amount of foliage and the condition of the crown during the active growing season of the flower.
Pinching seedlings
Many gardeners try to force the succulent to branch as early as possible by pinching the tops of the seedlings. Depending on when this procedure is performed, the desired result may not always be obtained. If you remove the apical bud during the dormant period, then one lateral bud, located first just below the apex, will receive an impetus for development. As a result, the plant will grow again with one stem.
During the active growing season, there is a greater chance of branching into several branches, but they are still negligible compared to adult succulents, since the dominance of the upper bud is very pronounced in young adeniums. Consequently, even at the very beginning of intensive growth after awakening from dormancy, it is not always possible to achieve the expected branching after pinching a young seedling.
When is pruning recommended?
To obtain a decorative tree, it is advisable to prune it no earlier than 1 year after rooting the cuttings or sowing the seeds. The best time for pruning is the end of winter, when the plant wakes up after a period of dormancy.
Theoretically, you can prune at other times of the growing season, but you can hardly expect the same effective branching as in the spring. It is not recommended to start pruning in cloudy weather that lasts for several days in a row. It is easier to initiate the awakening of the lateral buds in bright, diffused lighting; in extreme cases, the plant is provided with artificial lighting after all manipulations with the haircut have been carried out.
Errors in growing adenium associated with pruning
The most unacceptable thing is to prune in winter, when the plant is dormant. And if cutting off branches simply does not produce the expected branching, then by cutting off the roots in winter, you can lose the plant altogether.
One of the common mistakes when pruning adenium is keeping the plant in poor light conditions. In this case, the procedure will not give the desired effect, and if a low level of light is added to a low temperature in the room, even if not with too much watering, the cut areas often rot.
The use of cytokinin paste in combination with pinching or pruning causes most gardeners to be truly delighted with the result obtained, but there are also opposite impressions from seeing ugly pineal mutations or hyperbranching, which do not always look decorative, and sometimes completely stop the development of the succulent.
Caudex
Adenium forms a spectacular caudex with the help of proper pruning of the roots. This work is carried out constantly with each transplant. The soil for the flower should always be sufficiently moist, but not wet. How to form it correctly?
The right soil
To properly form the caudex of adenium, you need nutritious soil, fertile, rich in organic matter. This flower loves natural fertilizers, and therefore it is best to use real cow manure, which is well rotted, as nutrient mixtures. You can also use extracts from cow dung.
Rules for planting and formation:
- Select a strong seedling and shorten the main root and all the roots growing down.
- In a prepared pot with nutritious soil, pour soil on top. A plastic circle is placed on the slide.
- Place the plant on the plastic.
- The side roots should be carefully straightened and secured in the desired position with wire. You can use small stones or plastic sticks. You can also place a larger stone at the base of the plant to give the roots a fancy shape.
- The roots that will be straightened should be sprinkled with soil on top.
Adenium must be fixed by tying it to a support. You can use a clamp so that there are no marks left on the bark after dressing.
When the next transplant is carried out, the plant should be raised slightly. You cannot lift the roots too quickly, otherwise the adenium will hurt.
Forming a powerful root
First, you will need to grow several strong seedlings, choosing specimens of approximately the same age and with the same growth rate. An amazing flower can be grown by combining different varieties of adenium. How should this be done correctly?
Rules for combining different varieties of adenium:
- First, the best seedlings should be firmly connected to each other, tightly wrapped with films.
- Then they are planted in spilled, necessarily nutritious soil, and the film bandage is periodically renewed. This bandage can only be removed after at least 2 months. During this time, the plant will have time to gain a little mass.
- When the film bandage is removed, small cuts should be made in the places where the stems touch.
- Then the plant is put back together and tied with film for only 4 weeks. During this time, they will grow together well and form a strong root.
Formation of an octopus-shaped caudex
You should choose the strongest plants that are at least 5-6 months old. They are taken out of the soil and the roots are cleaned of the soil mixture. You can even wash the roots to make pruning easier. You need to cut the root only with a sterile and well-sharp instrument.
The sap of the plant contains poisons, so you need to work carefully. The cuts are blotted, and when the juice stops flowing, the cut is filled with wax or sprinkled with charcoal.
The cuts should dry out a little. This usually takes up to three days. But many people plant cuttings earlier so that they do not lose moisture. It is enough if you dry the material for 24 hours. Root adenium in perlite, which is very well shed. The formation of the octopus also takes place on a plastic circle, which is placed under the roots. The top of the plant is sprinkled with a little soil. Please note that the top layer of soil on the plastic will dry out very quickly. Therefore, adenium needs to be watered very often.
Immediately after pruning, the flower is exposed to the sun. The higher the temperature, the lower the likelihood of root rotting. The seedling is sprayed a couple of times a day.
After just a month, the roots will begin to grow. At this time, adenium is extracted from perlite. The roots are untangled and weak ones are removed. Then the flower is returned to the plastic, and the roots are lightly sprinkled with earth. You can secure the roots in the desired position with toothpicks.
Forming the caudex and crown of this flower is an exciting hobby that can take up all your free time
Be sure to try growing a fancy plant at home that will attract attention and delight with its originality
How to form a caudex
The formation of adenium caudex can begin in young seedlings. It will be possible to grow an unusual flower if you combine several varieties of plants together. This procedure is performed according to the following scheme:
- The seedlings are connected to each other and wrapped with film.
- In the next step, the plants are placed in the soil.
- The film is changed periodically.
- After a couple of months, the bandage is removed.
- In places where the trunks touch, cuts are made and the succulents are reconnected.
- The bandage is applied for one month. During this period, the trunks will have time to grow together and grow a powerful root system.
Root pruning is also done; it also helps to form the caudex. The most original version is in the shape of an octopus. In this case, not only the central root is removed, but all that are directed downwards and narrow. You can also not prune them, but simply systematically raise the flower above the ground, thereby achieving gradual exposure of the root system.
There are certain rules by which the formation in the shape of an octopus is carried out:
- In a strong seedling, the central root is shortened, as well as the roots growing downward.
- Soil is poured into a pot with soil, and a circle made of plastic is placed on it.
- The flower is placed directly on the plastic.
- The lateral roots are straightened and fixed in this position with wire. You can also use plastic sticks or small stones.
- A large stone is placed at the very base of the succulent, giving the root system an unusual shape.
- From above, the roots that have been straightened are sprinkled with earth.
- The plant is fixed. He is tied to a support.
- During the next transplant, the adenium rises slightly a short distance. Rapid lifting of the roots can lead to the development of the disease.
The long and soft caudex can also be rolled into a ring. Such actions are performed in cases where there is no desire to thicken it. In this case, the trunk is not cut, but gradually twisted so that it takes the shape of a ring. Due to these manipulations, the plant looks thicker.
There is also a weaving technique. In this case, at least three stems are planted in one container and braided. As a result, an original ornately shaped trunk is obtained.
Formation step by step
Using pruning, the crown, trunk and root of Adenium are formed. The kidneys have different activities, depending on their location.
Often, the apical bud develops more actively due to a special plant hormone - auxin, which is most concentrated in the upper part, stimulating its growth and inhibiting the development of lateral shoots. Removing the apical bud will help awaken the rest, but only a few of them will become full-fledged branches of the future crown.
Crowns
The formation of the crown is necessary to give splendor and intense flowering
A universal way to form a crown is to trim the side branches to 2/3 of their length. With this method, over time, the crown will become lush; otherwise, the branches will go up in thin sticks, which is considered ugly for adenium.
In hot weather, when all plant development processes are accelerated, healing will occur faster.
Watch a video about the formation of the adenium crown:
Caudex (trunk)
If everything is clear with the crown, then the formation of the trunk raises many questions. The caudex is an important part of the plant, which even without leaves is of interest. The thicker and denser the trunk, the richer the plant looks as a whole.
There are several techniques for forming the caudex. Let's look at them.
- Merging several seedlings is a method in which several young plants of the same age are placed together. It is possible to use different varieties of Adenium to achieve a more interesting result. Cuts are made where the stems touch, and the entire bunch is secured with tape. After about a month, the plants grow together and there is no need for staking.
- Braiding is a technique in which 3 or more stems planted in one container are braided to form one, ornate, common trunk.
- Ring formation - suitable for Adeniums with too long and thin caudex. Gradually it is rolled into a ring, which visually thickens the plant.
How to properly form a plant? A powerful caudex can be formed by trimming the roots. This procedure is carried out with each transplant, and the plant itself is gradually raised above the soil level.
It is important to choose the right soil and nutrient mixtures, to moisten but not flood the soil. As an auxiliary tool, a plastic ring is used, located on a hill of soil
Having shortened the main root, the plant is placed on a ring, carefully spreading the small roots in different directions. It is necessary to fix the plant for its proper growth. For fixation, use wire, small pebbles or wood chips. The straightened roots are sprinkled with earth.
We talked about how to correctly form the caudex and what to do if it has shriveled in this article.
Roots
It is not necessary to trim the roots, but using the root system you can modify the plant, giving it a more exotic look. There are 2 most common options for root formation:
- Pinching the main root of seedlings (plants 2-3 months old are taken). This is done only if there are lateral roots. The pinched area is treated with peroxide and sealed. The soil should not be very wet. Thanks to this procedure, Adenium forms several thick roots, which will subsequently affect the growth of the caudex.
- Pruning the main root. This method is otherwise called “Octopus” formation. When the central root is cut wide, the remaining roots appear smaller, tentacle-like. It is better to plant in a wide and flat pot for a more convenient location of the roots. With this option, there is a possibility that the cut site will take a long time to heal, which can lead to slow growth or rotting. You can avoid this by filling the cut areas with paraffin and drying them thoroughly.
It should be taken into account that pruning the roots of an adult Adenium (over 2 years old), which has already formed, can lead to its death. The appearance of an adult plant directly depends on the efforts, imagination and patience of the grower.
What to do if the plant begins to wither after the procedure?
Violations of the rules of pruning and shaping can lead to plant disease, which begins to wither and eventually dies. First you need to find out what is the cause of the disease and take treatment measures.
- Rooting of the root system can occur due to excessive watering, insufficient evaporation of moisture from the wrong container, or after pruning. To diagnose rot, it is necessary to remove the Adenium from the pot and inspect the roots. If necessary, remove damaged areas according to all plant care rules.
- Wilting of branches can be either a natural reaction to pruning or a cause of disease. It is considered normal that when the tips of pruned branches dry out, this process stops on its own after healing. If the situation worsens, you should try to remove the damaged tissue and treat the cut sites with antibiotics.
We talked about all the problems that you may encounter when growing Adenium here.
Caring for Adenium must be carried out with full responsibility, otherwise the consequences can be disastrous. In the race for the beauty and exotic appearance of a tree, you should not neglect its health. By taking the utmost care, you can get a gorgeous plant, worthy not only of a place in your personal collection, but also of general admiration at thematic exhibitions.
If you find an error, please select a piece of text and press Ctrl+Enter.
There are many indoor plants that lose their decorative properties in the absence of any actions by the grower aimed at forming a crown. Pruning adenium at home is an extremely important component of succulent care. Many plant owners are puzzled by the question - when can you start forming a crown, at what age, and if you don’t cut off the top, will the side shoots grow?
However, with regard to adenium, pruning also applies to the roots, if there is a desire to grow a succulent with an unusual caudex. True, for this you need to have a creative imagination in order to have an idea in advance what will happen as a result of cutting off this or that root.

