Basic rules for planting indoor plants
As in any other matter, to get a good result from planting indoor plants, you will have to take into account some rules for performing the procedure.
The main ones include the following:
- Optimal pot sizes. The container for seedlings should correspond to the size of their root part, and if you are going to sow seeds in small pots, be prepared to quickly replace the purchased option.
- Suitable soil. When choosing a substrate for a flower, be sure to take into account the requirements of a particular plant for alkalinity and soil density (especially when preparing the soil mixture yourself).
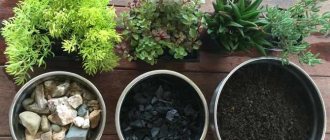
- Maintaining the required soil properties. To avoid compaction of the substrate and prevent “clogging” of the plant root system, before planting it is worth mixing the substrate with sifted sand, cleaned small pebbles or crushed charcoal. In some cases, foam beads are used to maintain looseness.
- Selection of ready-made soil mixture. When buying a store-bought substrate, be sure to pay attention to its composition and the fertilizers present. Also, do not forget to check the suitability of the product, because expired options will not have the required nutritional value.
- Preparing the soil for replanting. It is better to open the package with soil in advance, and not just before planting the plant. The nitrogen accumulated inside must come out, otherwise it can seriously harm the roots of the flower. Homemade soil mixtures must be steamed in the oven at a temperature of at least 80 °C, and in some cases the same will have to be done for ready-made varieties of soil.
- Compliance with planting technology. Depending on the type of root system of indoor plants, the appropriate planting depth is selected. In some cases, if the flower is buried too deeply in the soil mixture, the flower lags behind in growth and is not very decorative.
- Creation of optimal temperature conditions. Each plant has its own requirements for environmental conditions, therefore, during and after planting, temperature, humidity and lighting must comply with the stated standards. Think in advance which room of the house or apartment is best suited for placing a pot with a plant .
Did you know? According to the teachings of Feng Shui, each plant has its own unique energy and can influence the well-being and emotional state of the inhabitants of the house. For this reason, it is better not to place lemons or chamedoras in a room where two children live, as they will only intensify already frequent conflicts. At the same time, the Uzumbara violet would be an excellent option for organizing a green corner.
How to plant indoor flowers in a pot
The procedure for planting home flowers is a relatively simple task, especially if the gardener takes into account in advance all the nuances of each individual stage: choosing a pot, preparing the substrate, creating optimal temperature conditions, organizing lighting, as well as the subtleties of directly planting the plant.
Let's take a closer look at each of them.
Choosing a pot
Most often, when planting indoor plants, gardeners give preference to only two main types of pots: plastic and ceramic. The former are cheaper and more practical, while the latter are a little more expensive, but more stable, and it will not be easy to turn them over.
In addition, clay containers absorb moisture better than plastic ones and serve as a natural filter, trapping harmful minerals and allowing air to pass through.
The second thing you should pay attention to before purchasing is the required diameter of the container. If you are going to sow seeds of medium-sized plants into the soil, then in the first few months a pot up to 15 cm in diameter will be enough, but after about six months it will have to be replaced with a larger product.
For a finished seedling, a container that is 2–4 cm larger than the previous one is ideal, but here it is worth taking into account the growth rate of the crop being grown (for fast-growing indoor flowers, it is better to choose pots with a large supply). So, in which pots it is better to plant your particular plant - only you can answer.
Well, the last thing you shouldn’t forget about is the presence of drainage holes at the bottom. Usually there are no more than three, but if you are planting dry-loving plants, you can find a pot with five small holes. To prevent water from spilling onto the windowsill, a tray is additionally installed under each such product.
Important! Sometimes, instead of pots, flower growers buy a more interesting flowerpot, forgetting about its lack of drainage holes. Despite its high decorative value, such a product has a negative effect on the root system of plants: excessive moisture often leads to rotting of the roots.
Soil preparation
If you buy a ready-made substrate in a store, then before planting the plants you only need to ventilate it and bake it in the oven (the optimal temperature is 80–100 °C). Factory mixtures already have all the qualities necessary for plants, and you just have to choose a specific option depending on the type of crop.
For example, acidic soils are great for camellias, hydrangeas, ferns and rhododendrons, while alkaline soils are great for palms, lemons, cypresses and laurel. On neutral soils you can plant bryophyllum, primrose, pelargonium and other plants from the same families.
When preparing soil yourself at the end of summer, it is recommended to cut the top layers of turf soil from old meadows and pastures. In such places it is usually slightly acidic, which is ideal for most plants.
In addition to it, you can use leaf substrates (the leaves of poplar, hazel, maple, pear or apple trees should lie in a heap all summer) and peat soils obtained from swamp chernozems.
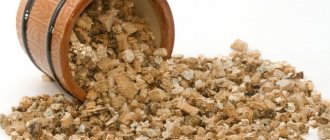
For greater looseness, fine expanded clay, perlite and vermiculite are added to the mixtures, and ready-made mineral fertilizers (sold in flower shops) will help increase their nutritional value.
Like purchased soils, a homemade substrate needs to be calcined in the oven and sifted, trying to select weed seeds and some other components harmful to indoor flowers.
Ensuring optimal conditions
When the main preparatory activities are successfully completed, it is worth thinking about the placement of the planted plants. Temperature conditions, air humidity in the room and lighting level play a primary role in the normal growth and development of the planted crop.
Temperature
For most indoor plants, ideal temperature conditions will be between 22–25 °C, with a slight drop to 17–20 °C in winter. This feature should be taken into account when choosing a place to place the pot, additionally paying attention to the presence of drafts or heating devices.
Both options are kind of extremes and can lead to complete or partial wilting of the flowers.
Humidity
This indicator is especially important for tropical and subtropical plant varieties (for example, Dieffenbachia or Dracaena) and should be at least 50–60%.
This result can be achieved in rooms with dry air by regularly spraying plants with a spray bottle or by hanging wet towels on radiators.
Dry air and low temperature values (down to +10 °C) will be acceptable only for crops with succulent leaves, but in this case the possibility of sudden temperature changes should be excluded.
Lighting
Typically, standard lighting in city apartments is sufficient for the normal growth and development of most indoor flowers; the main thing is to place the pots in bright areas: on window sills and next to the glass door.
Such places will be the optimal solution for decorative species from arid or even desert climatic zones, including flowers with succulent leaves.
Important! Direct sunlight should not fall on plants, even though some species can easily tolerate such exposure (for example, begonia, cyclamen, lily, geranium).
Light partial shade is an excellent solution for ficus, philodendron, dieffenbachia, aralia, cissus and pothos, and on the shelves in the middle of the rooms you can display pots with calathea, arrowroot, royal begonia and tradescantia.
Among the most unpretentious plants that can grow well in shaded areas are asparagus, tall aspidistra, and aglaonema.
In winter, when natural lighting is no longer enough for light-loving ornamental crops, you can create an artificially illuminated corner using fluorescent lamps.
Planting a plant
Having successfully completed the preparatory stage, it’s time to fill the selected pot with treated soil and plant the plant.
Did you know? If you want to protect yourself from
the evil thoughts and wishes of others, be sure to place aloe in the living room. This unremarkable flower perfectly calms anxiety and removes negative energy from the room.
The technology for performing this task is simple and involves the following steps:
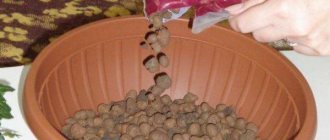
- Laying a drainage layer. To prevent the water in the pot from stagnating, a drainage layer is lined at the bottom of the container; broken bricks, small stones, or ready-made material purchased in the store are perfect for this role. The thickness of the layer depends on the size of the pot and the demands of the plant, but in most cases 2–3 cm will be sufficient.
- Filling the pot with prepared soil. The calcined and loosened soil mixture should occupy approximately half of the remaining volume, which in the future will allow the seedling to be placed more stable. If you decide to sow seeds, you can add more soil, and after sprouts appear, transplant the seedling into a larger pot.
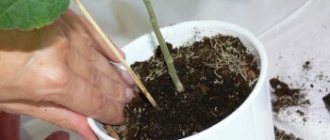
- Placement of seedlings. When planting a seedling of the selected ornamental plant, make sure that it has slightly moist but clean roots. Then lower it onto the soil in an upright position and carefully smooth out all the roots. Pour the remaining soil on top and lightly compact it with a spatula (when planting seeds, the substrate should not be compacted too much).
- Final activities. Place the pot with the plant on the windowsill and moisten the soil a little, but only so that it slightly sticks to your fingers. In some cases, moistening is not required if you immediately use a slightly moist substrate.
Calendar for transplanting indoor crops for October 2022
There is plenty of work left in the first days of October. It is necessary to dig up the soil near the trunk, treat the trees, and, in general, prepare the wards for the winter.
| October 1 | Waxing Crescent. Tie up currant, raspberry and gooseberry bushes |
| October 1 | Waxing Crescent. Tie up currant, raspberry and gooseberry bushes |
| 2 October | Waxing Crescent. Feed cyclamen, schlumbergera and zigocactus today |
| October 3 | Waxing Crescent. You need to start watering indoor flowers (once a week) |
| The 4th of October | Waxing Crescent. Humidify the air in rooms with flowers. Spray the plants |
| October 5 | First quarter. Check the plants in your apartment for diseases and insects |
| October 6 | Waxing Crescent. Good day for dry watering - loosen the soil in the pots |
| October 7th | Waxing Crescent. Plant annual currant and gooseberry bushes |
| October 8 | Waxing Crescent. A good day for fermenting cabbage and loosening the soil in pots |
| October 9 | Waxing Crescent. Water indoor flowers, spray palms and dracaenas |
| October 10 | Waxing Crescent. Tie the raspberry stems to the supports, rake the mulch to the roots |
| October 11 | Waxing Crescent. Unfavorable day for gardening and vegetable work |
| October 12 | Waxing Crescent. Make sure houseplants don't interfere with each other |
| October 13 | Waxing Crescent. Place a bowl of water near moisture-loving plants. |
| October 14 | Full moon. Do some preparation and planning |
| October 15 | Waning moon. Water cyclamen and decembrist. You can't move pots |
| October 16 | Waning moon. Hill up garden trees and shrubs (with snow if available) |
| 17 October | Waning moon. Make sure to cover roses and clematis securely |
| October 18 | Waning moon. Good day caring for flowering plants, remove dry buds |
| October 19 | Waning moon. Enjoy your plants and flowers, plan for the future |
| The 20th of October | Waning moon. Cover flower beds with heat-loving plants with soil or snow |
| October 21 | Third quarter. Check the trunks of fruit trees once again before winter |
| 22 of October | Waning moon. Feed flowering plants with dry fertilizer |
| October 23 | Waning moon. If there is snow, take measures to retain it |
| October 24 | Waning moon. Water indoor plants at home, spray and wash them |
| the 25th of October | Waning moon. Unfavorable day for working with the soil and communicating with plants |
| October 26 | Waning moon. Engage in planning home, country and greenhouse activities |
| 27th October | Waning moon. Prepare outdoor plants for winter; when it gets cold, move indoor pets to a warmer place |
| 28 of October | New moon. Do some preparation and planning |
| 29th of October | Waxing Crescent. Cover flower beds, trim old branches on indoor pets |
| October 30 | Waxing Crescent. Check the temperature and humidity in the basements and ventilate. Water your indoor plants |
| October 31 | Waxing Crescent. Favorable day for watering and fertilizing flowers and flowering plants |
Caring for indoor plants
Proper planting is only the first stage on the path to obtaining beautiful decorative flowers, because the success of their cultivation largely depends on further care. This definition usually means watering, fertilizing, pruning and transplanting grown seedlings, and each of the processes has its own characteristics.
Fertilizer
For good growth and prosperity, almost all house plants need calcium, phosphorus, iron, nitrogen, potassium, magnesium and sulfur, which they can receive along with regular self-fertilizing or by fertilizing during watering.
The application of nutrient formulations with water is becoming increasingly popular, which is explained by the ease of preparation and use of the nutrient solution (crystalline or liquid fertilizer just needs to be mixed with water, in a dosage clearly defined by the manufacturer, and then soak the soil with it).
In order not to harm the flowers, at the initial stages of using fertilizers, you should adhere to the minimum standards for their use, which can be increased only in the case of obvious signs of a lack of nutrients.
This also applies to the so-called prolonged preparations, which are produced in the form of capsules and, upon contact with groundwater, spread throughout the entire thickness of the soil for 30, 90 or 150 days (the exact duration of action depends on the specific substance located inside the capsules).
The best time to apply nutrients is when flowers are actively growing, but it is better not to fertilize them while the plants are dormant or immediately after replanting, since there is always a risk of burning the tender roots.
Watering
The rate and frequency of watering indoor plants directly depends on their type. For example, all aroid flowers do not go into a dormant state even in winter, but only slow down their growth, so watering can be reduced, but should not be stopped completely.
At the same time, representatives of the Mulberry family (for example, Ficus Benjamin) stop growing with the arrival of cold weather, which means they practically do not need moisture. Ornamental plants with succulent leaves often survive the winter without watering at all, since they have enough moisture accumulated inside.
There are several recommendations regarding proper watering:
- the addition of liquid should always be moderate (you should not overwater the plants, even if they are moisture-loving species);
- Watering should only be done after checking the soil moisture (if the soil is moist, you can wait a little longer);
- You can water your house plants only with settled water at room temperature; cold liquid with chemical compounds present in the composition will destroy the flowers;
- It is advisable to spray only those species that are favorable to such a procedure with a spray bottle, otherwise the leaves will curl and hurt.
On average, indoor plants are watered 1–2 times a week, but external climatic conditions play a big role in the regularity of this procedure: air humidity and room temperature.
Trimming
Novice gardeners are very wary of pruning indoor plants, but in fact it is simply necessary. Correctly performed decorative and sanitary shortening of shoots will not only not harm the plants, but will also significantly improve their appearance, so you should not exclude it from the care plan.
The best time to carry out the procedure is the beginning of summer, although the removal of yellowed leaves and diseased shoots should be done all year round to prevent the proliferation of harmful microorganisms.
Some types of flowers require formative pruning, which will stimulate the active growth of shortened lateral buds and the appearance of new flowering shoots (usually this applies to roses, ficus, hibiscus and citrus fruits).
Important! It is better to trim young and not overgrown plants to a minimum so that they slightly lose their decorative value.
Most often, cutting 2/3 of the length of the shoots is considered safe, even if only 2-3 live buds remain on the bush. Subsequent feeding of the flower will contribute to its rapid revival, and the decorativeness of the plant will only increase: it will have the strength to form new shoots.
Transfer
Contrary to popular belief, replanting does not need to be done for all problems with the flower. Thus, yellowing leaves and slow growth often indicate a lack of nutrients, and not a lack of space in the pot.
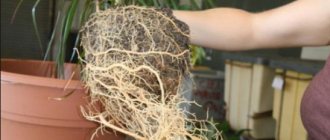
You can check your guesses only after carefully removing the plant: if, after turning the earthen ball upside down, you notice that the roots have actually pierced the entire soil, then you will still have to think about replanting.
For large plants, this procedure should be performed once every few years, while not forgetting to focus on the speed of their growth after the previous transplant.
If it comes to replacing the pot, it is better to postpone the transplant to the spring, choosing a larger container in advance. For large flowerpots, sometimes it is enough to simply replace the top part of the soil, but medium and small plants will have to be completely removed from the old pot, while being careful not to damage the root system.
If there are dried or damaged parts on it, it is better to cut them off, after which you can place the flower in a new pot, lined with a drainage layer and a soil mixture of a suitable composition.
All further actions are carried out in the same way as when planting seedlings: the plant is placed in the center of the container and, having straightened its roots, it is simply covered with soil. The root collar (the place where the stem transitions into the roots) should coincide with the line of the surface of the substrate.
The remaining soil mixture is poured on top and compacted around the stem of the plant so that there are no empty spaces between the roots. From the surface of the soil to the top edge of the pot you need to leave at least 1–2 cm of free space.
Rules for transplanting indoor crops
Prepare a container for planting. Rinse it if there was another flower there before. When using a clay pot, soak it overnight to remove burnt lime, which combines with water to form compounds that are harmful to the root system.
Pour drainage into the bottom of the planting container: expanded clay, pieces of brick or shards. Fill the drainage with a thin layer of soil.
Water the crop thoroughly. After an hour, carefully, holding it together with a lump of earth with one hand, turn the planting container over. With your other hand, carefully remove the pot from the lump of earth.
For easier separation, you can lightly tap the edge of the planting container on a hard surface.
Important! If the crop is epiphytic, then it is advisable to break the pot, since separating the root system can injure it. When replanting a large crop growing in a wooden container, you need to remove the hoops and then the wooden parts.
Using your hands or a sharp stick, carefully clear the top soil from the root system. If there are rotten areas, get rid of them. If you damage the roots, it is advisable to sprinkle the injury site with crushed coal.
The culture is placed in a new planting container so that the neck of the root is slightly below the edges of the pot. Fill the empty spaces between the remnants of the earth clod and the walls of the planting container with fresh soil that has been previously moistened.
Important! Compact the soil around the ball, slowly adding more. The level should be equal to the base of the stem.
Water the crop. Do not forget that a certain part of plants that love dry soil do not need watering after changing their “place of residence”. It is enough to simply plant them in a slightly wet substrate. Such crops include wallot, orchid, crassula and cacti.
In some cases, it is extremely undesirable to engage in transplantation. This applies to large individuals. In such a situation, it is advisable to replace the top layer of soil with a new one approximately 5 centimeters deep. The soil is carefully loosened, removed, after which new soil is brought in and slightly compacted.
Common mistakes
Both planting and replanting indoor plants usually do not cause difficulties even for novice gardeners, but no one is immune from mistakes in carrying out the procedure.
Did you know? To improve your personal life, flower growers recommend placing pots of violets in the house, in particular on the windowsill in the bedroom. Its energy will give inner peace, help cope with stressful situations and set the owner in a romantic mood.
The most common of them include the following:
- incorrect selection of soil (in some cases, even universal options have to be “adjusted” based on the needs of exotic flowers, thereby achieving a decrease in density, or, conversely, even greater compaction of the substrate);
- incorrect selection of pot (in very large containers the alkalinity of the substrate decreases, the root system rots and problems with flowering appear);
- incomplete replanting: do not try to preserve the maximum amount of “native” soil on the roots of the purchased plant, because it is only a temporary place of growth during sale and transportation (you can soften the old substrate with warm water, and this must be done so that there is no even the smallest grains of sand);
- increased content of nutrients in the soil (applying a large amount of fertilizing immediately after replanting threatens the growth of green mass while simultaneously crushing the flowers themselves);
- replacing the pot in plants that do not need it (for example, for hippeastrums, cramped space is even useful, as it does not allow children to grow and at the same time stimulates the flowering process);
- joint planting and pruning of flowers (this injures the plant twice as much and does not allow it to recover quickly).
What can it be made from?
Let's list a list of materials suitable for creating a drainage system and find out which one is better and how to prepare them correctly. Florists usually use the following as drainage materials:
- Ceramics . Old ceramic pots can be used to build drainage. It is enough to split them into small shards and disinfect them. The fragments are placed at the bottom of the pot with the convex part up. They shouldn't be too large. The downside is the presence of sharp edges.
- Expanded clay . This is one of the best and inexpensive drainage materials. It easily removes moisture and also absorbs it, giving it to the plant as needed. Expanded clay drainage does not have sharp corners, and therefore it is safe for the root system. However, it needs to be disinfected before use. No cons noted.
- Moss . Sphagnum moss can be collected from a swamp or bought at a flower shop. This is not only a drainage material, but also a good disinfectant and moisture-retaining agent. Before laying on the bottom, it must be soaked for 30 minutes in warm water. The downside is the fragility. But given that plants require frequent replanting, this is not a problem. Another drawback is that the roots grow through the moss. Therefore, it will be almost impossible to separate them from each other in the future.
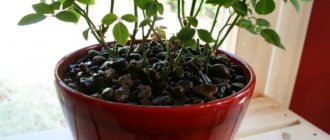
- Charcoal . This is not only drainage, but also fertilizing, as well as a moisture-retaining agent and material that absorbs salts and disinfects the soil. Coal is placed on the bottom of the pot in large pieces. There are no cons. But there is a nuance - it alkalizes the soil. And this is harmful if the plant prefers a slightly acidic or acidic soil reaction.
- Vermiculite . It absorbs water along with nutrients. Therefore, the plant will be fed every time the material begins to release moisture. There are no cons.
- Perlite . This is another one of the best materials for creating drainage. But it's expensive. Perhaps this is its only drawback.
Important! The drainage system includes two layers. The first is directly drainage material, and the second is a layer of sand. If it gets into the space between the stones, it’s not a big deal. After all, sand is permeable. If it were soil, then after compaction the outflow of water would be disrupted.
What flowers should not be planted at home?
Not all plants can be placed at home, even if they seem the most beautiful to you. Representatives of certain types of exotic vegetation are capable of releasing toxic substances into the air that are dangerous to all residents. Therefore, before you buy a seedling you like, you should ask the seller about the possibility of growing it at home.
The list of “undesirable” house flowers includes the much-loved Dieffenbafia. It is indeed often used to decorate homes, but if the juice gets on the skin, it leaves burns and can cause severe poisoning.
This fact made the plant conditionally safe, while some others were included in the list of completely prohibited for home cultivation.
These are exactly what they are:
- Mimosa. The flower has an interesting ability to respond to human touch by folding its leaves. This feature attracts the attention of many gardeners, but the aroma it spreads is dangerous to health. When constantly kept indoors, mimosa causes prolonged toxicosis and promotes hair loss.
- Monstera. It does not emit any toxic fumes, but its juice is even more toxic than that of Dieffenbafia and can cause serious burns.
- Nightshade. This plant is safe only until bright orange fruits appear on its shoots. They contain toxic substances and should be kept away from children and animals.
- Azalea Sims. This variety is much more dangerous than other similar plants with attractive lush leaves. The juice of the flower can cause severe poisoning, accompanied by colic, cramps and stomach pain.
- Indoor spurge. If the juice comes into contact with the skin, burns occur, and ingestion causes nausea and stomach upset. In some cases, burns of the mucous membrane and dizziness are possible.
Of course, careful handling of these types of indoor plants can reduce the risk of poisoning, but it cannot be completely eliminated, so it is better to choose completely safe flowers for your home.
Useful tips for beginners
Beginners in floriculture often have no luck with growing their favorite flowers, so when planting and further caring for the plant, you should listen to the opinions of already experienced flower growers.
The main recommendations in this case will be the following:
- selection of the optimal pot size (it can be only a few centimeters larger than the previous one);
- choosing the most suitable period for planting seedlings (usually it should be in March);
- the need for careful handling of the root system, but with the obligatory removal of dried and dead roots;
- using a drainage layer for all types of indoor flowers;
- the use of only special soil, the composition of which will fully meet the needs of each individual species;
- absence of voids under and around the earthen lump of the plant;
- free space above the ground: the soil level should not reach the very edge of the pot, so that when watering the water does not flow onto the windowsill.
After planting flowers, they should be watered well so that the soil settles a little (this requirement does not apply to dry-loving varieties), and then you can place the pot in the most suitable place for it.
In general, the process of planting indoor vegetation will take no more than an hour, but only if you prepare everything you need in advance. And as a reward for his efforts, the florist will receive an excellent decorative element, which, moreover, can have a positive effect on the general emotional state of the household.
What is drainage and why is it needed?
Drainage is an inert material that is placed at the bottom of the pot when planting. It is necessary to remove excess water from the earthen clod and plant roots when watering. For drainage, they mainly use small pebbles, clay shards, pieces of broken brick, coarse sand, expanded clay of various fractions, crushed polystyrene foam, and in some cases sphagnum moss.
