We still have time before planting seedlings, so let's look at how to disinfect the soil. Not all summer residents buy new soil every year when growing seedlings. It is clear that the healthier the soil, the stronger and stronger the seedlings themselves will be. This means that the soil from the garden does not become a source of infections for plants, it must be disinfected before use.
Preparing the soil for replanting indoor plants
Plants in their natural conditions and open ground do not always need fertilizers and fertilizing. They have a large amount of land at their disposal, which is restored naturally.
At home, they only have a pot of soil at their disposal. Such a small volume must be supplied with all the necessary substances. The soil must be moisture- and breathable, heat-conducting.
Before preparing the soil for planting or replanting a plant, be sure to read about what kind of soil is suitable for it.
The plant can love acidic or slightly acidic soil (for example, azalea, hydrangea, cyclamen). Orchids love soil with a high degree of breathability; the soil must contain leaf litter, or pieces of bark and moss.
For each plant you can now buy special soil in stores.
Universal soil
There are unpretentious plants that can be suitable for ordinary universal soil bought in a store. Such soil, as a rule, consists of peat with the addition of useful macro and microelements.
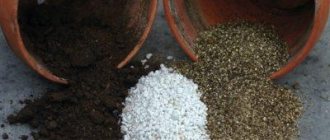
You can prepare the soil yourself. Usually this is peat, turf, leaf, coniferous soil or humus. The prepared soil is mixed with sand, pine needles and other components. The harvesting process is quite long, for example, leaf soil turns into compost within two years. If you have your own plot of land, preparing the soil on your own will not be difficult.
How should the soil for indoor flowers be treated before planting (cm)?
And how to process it?
This is clearly necessary, since otherwise fungus will form in the soil. It doesn't really harm the plants, but it doesn't look nice. Is this a fungus? As a rule, this word refers to mold. In flower pots, mold is most often gray-white and voluminous (fluffy):
The mushrooms themselves, in our usual understanding, also grow:
Fungal spores are constantly present in the space around us, in the air, on clothes, and skin. Mushroom mycelium begins to grow only in favorable conditions. If you take soil in a flower pot, then the optimal conditions for the development of mycelium will be: high air humidity combined with coolness and low lighting, poor ventilation. To avoid the appearance of mold, it is enough to regularly ventilate the room, water the plants based on their individual characteristics, and provide good lighting. To ensure that moisture in the soil does not remain for a long time, the roots breathe (creating drained soil), various types of disintegrants are added to it (perlite, sand, charcoal, vermiculite, zeolite, etc.).
Disinfection of soil by steaming at high temperatures, freezing, spilling with potassium permanganate will rid it of pathogenic fungi, insect larvae, etc., but it, like a living organism, will remain a medium for the possible reproduction of both the former and the latter.
Maybe it’s not a fungus after all, but a coating of salts that appear on the surface when moisture evaporates? Could there be a reddish coating from dolomite flour, which is added to reduce the acidity of peat soils (all soils in stores are peat-based)? In such cases, it is enough to only occasionally loosen the top layer of soil.
Another option could be acidification of the soil, when its surface becomes covered with a whitish coating. Souring occurs due to transplanting a plant with a small root system into a pot that is too large.
I steam the soil in a water bath or microwave oven, and most often only the soil that I collect in the forest or country house. Some gardeners freeze it out in winter on the balcony or other cold room.
Soil disinfection
Before planting seedlings or replanting flowers, it is necessary to disinfect the soil for indoor plants. The fact is that the soil may contain seeds of weeds and other plants that we do not need. But it’s even worse if the soil was contaminated with fungus, microbes, mold spores or insect larvae.
Preparing the soil for seedlings. Mild soil disinfection.
To a greater extent, disinfection applies to soil prepared on our own. Purchased soil is most often already sterile and does not need to be processed.
Freezing
The proverb “prepare a sleigh in summer and a cart in winter” is suitable for this method. If the gardener takes care of replanting indoor plants in advance, the soil can be frozen. The soil is placed on an open balcony in winter. It is better to time it when the temperature outside is -20°C. And they leave him there for two weeks. When the ground freezes thoroughly, it is brought to a warm place and left to warm up. During this time, insect larvae and pupae wake up, and the same happens with weed seeds. And then the soil is again placed in harsh cold conditions. It is better to repeat the temperature change procedures several times.
If winter is not frosty or it’s spring outside and the soil is not prepared, use the freezer. To do this, the soil is distributed into bags and placed at a distance from each other in the freezer. The temperature is set to the lowest.
At minimum thermometer values, some bacteria and fungi die, and weed larvae and seeds are completely destroyed.
Methods of soil disinfection
There are several ways to disinfect soil, but you need to remember that in all types of disinfection, be it chemicals or folk remedies, the beneficial microflora of the soil also suffers.
Freezing
Freezing is done as follows: the finished soil is taken out to the balcony in winter (preferably if the temperature is less than 15-20 degrees) and left there for 2 weeks until it freezes. Then it is brought into a warm place until it thaws. This is necessary to awaken insects, larvae and plant seeds sleeping in the ground. After warming up, we take the soil out into the cold again. This can be done two or three times; at low temperatures, insects and plant seeds die.
This method cannot get rid of all diseases (for example, late blight, clubroot), but is effective against insects and plant seeds.
Calcination and sterilization
Calcination of soil in a furnace
Set the oven to preheat to 80-90 degrees (at higher temperatures the soil will deteriorate). At this time, put foil or baking paper on a baking sheet, pour the prepared soil onto it, pour boiling water over it well and put it in the oven for 30 minutes to calcine the soil. After the earth has cooled a little, pour the calcined soil into a container, level it in a small layer (maximum 10 cm) and leave it to saturate with oxygen.
This method is capable of disinfecting the soil from all diseases and pests. The soil is enriched with oxygen and moisture.
Steaming in a water bath
Steaming the soil
The soil is poured into a colander onto double-folded gauze and placed over a pan of boiling water... The bottom of the colander should not come into contact with the water. The earth needs to be stirred constantly to heat it evenly for an hour and a half.
This method is also able to get rid of all diseases and pests, in addition, the soil is saturated with moisture.
Etching
Soil dressing involves introducing into it substances whose vapors are poisonous to insects and larvae in it. This method is dangerous for humans, since the injected substances are poisonous and maximum safety measures must be observed (carbon disulfide, cyanide compounds, chloropicrin, copper sulfate). These methods can be used in open ground on a garden or farm scale, but not for indoor plants.
4 ways to disinfect soil for planting seedlings
Calcination
Firing is carried out in the oven. To do this, place the soil in a fireproof container or baking sheet, first covering it with parchment. The soil is thoroughly poured with boiling water and covered with foil on top. The optimal thickness of the soil to be heated is 10 cm. The oven is heated, but not higher than 90 degrees, otherwise toxins will form in the soil and all beneficial microflora will be destroyed. The process lasts about half an hour, then the earth is left to cool and become saturated with oxygen.
Baking the soil is a variant of calcination. The earth is evenly distributed over the baking sleeve and closed with flexible brackets. Further actions correspond to the calcination process. In this case, moisture from the soil does not evaporate, but rather completely saturates and saturates it.
Chemical soil disinfection
At home, strong chemical preparations should only be used as a last resort if biological fungicides cannot cope with the disease or pest.
Chemicals come in solid, liquid and gaseous forms. They are applied to the soil or sprayed from above. All drugs must be used with extreme caution; some of them can even corrode the skin or cause poisoning in humans.
Chemicals:
- Bordeaux mixture;
- copper oxychloride;
- oxychome;
- phytolavine;
- copper carbonate;
- formalin;
- sulfur;
- carbon disulphide.
Highly effective against all types of diseases and pests, kills all harmful and beneficial microflora, high toxicity class for humans, can harm already growing plants.
Rubbing alcohol
Alcohol easily burns the sensitive leaves of plants, especially crops with dense leaves. But it is an excellent alternative to conventional insecticides if you need to deal with insects on woody shoots or if you need to remove scale insects or mealybug nests. Carefully remove insects from the affected plant with a cotton swab or a piece of soft cloth soaked in alcohol.
An infusion or decoction of Datura vulgare is used against spider mites and aphids
Land treatment after disinfection
After the soil is disinfected by calcination or steaming, it contains not only harmful, but also beneficial microflora, so the treated soil needs to be introduced with beneficial bacteria and microorganisms.
With the help of the fungicide Fitosporin - M, you can restore the beneficial properties of the soil. The drug contains the bacteria Bacillus subtilis, which restores the soil by multiplying in it and also destroys diseases. It is necessary to water the soil with the solution and wait for the bacteria to multiply; this takes several weeks.
On a note! Fitosporin is available in the form of powder, liquid and paste.
The drug must be diluted with water. The dosage is as follows:
- To prepare the soil for indoor plants, 5 grams per 10 liters of water will be enough.
- for the paste solution you need to take 15 drops per 1 liter of water.
- To dilute liquid Fitosporin, 10 drops per glass of water is enough.
Phytosporin can be used both for the prevention of plant diseases and for soil restoration. In addition, it is safe for animals and humans.
Calcination of soil in a water bath/steam.
This method requires a large saucepan. You need to pour water into it and put it to boil. Place a rag or gauze in several layers in a sieve (so that grains of sand do not spill through the holes) and add soil.
As soon as the water boils, you need to place a sieve with soil over the pan. To create a steam effect, cover the sieve with a lid. The procedure lasts from 30 minutes to 1 hour, depending on the volume of soil.
After the procedure, you need to let the soil cool. To enhance the effect and further prevention, you can add ash or charcoal powder to the prepared soil.
Watering with a strong solution of potassium permanganate
Spilling a pink solution of potassium permanganate is one of the easiest ways to disinfect the soil. Dissolve it in a proportion of three grams per ten liters of water. Spray the soil with this solution. Pots and seedling boxes are also treated with potassium permanganate.
Potassium permanganate solution
A quick and simple method, manganese after processing becomes a fertilizer, but this method is ineffective and is not able to completely sterilize the soil.
Fungicide treatment.
I will not focus on this method, since you can buy fungicides at any flower shop. Soil disinfection is carried out according to the instructions for each specific preparation.
I advise you to use either biofungicides, such as Fitosporin M, or even the well-known potassium permanganate (potassium permanganate). They are safe and effective.
Important! All of the above methods can also be used to disinfect sand that you use as a component in homemade soils.
Means for normalizing soil acidity
Soil acidity determinant or PH indicator - shows the amount of hydrogen ions in the soil. Soil acidity affects the uptake of water by roots and the absorption of nutrients. The neutral acidity indicator is PH -7. The lower the indicator, the more acidic the soil is.
| Soil classification | |
| very acidic soils | pH 3.8 - 4.0 |
| highly acidic soils | pH 4.1 - 4.5 |
| moderately acidic soils | pH 4.6 - 5.0 |
| slightly acidic soils | pH 5.1 - 5.5 |
| close to neutral soil | pH 5.6 - 6.9 |
Most often, indoor plants love neutral or slightly acidic soil, but there are many types of flowers that love more acidic soil (azalea, hydrangea, lupine).
Acid-base indicator
To determine the acidity of the soil, you can use litmus paper and a solution of soil in water; if the paper turns red, the soil is acidic; if it turns green, it is alkaline.
In highly acidic soil, plants lack nutrients, the work of all beneficial bacteria stops, and the plant quickly dies. Too alkaline soil is also not very good.
Ways to increase acidity:
- adding citric acid (0.5 tablespoon per 2.5 liters of water)
- adding malic acid (10 g per 1 liter of water)
- adding oxalic acid (1g per 2 liters of water)
- application of fertilizers (superphosphate, peat, sulfur sulfates)
Ways to reduce acidity:
You can reduce the acidity of the soil by adding chalk and special preparations and fertilizers containing calcium and magnesium (cement dust, slaked lime, ground limestone, fluff). They improve soil quality and normalize acidity. But all this does not happen immediately; lime works in the soil for several years.
Tillage in a greenhouse
The soil in the greenhouse must be processed twice: in the fall, after harvesting, preparing it for winter, and in the spring before planting seedlings. Treat the soil with the following preparations.
Treatment with phytosporin
I described in detail how to prepare a solution for use in the article about phytosporin. It is better to buy it in paste form. After dissolving a 100 gram package in 0.5 liters of water, you will obtain a dark brown liquid. The concentrated solution is diluted to prepare a working solution no earlier than one day later. This is necessary so that the living bacteria that are in the product are activated.
Immediately before tilling the soil, 1 tbsp. l. concentrated solution is diluted in 10 liters of water and this solution is poured generously from a watering can onto the soil in the greenhouse. The greenhouse is closed for 14-20 days to allow the bacteria to do their work. After this, the greenhouse is opened and you can start planting seedlings.
The unused concentrated solution is placed in a dark place and stored there until next use.
Disinfection with potassium permanganate solution
Disinfection with a solution of potassium permanganate is the easiest way to treat soil in a greenhouse. The essence of the method is to apply a pink solution of potassium permanganate and abundant watering of the soil. To create such a solution, just dip a damp toothpick in crystals of potassium permanganate, and then dissolve what remains on the toothpick in 1 liter of water. Sprinkle the prepared pink solution generously onto the soil and leave for several hours.
Boiling water treatment
Another very simple and affordable way to disinfect soil in a greenhouse is to pour boiling water over it. It is enough to pour boiling water over the soil and then cover it with plastic wrap. Under the influence of high temperature, all harmful microbes will also die.
And there is one more point that needs to be taken into account. Even after disinfecting the soil for seedlings, pathogens can be introduced with the seeds. This means that before planting, the seeds should also be treated and then your seedlings will be strong and healthy.
I wish you good harvests!
Calcination in the oven or microwave
Purchased or pre-prepared soil is poured onto a metal baking sheet in a layer up to 5 cm thick and poured with boiling water. You need enough water to slightly moisten the soil. After this, the baking sheet is placed in the oven and kept there at a temperature of 70-90 ° C for half an hour. Higher thermal exposure is unacceptable, as it will lead to mineralization of the soil, which will deteriorate its quality.
Heat treatment will destroy all pests and microorganisms. It should be carried out 1.5-2 weeks before sowing seeds for seedlings. After this, the earth is left at room temperature. In the time remaining before sowing, the soil microflora will be completely restored.
Instead of an oven, you can use a microwave oven for the procedure, reducing the processing time to 8 minutes (at medium power). The earth is first placed in a fabric bag and turned over once during the steaming process. If the volume of soil is small, calcination of the soil is carried out in 3–4 minutes at high power.
How to properly cultivate the soil for seedlings?
The easiest way to pre-sow the soil to disinfect it is to spill the soil with a solution of potassium permanganate, Fitosporin or the drug Baikal-EM. How to treat the soil for seedlings with such solutions: Potassium permanganate is diluted to form a pink solution. They water the soil mixture.
Interesting materials:
Where do the sheep graze? Where can I get my Zippo lighter repaired? Where to file an appeal for the Unified State Examination? Where to go for a walk in St. Petersburg in the center? Where did the first writing appear? Where did the world's first printed book appear? Where did cinema originate as an art form? Where did the first university appear? Where is N. S. Khrushchev buried? Where is athletics popular?
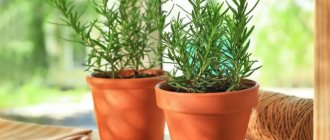
Which plants need spraying?
Cyperus, guzmania and palm trees are plants that require regular spraying
Most houseplants benefit from misting.
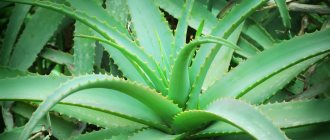
They are especially important for species with dense, leathery or large, rosette-forming leaves. Such indoor flowers evaporate a lot of moisture and need high air humidity, especially in the summer or heating season at temperatures above 20°C.
Regular spraying is necessary:
- tropical plants, for example, calathea, aglaonema, anthurium, orchid;
- coniferous species, in particular cypress and araucaria;
- citrus fruits - lemon, tangerine, grapefruit;
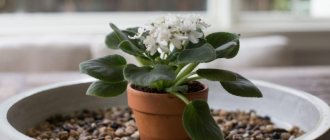
- plants with delicate flowers, for example azaleas, brunfelsia, anthurium, gardenia, but it is advisable to protect the petals from water;
- ferns, ficus;
- bromeliads - Aechmea, Nidularium, Neoregelia, which under natural conditions absorb water that falls into funnels from the leaves during rain.
Is it possible to treat a wound with potassium permanganate?
If the edges of the wound diverge, then they are tightened with narrow strips of adhesive plaster and the entire surface is thickly lubricated with a solution of potassium permanganate (potassium permanganate). It is sold in the form of crystals, which can cause severe burns, so a strong solution of potassium permanganate should be stored in a bottle with a ground stopper.
Interesting materials:
How much can you deduct from your salary? How much is deducted from your salary? How much is paid to the Pension Fund from wages in Ukraine? How long can an employer withhold wages by law? How much percent can be deducted from salary? What percentage of salary is child support for two children? What percentage of salary is alimony in Kazakhstan? What percentage of salary is maternity leave? What percentage of salary should rent be? What percentage of salary is paid sick leave?
Bacterial plant diseases
Bacterial plant infections do not always have clear symptoms, which can often be confused with other diseases of a different nature.
Bacterial wilt - its signs are the wilting of the tops of the sprouts, which over time spreads to the entire plant. Once bacteria enter the vascular system, they prevent water from circulating freely through the vessels. They also release toxins.
To prevent the development of the disease, it is necessary to disinfect tools and utensils, treat hands and fight insects and vectors of infection. Diseased plants must be kept dry and not sprayed or showered.
Bacterial wilt can only be controlled by pruning the infected areas.
If this is ineffective, then the plant must be destroyed. The pot must be doused with boiling water.
Bacterial spot
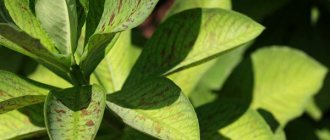
It manifests itself in the appearance of spots due to the death of sections of leaves. In terms of external signs, it differs from fungal spots: the spots do not have clear outlines, they have blurred edges. They are rapidly growing in size. The leaves quickly turn yellow, dry out and die. Bacterial spot develops especially quickly in warm, humid conditions.
Bacterial cancer
This is an atypical growth of healthy-looking crops. Growths in the form of tumors appear on the rhizomes, and in some cases on the stems. Some forms of cancer appear on
stems and flowers. They are characterized by the presence of small round spots, which grow over time and become brown. The leaves become deformed, swell, and flowers or fruits become covered with extensive warts. The plant begins to grow poorly and subsequently dies.
Weakened cultures are most susceptible to bacterial cancer. The tumor develops from a couple of millimeters in the initial stage to several centimeters. Over time, non-healing ulcers appear. In the ulcers you can see mucus, which is a product of bacterial activity. When black spores are noticeable on the sores, we can talk about the fungal nature of the plant infection.
For preventive purposes, soil and working tools are disinfected. They treat their hands with an alcohol solution so as not to transfer the infection to healthy crops, and destroy pests, if any. When transplanting, the pot is scalded with boiling water on all sides. Affected plants should not be sprayed with water or washed in the shower. If a healthy root is damaged during transplantation, you can treat it with charcoal.
Dropsy
It is not caused by bacteria or fungi - it is the result of excessive soil moisture and lack of light. The affected plant is characterized by the appearance of corky growths on the underside of the leaves. These leaves will not recover, meaning they must be removed. But if you create favorable conditions (reduce watering and move the flowerpot to a more illuminated place), then after some time new shoots will appear.
Seven secrets of ideal soil for seedlings
1 Loose, porous soil with low acidity that allows water to pass through easily, but at the same time moisture-absorbing, is ideal for seedlings. As a rule, the soil for seedlings is prepared from garden soil (2 parts), humus (1 part), peat (1 part) and 1 part sawdust (coarse granular sand can be taken instead).
2 The soil should be sufficiently nutritious, but not too much. Seedlings should not be overfed with minerals - this slows down seed germination and can cause disease. It is better to use moderately fertile soil, and during growth, constantly supply the seedlings with nutrition by watering them with water with fertilizers dissolved in it.
3 It will destroy seedlings and contaminated soil. Therefore, both ready-made and home-made soil mixtures must first be disinfected so that no pathogens remain in it. To prevent diseases, the soil can be treated with a thoroughly mixed (so that no crystals remain) solution of potassium permanganate (3 grams per 10 liters of water), and then carefully treat with antifungal drugs.
4 It doesn’t hurt to freeze the soil prepared for seedlings well. However, this does not get rid of pests 100%. Therefore, many gardeners supplement soil preparation with heat treatment. Some gardeners do it this way:
The soil is poured with hot water, loosened, mixed thoroughly, poured onto a baking sheet, placed in the oven and calcined at high temperature for 25-30 minutes.
Then the steamed soil is poured into a cloth bag and taken out into the cold to freeze for 6-10 days.
However, such a radical impact on the soil can lead to it losing all fertility. It is much better to use a steam bath rather than calcination. Of course, in this case, along with the destruction of pathogenic bacteria, beneficial microflora are negatively affected, but for young plants, sterile soil is still preferable to untreated soil.
Here is one of the options for a “ground bath”:
Place two bricks in a tank for boiling laundry, pour water at the bottom to a height of about five centimeters.
Pour 2/3 of the soil mixture into a bucket with a hole in the bottom.
Place the bucket on the bricks, cover the top of the tank with a lid and steam the soil over low heat for two hours.
Then you need to pour the soil into a cloth bag and put it in the cold to freeze for 6-10 days.
The homemade mixture can also be disinfected in the microwave. But it is recommended to calcinate the soil in advance so that the microflora can at least partially recover by the time the seedlings are sowed. To increase seed germination and uniform soil moisture, it is recommended to lightly compact the soil in containers with sown seeds and cover it with a layer of clean snow. Cover the boxes with plastic wrap or glass. After this, you can do without watering for 7-10 days. Then remove the film and prevent the soil from drying out in the future.
5 In order to provide mineral nutrition to the seedlings, you need to add ash or charcoal to the soil, or you can use a complex fertilizer that does not contain chlorine. Humus will increase nutritional value, sand or sawdust will be natural leavening agents, ash or coal will reduce acidity. All components need to be sifted, lumps and pebbles separated and mixed. In order for the seedlings to grow healthy, it is recommended to add 1 cup of raw ground eggshells to a bucket of soil.
6 If you do not have the opportunity to water the seedlings in a timely manner, then hydrogel must be added to the mixture in advance. This special polymer compound is capable of repeatedly absorbing large amounts of water with fertilizers dissolved in it, and then releasing this water to plants as needed. This reliably ensures an optimal level of moisture at the roots. The hydrogel is mixed with the soil directly during planting (by the way, it can be used in open ground). When the plant's roots grow into the swollen granules, they easily extract the accumulated water from them. Soil with hydrogel allows you to increase the intervals between waterings up to five to six times. And the polymer added to the soil lasts for several years. But when adding miracle gel to a seedling pot, keep in mind that by absorbing moisture during watering, the granules increase in volume by 200-300 times.
7 You can also improve the quality of the soil mixture for seedlings using vermiculite or perlite. These specially treated minerals provide air saturation to the soil and maintain water permeability. Like hydrogels, they can be bought at garden centers.
You may also find the following materials useful:
- Top 9 components that have no place in the substrate for seedlings
- What to plant in March for seedlings?
- Healthy seedlings: secrets of growing strong seedlings
- How to get rid of condensation drops in a greenhouse
- How to make granulated carrot seeds with your own hands