Design and principle of operation of the system
There are many types of automatic watering. Systems can be simple or complex: with electronic control, timer and pumping station.
Such a system consists of the following elements:
Main block . It consists of electronic filling and a timer. Due to the preliminary settings, the controller automatically opens the shut-off valve and shuts off the water supply.- Water container . Contains the necessary supply of water for long-term use.
- A system of droppers or tubes . Through them, water flows from the main unit to the pots with plants.
- Pump . The system does not have to be equipped with a pump. But if it exists, then its task is to pump water into the pipeline or dropper system.
- Emitter-regulators . They help regulate water flow.
Automatic watering works as follows:
- The owner pours water into the container and sets the settings for the start and end of water supply. Its temperature is also set.
- The controller opens the shut-off valve at a predetermined time and begins watering the plants. Depending on the model, the system can turn on the pump and supply a large volume of water (relevant for a large number of pots).
- After a specified period of time, the controller shuts off the water supply.
- At a time specified by the user, the process is repeated until the container is completely drained.
The owner of the system just needs to set the irrigation time and water temperature to implement it. It is also necessary to monitor the quality and quantity of water.
This video will tell you about watering systems for indoor plants during vacation:
How drip irrigation works for indoor flowers in pots
Automatic watering for indoor plants - do it yourself
Drip irrigation for indoor plants is used when it is not possible to water the plants daily.
Previously, it was used as an additional type of hydration. For best results, the system should be checked over a long period of time. Only then use this type of watering as the main one.
Automatic drip irrigation is the soaking of the soil in small portions (drops). The idea is to draw out the liquid with the roots. The root system consumes as much liquid as it needs.
People call this system an automatic potty. It has 2 vessels that are separated from each other by a barrier. One contains water, the other contains plant. The liquid, as necessary, seeps into the soil and is evenly distributed in it. Flowers in such pots are not subject to drying out.
Several types of soil moisture are known:
- Overhead is the standard type of top-down irrigation.
- Intrasoil - using droppers, flasks, funnels, etc.
- Root—fluid flow occurs from bottom to top.
Do-it-yourself auto watering system from scrap materials
Pros and cons of this installation
Advantages of automatic watering:
- correctly adjusted water supply of the required volume;
- reduction of labor intensity;
- reduction in consumption - the system supplies a given amount of water, maintaining an optimal balance of soil moisture;
- the ability to carry out irrigation in the long-term absence of the owner.
Flaws:
- purchased systems with software are more expensive;
- the electronic system depends on the household electrical network;
- cheap analogues are not durable.
The most important advantage of simple automatic irrigation is the ability to create such irrigation with your own hands, without the use of complex electronics.
What ready-made options are there on the market?
Gardening stores have a wide range of systems for automatically watering indoor plants. The following is a description of the most popular devices.
GARDENA 1265/1266
Fully automated system from German manufacturers. Equipped with a timer, pump, filter and hose system with a total length of 30 meters. Allows an even supply of water to up to 36 individual pots.
Characteristics:
- Capacity with a capacity of 9 liters.
- 12 outputs from 3 distributors.
- Pegs with water supply regulator.
- Supply hose length 9 m.
- The length of distribution lines is 30 m.
- Minimum irrigation time 1 min.
- Flow from 15 to 60 l/min.
- Possibility of regulating flow for each type of plant.
The system is suitable for owners of a large number of plants. The approximate cost of the model starts from 3,400 rubles. Read about Garden drip irrigation in this article.
DEWDROP
Model from Russian manufacturers . It does not have an electronic component, therefore it is completely independent of the electrical voltage in the network. Consists of main lines and emitters with a water supply regulator.
The system can be connected to a water line or tank. One set is suitable for irrigating a greenhouse or indoor plants in quantities of up to 50 pcs. The cost of the set is from 350 to 500 rubles. Read more about drip irrigation Rosinka here.
Characteristics:
- hose length 20 m;
- number of droppers 50 pcs.;
- water consumption up to 2 l/h;
- working pressure up to 1 bar.
“Rosinka” is completely independent of the container when operating. The main thing is to regulate the water flow and monitor its volume.
Argus
This model is a ceramic cone. Irrigation is carried out through the controlled flow of water from a container (plastic bottle) or using a hose from a container located at a distance.
Characteristics:
- Number of cones 2 pcs.
- Hose length 1 m.
- Water consumption up to 0.5 l/h.
- The ability to connect the cone to the neck of a plastic bottle with a standard diameter.
Ceramic cones are great for irrigation throughout the day. The approximate cost of the model starts from 350 rubles.
How to organize it yourself?
Let's look at several options for making a homemade system.
Drip
Drip irrigation at home can be organized using medical droppers . It is enough to fill the dropper with water, place the hose in the pot with the plant and adjust the water flow.
Instead of a dropper container, you can use a plastic bottle suspended above the flower. This design will allow you to irrigate several pots at once. Read about drip watering of indoor flowers in this article.
Hydrogel
A completely new and efficient automatic watering system. They are helium balls that first absorb and then release moisture into the soil. 2 g of such gel can absorb up to 0.5 liters of water.
Before use, you need to know what root system each house plant has. If it is superficial, then the balls should be placed directly on the surface of the soil and watered abundantly. If the system is deeply buried, helium balls need to be buried to a depth of 3-4 cm.
Before use and the owner's absence for a long time, the balls must be soaked in water for 5-7 hours, and only then placed in pots.
Using a wick
The automatic watering system using a wick is quite simple. It will require:
- water container - it is selected taking into account the number of pots;
- a narrow piece of fabric or fabric cord - it is better to take a synthetic one, as it does not rot.
Next you need:
- Fill the container with water and place the wick.
- Place the container on a slight elevation. Pre-moisten the prepared wick.
- Place one end of the wick in a vessel with water, and the other in a pot with a plant.
For better moisture, it is better to twist the end of the wick around the trunk of the plant.
Using flasks
The flask for automatic watering is a hollow glass ball with a long tip for fixation in the soil . To water one plant during the day, you will need 1 flask with a capacity of 200 ml.
The flask must be filled with water and inserted with the neck into the soil. Irrigation occurs due to drying of the soil. As soon as the soil dries out, water from the flask moistens it again.
Instead of flasks, you can use a regular plastic bottle with a dispenser peg. The system requires:
- plastic bottle with a capacity of up to 1.5 l;
- plastic dispenser peg.
Next you need:
- Fill the bottle with water.
- Screw the peg onto the neck of the bottle.
- Insert the dispenser peg into the ground.
The bottle will moisten the soil in the same way as a factory flask. The dispenser can be adjusted to the desired flow rate.
Capillary mats
Capillary mats are a piece of felt placed in a tray with sides and covered with plastic film with holes. The mat is filled with water, and after impregnation, a pot with a plant is placed on it. You can make such a mat yourself.
For this you will need:
- pallet - you can use a deep bowl for one pot, a construction pallet for paint, a wooden box;
- thick terry towel;
- plastic film or dark colored bag.
Next you need:
- Place a towel on the bottom of the tray. If a wooden box is used, its bottom must be lined with plastic film.
- Punch many small holes in a dark plastic bag. You can roll the film several times and make a hole with an awl.
- Fill the tray with water until the towel is completely saturated.
- Cover the towel with film with holes.
- Place pots of plants on top of the mat.
This system will allow you to moisten the soil as it dries out. The main thing is to periodically remove the towel, rinse it and put it back. If you do not monitor the condition of the system, the towel may become moldy.
The video will tell you about capillary mats for watering indoor flowers:
Self-irrigating pots
A self-irrigating pot consists of 2 containers inserted into each other. A plant grows in one pot, and the outer one is filled with water. To make it yourself you will need: a container with a diameter 1-2 cm larger than the diameter of the planting pot.
Next you need:
- make several holes in the pot with soil, the holes are made near the bottom or on it;
- Pour water into the external tank; it is enough to fill it 3-5 cm;
- cover the bottom of the pot with felt fabric - the fabric is placed on the bottom with a margin of 3-5 cm on the walls of the vessel;
- insert the pot with soil into a container of water.
Irrigation is carried out due to uniform drying of the soil. Water consumption depends on the size of the holes in the container with soil and the speed of its drying. To ensure temperature balance, the water tank must be wrapped in a towel or cloth.
Ceramic cones
This product is a cone with a container for water. The container is filled with water, and the sharp part of the cone itself is inserted into the ground. To ensure an uninterrupted supply of water, the cone is equipped with a hose that draws water from an additional source at an elevation.
To make such a system yourself, you will need an empty tube of construction silicone:
- Remove the cap from the tube.
- Clean and rinse the tube to remove remaining silicone.
- Insert the sharp part into the ground.
- Pour water into the tube.
To ensure that the system is always filled with water, you need to connect the hose from the dropper to the tube. One end of the hose is lowered into the tube, and the other end into an additional water container. For example, a plastic bottle suspended over a pot.
From plastic bottles
This type of watering involves supplying water from a bottle inserted directly into the pot. The system will require:
- plastic bottle;
- dispenser tip.
Next you need:
- Fill the bottle with water.
- Screw the dispenser onto the neck.
- Insert the dispenser with the narrow end into the ground.
- Make a small hole in the bottom of the bottle.
A similar system can be assembled without a dispenser. You just need to make holes in the bottle cap and bury the bottle neck down. Watering will be carried out as the soil dries.
The video will show you how to make a drip watering system for indoor flowers from a plastic bottle:
With microcontroller
This system is more complex and will require knowledge in the field of radio engineering. To create automatic watering you will need:
- Microcontroller "Attiny13A". Can be purchased at a radio equipment store. Approximate cost 150 rubles.
- Soil moisture sensor. Cost 350 rubles.
- Bread board. Cost from 100 rubles.
- Relay. A relay is needed for the pump.
- Copper wires, cross section 1.5-2.5 mm.
- Pump.
- 12 volt power supply.
- Irrigation hoses.
- Several adapters for connecting hoses.
- Water container.
power unit
Connects as follows:
- power supply from a 220 volt household network is connected through the “L” and “N” terminals;
- 12 volt output via terminals “V+” and “CON”.
It is necessary to mark the + wire or use a red wire. Connect the wires from the power supply outputs to the mounting terminal block and output 2 from each terminal.
Controller
Connection process:
On the controller connector, connect the red wire to the “5 Volt” terminal.- Gray wire with terminal “A1”.
- Connect the + blue wire from the power supply to the “GND” connector on the controller.
- Connect another + wire from the power supply to the “VIN” connector
- Connect the red wire of the controller to the “5V” terminal on the board itself.
Humidity sensor module
Connection is carried out in the following order:
- connect the red wire from terminal + on the controller to one output of the humidity sensor module;
- connect the second contact of the sensor module to the “GND” terminal on the controller;
- connect the sensor to the module using the terminal block.
Relay
Connects as follows:
- + from the power supply connect to the “NC” contact.
- A negative wire from the power supply with a “no” contact.
- Connect the relay contacts to the controller through its own connector: “VCC” with the red wire, “GND” with the yellow wire, “INN” with the brown wire.
The entire circuit must be assembled on a printed circuit board without using a soldering iron. Next you need to connect the pump.
This is done as follows:
- the brown wire from the relay connects to any contact on the pump;
- Connect the negative wire from the power supply to the second wire of the pump.
Next, you need to connect the water constipation and water supply tubes to the pump.
The system works as follows:
- The inlet from the pump is placed in a container of water.
- The system is connected to a 220 Volt household network.
- The moisture sensor is inserted into the soil.
- The outlet tube from the pump is placed in the plant pot.
- When the humidity level reaches less than 70%, the relay will turn on the controller, which in turn will turn on the pump.
- Watering will take place.
The duration of watering is set by the controller settings. They are set only through the programmer. You can order the controller firmware immediately upon purchase.
How to prepare plants
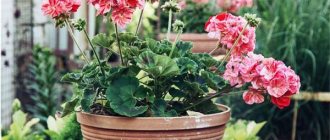
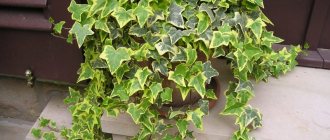
Before using automatic watering, you need to prepare your indoor plants. Not all varieties of flower crops can survive the lack of regular irrigation. So that your absence does not become a shock for the flowers, prepare them two or three days before departure. What is the preparation:
- Inspecting the plant and removing excess: partially thin out healthy leaves, cut off large lower and wilted leaves. Remove faded and blossoming flowers, as well as buds. The measure is tough, but after this procedure the flower will consume much less moisture.
- If the flowers are on the windowsill, they are moved deeper into the room. The less exposure to sunlight, the longer the soil will be moist, because evaporation will be less intense. Evaporation is affected by heating devices operating in the room.
- Spray the leaves with a spray bottle and wipe them.
- Create a humid atmosphere for the flowers. To do this, collect all the flower pots in one place. Cover them with film on top and make many holes for air to enter. This way the plants will create the desired level of humidity for themselves.
- If there are sick flowers, isolate them. Otherwise, banal mold will quickly infect healthy plants.
- Before leaving, all the flowers are well watered.
Important! You cannot apply fertilizer before leaving. To absorb microelements, flowers require large amounts of liquid.
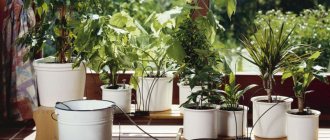
The most basic method of automatic watering is to place all the flowers in a large basin or bathtub filled with water. This option is simple, but has too many disadvantages:
- the liquid will flow only into the lower layers of the soil, and this is very harmful for flowers whose roots are weak;
- when the water does not change for three to four days, it turns into an ideal liquid, where mold or mildew will begin to multiply;
- the water will begin to stagnate at the bottom of the soil in the pot and there will be no outflow of excess moisture.
It is more reliable to install flower pots on a base made of expanded clay, which is filled with water.