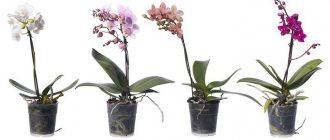
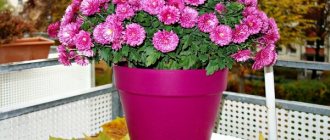
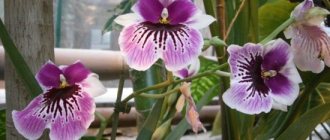
If there are more and more flowers in the house, and less and less free space, group planting in one pot is an excellent way out of this situation. Especially if these flowers are beautiful orchids. Each of them individually is capable of delivering aesthetic pleasure. But the man-made composition of several orchids in one voluminous flowerpot causes genuine delight. Group flowering looks especially impressive. Being in equal conditions, they also develop simultaneously. Already in a paired planting, at least two peduncles are formed at once.
In 90% of cases, plants sitting together grow leaves and shoot arrows at the same time. Group flowering, for example, of large-flowered snow-white phalaenopsis is a simply mesmerizing sight.
Another equally important reason for paired (and not only) planting of orchids is the banal saving of usable space. One, even medium-sized pot takes up much less space than two small ones. There will be more indoor plants and less dishes. Therefore, several orchids in a container make the owner’s life much easier.
By the way, specimens with a healthy root system quickly adapt to a new environment. And when optimal conditions of light, temperature and humidity are created for them, they coexist perfectly with their “neighbors.” You can help them develop by adding fertilizers and biologically active additives to the substrate.
Landing in a classic closed system
For planting, for example, in pairs, it is desirable that both plants are in the growth phase, with healthy roots. Then they will not require special conditions - they will not need to be watered or sprayed more often. Pairs are selected randomly. Based more on personal preference. Either one variety or two flowers of different types will do. Different varieties are sometimes combined on the principle of similarity in the color of leaves or buds, paying attention to the uniformity of color, the presence of speckled spots, etc. Successful acclimatization and the presence of a certain number of healthy roots are mandatory.
Important! If the root system is initially diseased, resuscitation measures and observation are first needed.
Store-bought flowers with relatively healthy roots can be treated with Fitosporin within half an hour. After drying for 20 minutes, they can be planted together in new soil, in a closed system.
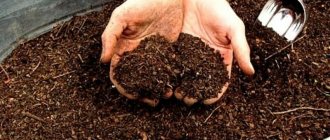
The classic substrate is made up of Seramis, bark, coal, expanded clay, and sphagnum moss. The flowerpot is selected depending on the size of the roots. Small if the roots are small. If the roots are large, then it is better to choose a pot or vase of significant size if the volume of the roots is impressive.
Expanded clay and sphagnum are laid in layers on the bottom, and large pieces of bark, pieces of charcoal, and Seramis are placed on top. The orchid is placed in a vase and covered with large bark. For convenience, it can be secured with a holder using fasteners.
Note! In some cases, adding polystyrene foam to the soil has a beneficial effect. This planting material is “warmer” compared to others. Some species grow roots well in it.
The voids are filled with bark as much as possible. A small amount of charcoal and Seramis are added. The surface of the substrate around the flower is framed with moss. Watering should be done no earlier than every 3-4 days.
How to choose a pot for an orchid: basic rules
Recommendations for choosing pots are as follows:
- It should be larger in size than the transparent pot inserted inside, about 2 cm in diameter. This will ensure air circulation, which will protect the phalaenopsis from excess moisture. If the pot will be used without an inner pot, then it must also be large enough to lay expanded clay. Which will make up the drainage system of the flower.
- You should choose a heavy pot. This is explained by the fact that phalaenopsis is actively growing in height and if the pot is light, then it can simply fall.
- The container must have drainage holes, since the soil of orchids should not be waterlogged.
The whole variety of orchid pots can be divided into:
- ordinary;
- with automatic watering;
- double;
- crowns with tray.
All of them are actively used. But it is worth noting that there are significant differences between them. Everyone has their pros and cons. The future owner needs to pay attention to the characteristics of each and choose the one that is suitable for him.
Ordinary
The easiest choice. You can choose the color, material and shape that will match the design of the room. But don’t forget that you can’t just plant an orchid in a pot. First you need to create drainage between the wall of the flowerpot and the soil of the flower. Expanded clay is ideal for this. It will prevent stagnation of moisture and prevent the death of the plant. You will have to water the flower yourself, controlling the soil moisture.
With automatic watering
A modern and convenient solution for all lovers of indoor plants. The flowerpot independently controls the water supply, providing the flower with the right amount of moisture. This type of pot includes an inner container, into which the phalaenopsis is planted, and an outer one, into which the previous one is inserted. The flowerpot has a reservoir of water. It needs to be replenished periodically, which is not difficult. But this type of flower pot is not ideal. It is not suitable for young plants. They have a poorly developed root system that does not reach the drainage layer.
Double
This is a very practical and aesthetically attractive solution. An orchid planted in a regular plastic pot is placed in a flowerpot. It can have different sizes, materials and colors, perfectly fitting into the interior of the house. The disadvantage of this type of pot is watering. The owner will have to constantly monitor the soil moisture and irrigate it as required, and pour out excess moisture himself.
Corona” with a pallet: what’s bad?
This type of pot was invented specifically for orchids. The flowerpot consists of a pallet and the “crown” itself. It has a lower disk, with a palisade of small sticks of the same height attached around the circumference and with equal gaps between them. This ensures ventilation of the phalaenopsis roots and access to light.
But many orchid lovers are categorically against this type of pot. The key to good growth and long life of a plant is proper watering, which cannot be ensured in a pot of such a design. In addition, the pot is very light, the flower can fall, and due to the fragile design, the “crown” simply breaks.
Planting in wicker flowerpots
The composition looks very beautiful in wicker baskets-pots suspended above the window. A drainage layer of coarse expanded clay is placed on the bottom of the basket, on top of which is sphagnum moss and a “nest” made of a layer of coconut fiber. You can add a large fraction of pine bark. The plant must first be treated with a fungicide solution. The systemic drug Previkur is suitable for this purpose. To increase stress resistance, accelerate development and reduce rooting time, “grafting” with mycorrhiza is sometimes practiced.
Old bark can be boiled and used for other plantings.
Wash orchids with warm water from the shower using baby or laundry soap. Place under the phytolamp. During this time, all cuts and wounds that will inevitably form will dry out. After drying, you can plant it in a flowerpot. Place wine corks or polystyrene foam between the roots.
Humidity, maintenance conditions - this is what determines what soil is suitable for planting. Thus, coconut fiber is a moisture-intensive material. It is good to use if the apartment is warm - 27 C; in cooler conditions it will not serve very well.
In case of mass flowering in lush clusters for at least 9 months, it is advisable to give it a rest once a year. Trim flower stalks, preferably in late autumn, and ensure a dormant period of 2-3 months. Rested plants will begin to grow flower stalks, leaves, and roots with renewed vigor.
How to make an orchid pot with your own hands
Having studied all the requirements for containers for growing orchids, it is easy to make a pot yourself using available materials. There are desktop designs, as well as containers for mounting on walls. It is up to the grower to decide whether to make the vessel transparent or not.
The right plastic pot for an orchid
The following are suitable as a basis for transparent containers:
- polyethylene or plastic grocery baskets;
- plastic containers of various sizes;
- plastic buckets (for pickles, mayonnaise, jam);
- standard plastic flower pots;
- plastic bottles.
Holes in a plastic orchid pot are made in the bottom and along the walls of the container. To do this, an iron rod or nail is heated on a stove and holes are carefully pierced. Excess plastic from the edges of the holes is cut off, and the container is placed on a tray or in a flowerpot.
Orchids made from wood cuts, tree bark, plastic baskets, and containers made from wooden blocks look beautiful. Glass aquariums and plaster pots are also used for cultivating and breeding representatives of the tropics. Pots for orchids with decorations made of beads and glass are interesting, but how to use available materials is up to the gardener to decide.
From planks or dies
Video review of orchid pots: Watch the video for errors with closed systems:
Reasons for failure of group plantings
- Parasites can cause death.
1) Mealybug. The pest settles in the center of growths and feeds on young growth. As a result, a leaf of a non-standard, twisted shape grows. A microscopic parasite is difficult to detect until a certain moment, until it multiplies in huge numbers. Processing each “patient” in a group planting is a labor-intensive process. In severe cases, the orchid becomes densely covered with cobwebs and quickly fades. Leaf rollers have the same effect .
2) Leaf juice is a favorite treat for fungus gnat . In nature, they colonize various types of fungi with their offspring. They can be brought from the forest along with planting material. The larvae gnaw through the roots and eat the nutritious shell - velamen - from the inside. Although the strands remain intact, the roots, and after them the leaves, begin to rot. In advanced forms, it is no longer possible to save the patient.
Getting rid of adult mosquitoes is quite difficult; treatment must be carried out repeatedly. They are destroyed by fumigators and dichlorvos. You can plug in the electric fumigator and place the contaminated pots very close to it. If you have pets, it is better to use special animal-safe products.
- Excessive planting density.
In order for the planting to grow and develop well, it is advisable to allocate 10-12 cm of soil area for each inhabitant. This will be more than enough for any type. The statement that the more plants and, accordingly, flower stalks, the more magnificent the flowering will be, is erroneous. Large specimens need space for free growth of leaf mass. In forced close quarters, orchids will inhibit each other’s development. Sooner or later, the “extra” specimens will have to be replanted. With rooted orchids this manipulation will be more problematic.
- Content shortcomings.
If many plants grow in a massive flask, difficulties with watering will inevitably arise. Even if drainage tubes are pre-installed, pouring and draining the solution always requires some skill. As well as for washing them if necessary. Experienced orchid growers do not recommend combining more than 3-4 plants into one group.
What size should it be?
There are several rules for selecting the optimal pot size:
- The height of the flowerpot should correspond to the diameter.
- When replanting, you should choose a container 1-2 cm wider than the previous one.
- The volume is determined by the size of the root system. An orchid should not be planted in a pot that is too loose; this plant prefers tight spaces.
- Planting several flowers in one container is possible.
Let's consider two options for pots.
Small
Quite suitable for young orchids. The earthen lump in such a pot will not be too large, which is preferable for phalaenopsis. But do not forget that the roots of the plant need air. Therefore, over time, the flower should be transplanted into a larger pot. In addition, such pots are not suitable for planting more than one plant.
Big
Orchids do not need huge pots because they are not suitable for their root system. Excessive amounts of soil disrupt the air exchange of phalaenopsis roots. This could lead to his death. But such pots are suitable for growing two orchids at the same time. To select a pot for several plants, you need to follow the same rules.
When choosing the color of your plant pots, you should consider the design of your specific room. Typically, plants are planted in a pot of neutral shades that highlight the beauty of the orchid. Preferred colors:
The choice of shade remains entirely with the owner. The modern market can provide any color option.
Is clear ok?
Most often, orchids are sold in transparent pots. Many owners do not replant phalaenopsis. As a rule, they additionally buy a glass or ceramic pot. The transparency of the inside will provide additional light flow to the roots of the plant. Although this is not necessary, it is quite useful for the plant.
Features of growing in large vases
The main disadvantage of a closed system is the potential for waterlogging of the soil and the development of putrefactive processes. In the case of group planting and against the backdrop of difficulties in maintenance, the risk of rotting increases. ZeoFlora soil for orchids will help improve the situation even in flooded conditions . Keeping several flowers together makes it possible to experiment and find new care options. And you can start by modifying the composition of the components of a classical closed system.
Due to the fairly large granule sizes - from 5 to 9 mm - Ceoflora can be used both as drainage and as a monosubstrate. The main substance - zeolite - absorbs water well and releases it into the soil gradually. Which is a huge plus. There is no accumulation of excess water, as in expanded clay.
Ceoflora is a sorbent that replaces charcoal and performs such important functions as:
- protection against all types of rot;
- resistance to fermentation processes;
- maintaining the purity of the substrate.
During the watering process, the drainage layer is saturated with water, allowing a small excess to pass down. It dries out about 1 cm on top, the crust retains moisture, which remains below. A mulch layer is formed that does not release moisture from the inside. By preventing the soil from becoming too acidic, it at the same time prevents it from drying out. The timing of the next watering depends on the degree of drying of the sorbent.
Ceoflora is the optimal soil for planting orchids that require resuscitation. In addition, it relieves stress in the weak, will help them adapt to a new method of planting, will retain all the necessary nutrients, and will not allow them to be washed out. Before use, you need to soak it for an hour, then drain the unabsorbed water.
Fact! The soil contains silicon, nitrogen and potassium, which are necessary for the nutrition and development of roots, especially in the flowering phase.
The bark is used in sizes from 2 to 4 cm. Thermally untreated is acceptable - it will last longer and retain its properties. It is good if the bark has a soft, sponge-like structure, reminiscent of cork material. It makes no sense to add moss with this type of planting. Sphagnum is added to prevent the soil from rotting. It also separates the drainage layer from the soil, consumes moisture, and then releases it. All these functions are performed by zeolite.
During the next watering activities, you can add a little specialized fertilizer. Or use any growth stimulator - vitalizer NV-101, Epin, Fitosporin-reanimator, etc.
Planting process
You should first lay a drainage layer of soaked Ceoflora on the bottom and secure a polypropylene tube. For better water passage, the lower part of the tube can be cut at an angle. Sprinkle evenly with some of the bark.
Important! After planting, a small amount of moisture remains at the bottom. You should not be afraid of this, since the water remains within the drainage layer and does not cause any harm.
It is important to carefully prepare transplant applicants:
- to avoid rotting, remove questionable roots, including filamentous ones;
- remove old leaves and dry flower stalks;
- apply green paint to the cut areas of the roots, creases on the leaves and the base of the stem.
The flowers are distributed in a wide pot so that the roots are located horizontally and are immersed in the substrate right up to the foliage. The planting depth should be the same for everyone. When adding bark, you need to carefully compact it. You can fix the position using peduncle holders.
At the next stage, the substrate is distributed between the flowers - wherever voids have formed. In fact, zeolite will take up about 30% of the total soil volume. It will compact the base and increase the overall moisture capacity. In the future, you may have to add some more if they lack water. It is better to cut off flower stalks with flowering buds to ensure a dormant period and give time for adaptation.
Advice! Before cutting flower stalks, it is advisable to mark the stems, if this has not been done previously. This way it will be easier to “recognize” the origin in the general planting.
The finished product produces a very beautiful composition in eco-style: a combination of wood, lush greenery and glass.
Types of orchid pots: description of materials, features
Containers for planting are bought in stores, or made with your own hands using scrap materials. Ready-made Corona models, designed specifically for orchids, are popular, as are ordinary plastic food buckets and wicker baskets.
Plastic
Plastic orchid pots are the most popular. Such vessels are easy to clean, have transparent walls, which is especially important for members of the family, and tolerate both slight drops in temperature and sunlight. Hobbyists are often worried about the walls and ask experts whether it is necessary to plant capricious orchids in a transparent pot. This is necessary for a number of species in which sunlight is required for the root system. Otherwise, the process of photosynthesis is blocked. In all other cases, the characteristic is not so important.
Store-bought plastic pots are already equipped with holes for drainage; in homemade containers, you can make them yourself. If necessary, it is easy to add 2-3 holes if required for a specific flower.
Flower shops offer Corona plastic pots, which are based on flexible rods arranged in a circle. The walls transmit light, aeration is provided for the roots of the plant, so there are no special problems with excess moisture. The kit includes a tray, the diameter of which is wider than the bottom of the pot. Coarse sand and stones are added to the tray for more comfortable growing of orchids.
This pot is suitable for Phalaenopsis and Vanda, since their roots require light to participate in photosynthesis. But plants with pseudobulbs also grow well in them: Cambria, Denndrobium, Brassia. If suddenly the roots of a flower grow through the holes, it is easy to cut the plastic and remove the leaf rosette without damage.
In addition, through the transparent walls you can clearly see how the roots of the orchid are developing, what is the condition of the substrate, and whether there is stagnation of moisture. This makes maintenance easier, which is why plastic containers are usually recommended for beginning gardeners.
Clay
Exotic flowers grow well in clay pots. This is a practical, environmentally friendly material, without harmful impurities and additives. Air passes through the pores in the walls of the container, aeration of the roots is ensured, and there is no stagnation of moisture. But many people are interested in whether it is possible to plant an orchid in an opaque pot? This is allowed for certain species whose roots do not need sunlight.
Unlike unstable plastic pots, clay containers do not tip over under the weight of orchid stems and peduncles and are more stable. But such dishes have disadvantages:
- in a city apartment near heating systems (especially in winter), the walls intensively evaporate moisture. This leads to hypothermia of the root system and flower diseases;
- Inside, the roots of the plant are attached to the clay porous rough walls. When transplanting, it is impossible to avoid damage and deformation;
- clay is not suitable for orchids, whose root systems are involved in photosynthesis and require light;
- after watering and fertilizing, a layer of salts is deposited on the inner walls of the clay container. This worsens aeration and porosity, and the plant feels uncomfortable in such a vessel;
- fragility (breaks when dropped).
Ceramics
Unlike earthenware, ceramic pots are coated with glaze on all sides. The problem with roots attaching to the walls disappears, the plant feels good and does not experience stress during transplantation. The containers are stable and beautiful in appearance, so orchids look great in them.
“Minus” - ceramics do not accumulate, but release heat. Therefore, this material is suitable for hot rooms, but when growing orchids in cool conditions, it is advisable to select a more convenient plastic.
Experienced flower growers often grow their beauties in such pots, as it is easier for them to provide comfortable conditions for the root system of orchids. There is no way to control the condition of the substrate or plant roots through the walls, so you need to take care of high-quality drainage in advance.
Glass
Recommended for experienced orchid lovers who know in practice all the intricacies of growing exotic flowers. In terms of attractiveness and beauty, glass containers are superior to others. Manufacturers offer “aquarium” vessels, stylish glasses in which orchids look incredibly beautiful. But such dishes have more disadvantages.
- due to the limited model range, it is difficult to choose a pot for a certain type and size of plant;
- it is impossible to make additional drainage holes;
- Condensation that is harmful to orchids often accumulates on the walls;
- Green algae grow on the roots and mucus appears, which is detrimental to plants.
Post-landing care regimen
After planting, if wet zeolite was used, no watering is required for at least a week. There is already a sufficient amount of moisture in the pot, which was obtained when processing and soaking in various preparations were carried out. Overmoistening in this case will only increase the acidity of the substrate. Sometimes, after a day or two, it is possible to drip moisten the soil using a medical bulb. As well as lightly spraying the leaves from a spray bottle, to which you can add a few drops of Epin, succinic acid.
Note! Pre-soaking future neighbors for 30 minutes in Fufanon with the addition of Fitosporin will minimize the appearance of pests on them in the future - mealybugs, etc.
When Ceoflora dries out, it is time for the first and subsequent waterings. It is important not to miss the moment when it begins to take moisture from the roots.
How best to water
Follow several methods of moisturizing.
- First time after landing.
You need to dilute thiamine chloride - vitamin B1 - in warm water. It stimulates the growth of leaves and root systems, and generally has a beneficial effect on the life cycle. It is suitable for adaptation measures. You can add succinic acid, a few drops of echinacea, Heteroauxin or any other growth stimulant.
A small amount of solution is enough, since the zeolite layer is still wet. It is necessary to replenish the water in the drainage layer. To do this, take the solution into a bulb or spray bottle and pour it onto the surface, including under the leaves if they are tightly adjacent to the substrate. In this way, excessive flooding is avoided, as, for example, when using a watering can. The roots and substrate have time to become saturated. With the remaining liquid you can wipe the leaves from above and especially from below. Finally, the growth point should be blotted from water with a dry cotton swab.
Advice! Leaves that have lost turgor can be covered underneath with cotton pads soaked in a solution with vitamin B1.
- Fill a watering can with warm, settled water and add liquid Fitosporin or Epin. Pour the containers with flowers with this mixture for at least 1-1.5-2 hours so that the zeolite has time to be saturated. Water the soil with caution, trying not to get it on the leaves or at the growing point.
Advice! It is better to use Fitosporin at half the recommended dosage. For example, 20-30 drops per two-liter watering can. This amount will be safe for roots and leaves and is suitable for frequent feeding.
To drain the water, you will need a silicone hose and an aquarium pump (or the same medical bulb). This method greatly facilitates the care of a group placed in one large flask. You need to place the hose in the polypropylene tube all the way to the bottom. With a few presses, pump out all the water into a bucket or basin. A small amount of water remaining in the drainage layer is acceptable.
Advice! It is convenient to close the tubes during periods between waterings using plugs, which are sold in hardware stores.
It is recommended to carry out this procedure no more than once a month (during the warm season).
- Showering at weekly intervals . Wash the leaves of the plants and fill the pots completely for several hours or overnight. Drain in the morning. In this case, the bark becomes more structured and hygroscopic - it absorbs as much water as the plants require. Orchids are saturated with the moisture they need to grow root and leaf mass. As a rule, they tolerate showering well and no rot occurs.
Note! An overdried orchid should not be suddenly given water. Otherwise, its leaves may crack.
By watering, you can add nutritious fertilizer. Use weak solutions if there were problems before and the active growth phase has now begun. A strong solution can leave burn marks on the roots. If there are not many roots, care for preservation will not be superfluous. Nutrition in this case is simply necessary.
- Add water little by little so that the drainage layer does not dry out. Or pour in for 10-15 minutes and drain.
If the bark does “bloom”, it is recommended to pour a solution of Fitosporin with a few drops of Fitoverm under the neck. Wait 30 minutes. During this time, the drugs will have an effect on pathogenic fungi, microorganisms and rid the bark of pests.
Group planting is suitable for aesthetes and those lovers who are not afraid of any maintenance problems to obtain a beautiful result. Compensation for overcoming all difficulties will certainly be the lush and abundant flowering of these amazing plants.
Pot for orchids: how to choose a vessel with additional options
At the same time, many people use transparent pots for all types of orchids of this large family. The explanation is simple: this makes it easier to control the condition of the plant root system and the moisture content of the substrate. Through the transparent walls it is easy to notice any changes: a change in the color of the roots, the appearance of spots, rot, mucus, parasites. This helps to quickly take action and save the flower from death.
In flower shops you can buy orchid pots with additional options:
- automatic watering;
- dipping trays;
- phytolighting.
Containers with automatic watering operate on the principle of capillary irrigation, equipped with indicator tubes and reservoirs for water storage. In essence, this is a double pot - a container for planting and a flowerpot for orchids, and how to use it depends on the design. Kits are available with dismountable automatic watering systems, indication, as well as a drainage mixture for dosing the water supply. Caring for such pots is easier, but they do not completely replace caring for the plant.

