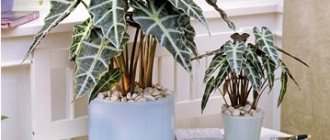
Fans of indoor floriculture know that plants need to be planted in pots or containers with drainage holes. It turns out that this rule can sometimes be broken. If the store or garden center liked a pot made of ceramic, earthenware, stainless steel or glass that does not have holes for water drainage, it can also be used for planting.
Houseplants. The illustration for the article is used from open sources.
How to choose a pot for a house plant?
Pots are made of plastic, clay, stone and other materials. It is believed that a plant feels better in a clay pot than in a plastic one. This is explained by the fact that the soil in such a pot “breathes” and also heats up and cools down more slowly.
I think the following. What kind of temperature difference can we talk about if a plant lives in a house? And the surface of the soil in the pot is quite enough for “breathing”. It seems that the pot material is not important for houseplants.
Plant pots come with or without a hole for draining water. This condition is very important; excess water must go away after watering, of course, if the plant is not a swamp.
In the photo you see a large pot with a very small drainage hole. To avoid rotting of the roots, the bottom of such a pot is covered with expanded clay, or pebbles, or clay shards. In the third photo on the right you see expanded clay. It comes in different fractions (small, medium, large) and is sold cheaply in flower shops. Expanded clay weighs less than any stone of the same size.
I don't like it when trays are visible, so I use pots - planters in which I put plants planted in plastic pots with holes to drain excess water.
In the next photo you see my favorite flower pots.
In the photo, next to the flowerpot (without a hole for draining water) there is a plastic pot selected to size. The diameters of the flower pot and the inner plastic pot must be correlated in such a way that the inner pot does not fall through and there is a gap between their bottoms.
The next photo shows another example of placing an ampelous (hanging) plant in a tall pot.
I call such pots (a flower pot and a plastic one selected according to the diameter) “matryoshkas”.
If the bottom of the plastic pot comes into contact with the bottom of the flowerpot, then after watering, after about 15 minutes, the excess water must be drained.
There are also advantages to using “matryoshka dolls”.
For example, New Year, the house is transformed, I take out a collection of silver pots and simply rearrange the house plants in them! No need to replant anything! The following photo shows several pots from this collection.
You can always change the “dress” (pot) for a plant according to your mood, without resorting to replanting it.
We change textiles, flower pots and now the room has a completely different mood!
Sizes and shapes of orchid pots
Lush flowering is achieved only with proper care, compliance with growing rules and, oddly enough, with the correct purchase of a pot. Orchids do not like to grow in large containers, so they select vessels so that the roots fit into them without free space.
When replanting a plant, the volume of the container may be slightly larger, by 2-3 cm. But pots are not selected “for growth,” especially for orchids such as paphiopedilum.
Flowers planted as a group in one container look impressive. But you need to calculate the volume of the roots and then select the appropriate container. Cone pots are not suitable for planting orchids.
Pots for mini orchids
For miniature plants, it is best to buy or make your own transparent pot. Such specimens love high moisture, but at the same time suffer from an excess of water. In transparent containers it will be easier for babies to control the roots and substrate.
There are special species in the orchid family, for example Miltonia. It is often grown in aquariums, placing several bushes inside at once. Each plant is assigned its own “living space”, for which additional transparent plastic bottles are placed. It turns out to be a pot in a greenhouse. To allow air flow, the containers are opened, and the aquarium itself is protected from direct sunlight and kept in slight partial shade.
You may be interested in:
Several orchids in one pot: can they be planted, how to care for them ? An orchid is a very unusual and interesting flower. It is often used in interior design of various formats. Flower growers...Read more...
Planting children
Children are used to propagate the plant species they like. They are easy to grow in miniature pots (plastic cups) so that the roots are a little cramped. In spacious containers, babies are more likely to rot. Practical gardeners often make greenhouses from polyethylene or grow plants in pieces of polystyrene foam.
Flower growers have no shortage of choice of flowerpots and pots for orchids. Specialized stores offer a huge range of models made of glass, plastic, and ceramics. Bamboo baskets and plant pots are popular, and Corona pots with a needle-shaped design that simplify plant care are in demand.
Many people order containers through online stores. But it is advisable to find reliable manufacturers and first order 1-2 pots to check the quality.
What is the best pot for outdoor plants?
In the summer we decorate the entrance to the house, porch, patio (inner courtyard) with plants. It is important that the soil temperature does not change abruptly, but slowly, which means preference should be given to clay pots.
It is important where the pots with plants will be placed, under a canopy or not. If under a canopy, then you can use the “matryoshka” principle described earlier. And if it’s outdoors, then a “matryoshka” in a pot - a pot without a hole for draining water is not suitable! After the first rain, the plant will appear to be floating. In this case, it is necessary to use flower pots with large holes for draining and, preferably, put a layer of expanded clay on the bottom so that the hole does not become clogged.
Here are my favorite outdoor boxwood pots that decorate the porch in the winter and move outside in the summer.
Such pots must have a hole for draining water! It is unrealistic to pour water out of them every time after rain.
Planting plants in outdoor pots also has its own characteristics.
A method I don't like.
They suggest filling a tall pot with plastic bottles, pouring soil on top and planting a plant. They do this in order to reduce the weight of the pot.
The method I use.
I use the “matryoshka” method described earlier, I select a plastic pot according to the diameter that hangs inside the flowerpot, in this case both pots have holes for draining water. If you need to rearrange the plant, then this will not be a problem; we take out the plastic pot with the plant and move everything in parts.
In the fall, when I move large plants from the street home, I put a block prepared to size in each flowerpot-cone, put a large plastic tray on it, and then a plant in a plastic pot.
Do you need a hole in the pot?
The hole in the bottom of the pot is designed to drain excess water. Above, I described in detail how best to use pots with and without holes when growing plants indoors and outdoors.
You can use drainage to grow plants at home in pots without drainage holes, but there is always a chance that you will flood the plant or, conversely, the roots will not have enough water. I think it is best to use the “matryoshka” principle, which I have already written about in detail.
Indoor plants delight with green leaves and flowers only when they are healthy and receive appropriate care. Good care involves regular watering and fertilizing, but it is impossible without proper planting in the appropriate pot.
Materials from which growing containers are made
Glass
Glass planters are very beautiful, but they have a number of disadvantages :
- Does not maintain temperature during sudden changes in temperature;
- Container weight;
- Fragility;
- Price;
- A small number of different forms.
Despite the fact that there are certain inconveniences, many gardeners still prefer to grow flowers in glass flowerpots .
Ceramics
Only experienced gardeners can afford to cultivate the plant in ceramic pots . Because you need to determine the time of watering. Typically, gardeners look at the condition of the roots; they will immediately have to water based on their intuition.
When transplanting, very often the roots grow to the walls of the pot , and then you have to sacrifice the pot or the root system of the flower when replanting.
Advantages of pots with drainage system
The main advantage is that inexperienced indoor plant lovers who do not understand the need for drainage and do not take into account watering rates receive a pot that will take care of the home flower itself. It is almost impossible to flood the plant in it, and it is difficult to dry it. There are other advantages:
- You can water irregularly . For those who travel frequently and rarely spend weekends at home, flower care is simplified, especially if the pot is equipped with an automatic watering system with an indicator.
- There is no need for frequent transplantation . Many beautiful indoor flowers are very painful to transplant. Even with careful handling, they get sick and drop their buds and leaves. If the soil is depleted, then feeding the plant with mineral additives in the water for irrigation or special replacement drainage with slowly dissolving fertilizers will allow you not to rush to replant.
- The transplant process is simplified . The earthen ball with roots can be easily removed from the pot. In some types of structures - together with a dividing mesh, which is then not difficult to remove. This is very important for plants with delicate root systems.
- There are holes for bottom watering . Most pots with drainage systems have special holes in the bottom of the pot. They serve not only for ventilation and draining excess water, they are convenient to use for bottom watering. In self-watering pots, water also flows to the roots from below, and this allows the soil to remain loose.
Orchid care
Pots for orchids are a kind of support.
If in nature orchids are attached to tree trunks and held there by roots, then at home, in an ordinary city apartment, this method of growing is not always convenient.
The dryness of the air in apartments with central heating is great; the roots dry out quickly. That is why various pots and baskets were invented in which orchids are planted.
The choice of containers for planting orchids is now huge - pots made of various materials are offered - glass, plastic, ceramic.
How to choose the right pot for an orchid? What to follow in doing so?
When choosing a pot for an orchid, you should always remember that the orchid pots must meet the following requirements:
- they must have good water flow;
- there must be good aeration - the roots must breathe;
- orchid roots should not be attached to the walls of the pot;
- it should also not overheat or overcool;
- Since the roots of some types of orchids are photosynthetic, it is better to allow light to reach the roots.
Plastic pots meet all these requirements.
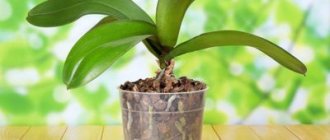
For orchids with photosynthetic roots, it is better to use transparent pots; in addition, this is an additional convenience - the condition of the roots is clearly visible through the transparent walls.
We also take into account the size of the plant’s root system and don’t buy pots for growing!
Phalaenopsis orchids are usually grown in transparent pots, and transplanted vandas can often be found in them. For a beginner, it would not be a mistake to plant dendrobium or brasia in such a pot - through its transparent walls you can clearly see the condition of the roots, and you can also observe the degree of drying of the substrate.
Look at its bottom - it’s practically a sieve! Many novice flower growers also make additional holes on the side walls of such pots. It's not obligatory.
Nowadays, domestic pots for orchids have begun to appear in stores, but they need to be modified a little - drainage holes must be made. Moreover, their number should not be 4 pieces, as planned, but much more, approximately the same as on the branded pot in which the plant went on sale.
How to make your own orchid pot.
If it is not possible to buy a transparent pot of suitable size, then we go to a store that sells transparent plastic containers for food products - we buy it, bring it home and drill it! Some make holes with a knife, some with a soldering iron, some with a drill. But in this case, you need to make quite a lot of holes at the bottom of the container and at the bottom on the side walls. If you look at the “native” orchid pot in which it was sold, we will see that the pot has “legs”. This allows air to better penetrate to the roots of the orchid.
Disadvantages of pots with drainage system
There are also disadvantages. How could we live without them?
Double pots with drainage are more expensive than regular ones. But not by much. Flowerpots with a built-in automatic watering system are even more expensive, their design is more complex, but there is a water level indicator.
The big disadvantage is that the level of water flowing down is not visible. Unless the pot is transparent, of course. Some who like to generously moisten their plants pour so much water that its level rises much above the drainage level, causing the roots to become soaked and rot. In ordinary pots with a tray, with such a significant overflow, excess water simply flows out of the tray.
In a confined space between two plastic containers - internal and external - water almost does not evaporate. On the one hand, this is good; you can water less often. On the other hand, without regular washing, mold, rot, and the unpleasant smell of stagnant water appear.
You can make an orchid pot yourself
You can make an orchid pot yourself, for example, from any transparent plastic container or plastic bottle. In this case, we will make a pot for an orchid from a container that contained liquid soap.
Carefully and carefully cut off the top of the bottle. It's safer to cut with scissors. The bottle is too long and the top cut can be decorated, for example, by cutting out the corners and bending them. A homemade orchid pot differs from a factory one in the quality of plastic, but it can be beautifully decorated.
The plastic container for the orchid pot should be quite rigid. You must make holes on the bottom. The holes need to be widened using edged scissors. Be careful, you might get hurt.
Video on how to make an orchid pot with your own hands.
Drainage holes in a flower pot
With all the abundance of flower pots, one cannot help but notice that the vast majority of them are plastic pots. This is understandable, because they are lighter, easier to care for, and they cost much less. But every experienced gardener knows that the best container for a houseplant is the simplest, unglazed clay pot. Such a pot itself is part of the drainage system. The clay from which it is made perfectly removes excess moisture, absorbing it into itself, and allows air to pass through to the roots, allowing them to fully “breathe.” There is usually only one drainage hole in such pots, and in most cases this is quite enough. The situation is different with plastic pots. They are produced without holes at all, only with designated places for them, allowing the grower to decide for himself what diameter the drainage holes should be and how many of them are needed. And for each specific type of indoor plant they should be different. So for succulents, that is, plants that do not need frequent and abundant watering and constantly moist soil (cacti, aloe, Kalanchoe, etc.), they are made larger both in quantity and in diameter. The same applies to orchids. A good example of this is phalaenopsis. Experienced gardeners even make additional drainage cuts in the side of the pot when replanting this orchid. They allow you not only to better nourish the soil during watering, but also to remove excess moisture from the roots of the flower. The situation is different with moisture-loving plants. Contrary to the statements that are encountered that they do not need drainage, they cannot do without it at all. Even for the most moisture-loving plant, the soil should only be moist, and not soggy or waterlogged. The ability of such plants to grow in swamps in their natural habitat does not mean that they can exist in the waterlogged soil of a flower pot. The set of conditions for natural growth and cultivation at home are significantly different. Drainage for these plants is created more moderate. Consequently, fewer holes are made in the pot. It is impossible to give universal advice on the number and size of drainage holes. Everything must be taken into account. And the volume of the pot, and the age of the plant, and its size. But first of all, you must become familiar with the peculiarities of growing each specific type of indoor flower. During the growing process, you need to constantly monitor the condition of the drainage holes in the pot. They should not be tightly blocked with drainage material or soil. If this happens, they must be cleaned immediately.
By the way. Often, pots for hanging structures do not have drainage holes. Otherwise, excess moisture will flow onto the floor, furniture, etc. This is not a flagrant violation of the rules. But the layer of drainage material in this case should be much thicker than usual. Yes, and you need to monitor such plants more carefully.
Drainage for indoor flowers in a pot - what is it for and how to make it
Every description of indoor flowers from books on floriculture mentions a word such as drainage. Beginning plant growers often neglect it. After all, there is no point in paying attention to a small, incomprehensible word: the flower will be fine anyway, no matter what this drainage is. As a result, if you deviate just a little from the rules of maintenance and care, the plant dies. Let's find out what a drainage system is, why it is so important, and how to make it yourself.
What is drainage and why is it needed?
For healthy growth of indoor plants, you need to ensure the following:
- soil suitable for a specific flower;
- optimal watering regime;
- sunlight;
- air.
It seems that if you took care of the soil, watering and lighting, then there are no more problems. After all, air is everywhere, and the plant has access to it. But not only leaves, but also roots need oxygen.
However, the pot is already occupied by soil, so air can only penetrate into it through small cracks between the lumps of soil. But over time, it becomes denser, and then the root system stops breathing, and the water stops being evenly distributed throughout the entire volume and evaporates. Favorable conditions are created for the proliferation of pathogenic microorganisms, which leads to rotting of the roots and the subsequent death of the above-ground part of the plant.
Drainage, or drainage system, is a layer at the bottom of a flower pot made of rocky or other material that improves the outflow of excess liquid and facilitates the penetration of oxygen to the roots of the plant. A fairly large space is maintained between the stones, allowing water to flow down and air to accumulate there.
Why make holes in a pot?
The holes that you can see at the bottom of flower pots are called drainage holes. They received this name because they are also designed to remove excess moisture. If drainage is a place where water accumulates, then holes are where it comes out. One doesn't work without the other.
Here's what you should know about drainage holes in a pot:
- Moisture does not pass through holes that are too small. Therefore, they should be chosen for plants that need a constantly moistened substrate.
- Water flows well through holes that are too large: almost all of it is removed immediately after watering. These are suitable for flowers that are afraid of excess moisture in the soil.
Important! If you use improvised containers as a pot, take care of the drainage holes yourself. They can be made at home using a sharp metal object (screwdriver, nail, tip of a knife). It needs to be heated over a fire and several holes must be made at the bottom of the pot.
What kind of drainage is there for indoor plants?
Let's list a list of materials suitable for creating a drainage system and find out which one is better and how to prepare them correctly. Florists usually use the following as drainage materials:
- Ceramics . Old ceramic pots can be used to build drainage. It is enough to split them into small shards and disinfect them. The fragments are placed at the bottom of the pot with the convex part up. They shouldn't be too large. The downside is the presence of sharp edges.
- Expanded clay . This is one of the best and inexpensive drainage materials. It easily removes moisture and also absorbs it, giving it to the plant as needed. Expanded clay drainage does not have sharp corners, and therefore it is safe for the root system. However, it needs to be disinfected before use. No cons noted.
- Moss . Sphagnum moss can be collected from a swamp or bought at a flower shop. This is not only a drainage material, but also a good disinfectant and moisture-retaining agent. Before laying on the bottom, it must be soaked for 30 minutes in warm water. The downside is the fragility. But given that plants require frequent replanting, this is not a problem. Another drawback is that the roots grow through the moss. Therefore, it will be almost impossible to separate them from each other in the future.
- Charcoal . This is not only drainage, but also fertilizing, as well as a moisture-retaining agent and material that absorbs salts and disinfects the soil. Coal is placed on the bottom of the pot in large pieces. There are no cons. But there is a nuance - it alkalizes the soil. And this is harmful if the plant prefers a slightly acidic or acidic soil reaction.
- Vermiculite . It absorbs water along with nutrients. Therefore, the plant will be fed every time the material begins to release moisture. There are no cons.
- Perlite . This is another one of the best materials for creating drainage. But it's expensive. Perhaps this is its only drawback.
Drainage materials
Only materials of inorganic origin are suitable for creating a drainage layer. Moreover, they must be chemically neutral and have good resistance to destruction and oxidation. For example, marble chips are absolutely not suitable for drainage, since with prolonged interaction with water, they significantly reduce the acidity of the soil, making it excessively alkaline. Fine materials, such as gravel or sand, are also not particularly suitable as primary drainage. Over time, they become thoroughly compacted and clog the drainage holes.
Expanded clay
It is for this material that the word “Drainage” has become a household name among amateur flower growers. It is under this name that it is sold. What is the difference between construction expanded clay and drainage, “flower” expanded clay? Yes, actually nothing. In any case, from the point of view of the source material and manufacturing technology. In both cases, these are burnt lumps of clay. But there is still a difference. Firstly, before going on sale, it is washed and cleared of dirt and dust, and secondly, the drainage expanded clay is calibrated according to the size of the fraction. Therefore, on sale you can find expanded clay of small, medium and large fractions from 5 to 20 millimeters. It is selected based on the size of the flower pot and the diameter of the drainage holes. Balls - granules should not clog the holes or spill through them.
How to create proper drainage
- You need to start with the drainage holes in the pot. As I already noted, their size and number depend on the type of plant and the pot itself. In most cases, they are guided by this rule: the higher the pot, the more holes (up to five). For a low and wide pot, two are enough. There is no point in making holes with a diameter of more than one centimeter. Their usual size is from 0.5 to 1 centimeter. If you use pots that initially have large holes, then to prevent drainage material and soil from spilling out, cover the holes with a mesh.
- For each planned transplant, create a new drainage layer. It is advisable to use fresh drainage material. Although pebbles, expanded clay and clay shards can be reused after careful cleaning and treatment.
Pay special attention! If the transplant is done urgently due to a plant disease, the drainage layer is completely renewed and the old one is thrown away. He may be infected!
