How to prepare soil at home
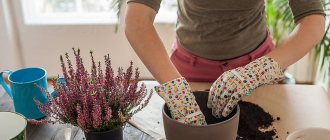
The ingredients must be mixed in a clean, treated container.
First, the base for the mixture is poured, and only then the additional ingredients. Lastly, disintegrants (sand, agroperlite) are added. Mix everything thoroughly so that the mass is homogeneous. In what soil to plant spathiphyllum:
- All ingredients must be fresh.
- You can open additional ingredients only immediately before mixing.
- Dosages must be correct.
- Before planting, be sure to measure the acidity level. If necessary, you will have to adjust it.
As soon as the substrate is ready and all the characteristics are suitable for the flower, you can begin planting.
How to choose a ready-made substrate
It is best to purchase a ready-made substrate at a gardening store rather than rack your brains over the question of what soil is needed for spathiphyllum and how to make it yourself.
Nowadays, it is not so difficult to find special soil for the flower of female happiness in stores. One of the suitable options is Vermion soil mixture. If you cannot find soil for spathiphyllum, a soil mixture for tropical plants or aroid crops is suitable. If you don’t find such soil mixtures, you can buy a universal soil, but you will have to carefully study the composition before purchasing and add additional ingredients.
It is better to choose a substrate whose packaging says that it is for spathiphyllum
What kind of soil is needed for spathiphyllum:
- Universal primer for the aroid family Seliger-Agro. The acidity level of this substrate is within 5-6. The composition includes river sand, peat, expanded clay, large-pored baking powder and a complex of mineral fertilizers specially selected for this group of plants.
- Another good substrate is BioMaster. The composition includes moss, biosoil, sand and charcoal.
- The substrate from Eco Sad is also suitable for planting the flower of female happiness. It consists of sand, moss, turf soil, peat, vermicompost, charcoal, agroperlite. All ingredients are laid in layers. You can mix them at your discretion.
Important! Universal soil mixtures usually have a high level of acidity and are too heavy for aroid crops. But purchased soil mixtures are not always suitable for plants. After transplantation, the first time you need to monitor the flower
And if it looks bad, you need to change the soil
After transplantation, the first time you need to monitor the flower. And if it looks bad, you need to change the soil
But purchased soil mixtures are not always suitable for plants. After transplantation, the first time you need to monitor the flower. And if it looks bad, you need to change the soil.
What can be added to purchased soil to improve it?
If you can’t find a soil with a suitable composition, you will have to buy a universal soil mixture and add other ingredients to it to improve it.
Before planting, sand, wood ash, coconut shavings, crushed tree bark or perlite are added to the universal soil for spathiphyllum.
Types of store-bought mixtures
Today, ready-made soil mixtures for Aroids are not a rare commodity. You can purchase it in specialized garden stores and flower shops. These products have approximately the same composition, but different manufacturers and, accordingly, prices.
- "Vermion" soil for spathiphyllum. The composition contains large quantities of organic components, nitrogen, as well as balanced levels of potassium and phosphorus. Suitable for all representatives of the Araceae family. The volume of soil in the bag is 2.5 liters, the price is 40 rubles.
- “Biomaster” for aroid plant species is a soil mixture made exclusively from natural, natural ingredients. Manufacturer – Russia. It is characterized by an optimal ratio of minerals for the full development of spathiphyllum. The composition includes sphagnum moss, which protects the roots of the plant from rotting. Volume 2 l, cost 54 rubles.
- "Agrosver" soil for spathiphyllum. The product is completely ready for use and does not require additional sterilization. The amount of soil mixture is designed for a pot with a capacity of up to 2 liters. The cost is about 30 rubles.
Pros and cons of ready-made soil and homemade soil
How to replant a fern - what soil and pot are needed
In order to choose one or another type of soil, you need to know all its advantages and disadvantages. And there are a lot of them in both species.
DIY soil mixtures
Pros of homemade mixtures:
- You can independently adjust the amount of required ingredients.
- The soil mixture can be made according to the exact recipe.
- During its preparation, you can add complex mineral fertilizers, which have a positive effect on flower growth.
- Saving money.
Disadvantages of a homemade substrate:
- It takes a lot of time to prepare.
- You need to follow the instructions exactly and measure the ingredients correctly.
- The soil may be contaminated with fungal spores and insect larvae.
Although the homemade option seems more economical, you will still have to spend money on purchasing additional ingredients.
Soil mixture for a flower - women's happiness
Ready mixes
Purchased products also have their advantages and disadvantages.
The disadvantages include:
- Inaccurate amount of micro- and macroelements in the composition. These ingredients are usually stated as a range (eg 6-10g per 100g soil).
- Inaccurate acidity level. When growing spathiphyllum, it must be specific.
- High-quality soil is expensive.
The advantages include ease of use. You also don’t have to waste time calculating ingredients and mixing them.
Possible problems with illiterate care and ways to solve them
Main consequences:
- Does not bloom - the reason may be in the pot or soil. For spathiphyllum to bloom, it is planted in a small flowerpot (what pot is suitable for spathiphyllum?). If this measure does not help, then the soil is not selected correctly. Perhaps there is not enough potassium or phosphorus with excess nitrogen. Then the leaves grow actively. This means you need to add the missing fertilizers.
- Root rotting - if action is not taken in time, the flower will die. The reason is excess humidity. Possibly little added drainage. The only thing that will help is replanting it in new soil, where you add activated carbon and moss. Trim rotten roots and dry them. After transplanting, do not water for 2-3 days.
- The plant is withering - perhaps the soil is too dense. This may be due to a lack of natural raising agents. Either the soil has become outdated and has become lumpy over time. A transplant will help.
- Black spots appear - this indicates high acidity in the soil or an excess of fertilizers. Need an urgent transplant.
- The appearance of yellow spots - the leaves turn yellow, while the veins remain green. Possible iron deficiency. Spraying with iron chelate will help. It is better to replant in new soil.
- Parasites on the plant - most likely insects lived in the soil. Or it was poorly processed. It is necessary to replant and treat the soil and drainage.
Spathiphyllum is a beautiful and unpretentious flower. But it has special care features. It is not difficult to follow the rules and know the preferences of the plant. But it will protect you from problems and diseases. Moreover, the flower is picky mainly about the soil.
If you find an error, please select a piece of text and press Ctrl+Enter.
What kind of soil do aroid plants need?
@ Prajak stock.adobe.com Syngonium after transplant
Before choosing the most favorable soil for aroids, you need to understand what conditions do they live in nature? Most often they grow in the humid tropics, in areas with wetlands, near bodies of water and near rivers. The soil in such a zone is enriched with humus, and the basis is peat. Therefore, home-made soil or a purchased composition must meet the following criteria:
- easy;
- loose;
- breathable;
- wet.
It is also worth paying attention to the fact that the soil should be slightly acidic.
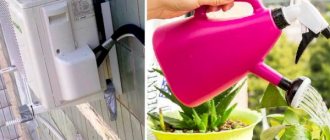
To increase breathability, washed and additionally purified coarse sand is added to the soil, and drainage is arranged at the bottom of the flowerpot.
The standard (universal) soil mixture has high acidity, but it can be reduced by adding ash or slaked lime.
How to choose a purchased mixture?
Ready-made mixtures are sold in flower shops, gardening departments, and on the market. There is a special soil for spathiphyllum. But it is also suitable for araceae, the family of which the flower belongs to.
However, it is worth considering that the mixture is not suitable for anthurium. It is also of the aroid family, but prefers low-lying peat. And all other related flowers love the mount. Such peat becomes compacted over time, which is detrimental to the root system of spathiphyllum.
Ready-made soils from different manufacturers vary in price and composition:
- There are completely natural soils, using natural components, for example, Russian-made “Biomaster” for aroids. Price per package of 2 kg from 50 rubles. It contains sphagnum moss.
- From cheap mixtures "Agrosver" for spathiphyllum. It is completely ready for planting and transplanting. The components are sterilized. For a package of 2 kg from 30 rubles.
- More expensive "Vermion" for aroids. It contains a lot of nitrogen, organic matter, potassium and phosphorus. Price per package of 2.5 kg from 40 rubles.
When choosing soil you need to focus on:
- to customer reviews;
- description of the composition (a bona fide manufacturer indicates all the components of the soil);
- what plants is it intended for?
- tips for use.
Plant nutrition
Do not forget also about fertilizers, which contribute to full development. It is important to add nutrients to the diet of indoor exotics. During flowering, the amount of fertilizing should be on average 3 times a month, with a predominance of potassium and phosphorus.
During the growth process it is better to use nitrogen fertilizers. When the flower is dormant, it should be fed no more than once a month. Mineral preparations must be applied exclusively to wet roots and after the main watering.
Buy ready-made soil or make it yourself – it’s up to you. The correctly selected composition of the soil flower mixture guarantees that the spaciphyllum will not only calmly adapt after transplantation, but will also grow and bloom to the delight of everyone.
Stages of spathiphyllum transplantation
- Land preparation. It is correct to buy soil for transplanting spathiphyllum at home in a specialized store. So the composition and concentration of nutrients will correspond to the requirements of the plant. If it is not possible to buy ready-made soil for spathiphyllum, then you can prepare it yourself. You need to replant in slightly acidic soil. It is made up of turf soil, leaf soil, peat, and coarse river sand. It is also recommended to add additives to the soil in the form of charcoal, brick chips, and superphosphate.
- Preparing a pot or flowerpot. The choice of container for transplanting spathiphyllum at home depends on the size of the old pot. If you plan to leave the plant intact without planting the children, then you should take a pot two to three sizes larger than the previous one. When planting, you will need additional containers for new plants. When choosing what material the new container will be made of, you should give preference to natural clay. A drainage layer of expanded clay (2 cm) must be placed on the bottom of the new pot.
- Preparing the plant for transplantation. On the day of the planned transplant at home, the pot with spathiphyllum is well watered so that the soil becomes moist. This will make it easier to remove the plant from the pot and, if necessary, divide the rhizomes. Use a garden spatula to walk along the edge of the old pot, digging up the roots. The plant, along with the earthen lump, is pulled out of the container. The roots of an adult plant tightly entwine the entire soil. It is at this stage that spathiphyllum blooms. The root system must be gently cleaned of drainage and old soil. If the plant has flower stalks, then it is worth cutting them off with pruning shears so that it can use all its strength to take root in the new pot. Dried and wilted leaves are carefully removed or, if yielding, torn off.
- Rhizome division. Several rosettes can be separated from the entire mass of plants. This is the easiest way to propagate spathiphyllum at home. If it has not been replanted for a long time, then there may be a lot of young plants in the pot. When separating the children, the main task is to preserve the powerful rhizome behind each rosette of leaves. After dividing, you should inspect the roots. Rotten and too long ones are cut off.
- Planting spathiphyllum. To transplant spathiphyllum according to the rules at home, you need to follow simple tips. You need to replant carefully. Prepared soil is poured onto the expanded clay laid at the bottom of the pot or cache-pot up to half the volume. Spathiphyllum is placed in the middle of the pot and the root system is distributed over the surface. Next, add the substrate to the desired level. The plant should not be deepened into the soil, even if the root buds do not reach it. After some time, they will reach the ground and strengthen the flower even better. When the soil is poured, it should be compacted a little so that the plant does not sway and sits tightly in the ground. Then the spathiphyllum plantings are watered abundantly to eliminate voids in the soil. If at the end of watering a depression is formed, then it is necessary to add more soil and repeat the procedure of compacting and watering. After all manipulations, the leaves are sprayed to wash away dust and dirt.
- Caring for a transplanted plant. In the first month in a new pot, spathiphyllum is very demanding on humidity. Many gardeners even recommend setting up a mini-greenhouse for it. This is quite easy to do. You can place the plant along with the pots in a plastic bag and the greenhouse is ready. Spathiphyllum leaves need frequent spraying from a spray bottle. Spraying is best done early in the morning and at dusk and preferably twice a day. The soil should not be allowed to dry out, so it should be watered as soon as the top layer of soil dries out a little. To speed up root formation, the plant can be watered once with “Kornevin” or another preparation that stimulates root formation. You can also use root or foliar feeding with special fertilizers. It should be remembered that the plant will not bloom until the root system completely entwines the pot from the inside.
Popular articles Spathiphyllum cupido: caring for the plant at home
Proper transplantation of spathiphyllum and care at home after it will help the plant to recover and grow its root system in a short time. A healthy plant will delight with lush flowering and beautiful succulent foliage.
Natural conditions
To understand how to successfully grow “female happiness,” you should familiarize yourself with the conditions in which this plant grows in nature. Spathiphyllum is native to South American and Malaysian tropical forests. Favorite places of growth are flooded or marshy areas, the banks of reservoirs.
You may be interested in: How to plant an aloe shoot without a root: methods, basic rules and recommendations
That is, in the usual habitat - high air humidity, loose and damp slightly acidic soil. In such conditions, “female happiness” successfully grows and blooms. And what conclusion follows from this? What soil is suitable for spathiphyllum? In the natural environment, soil includes fallen leaves, rotten branches, charcoal and compost. Based on this knowledge, you can create your own nutritional mixture.
You may be interested in: How to care for a Port Sunlight rose? Photos and reviews
Should the land for planting and replanting be different?
Growing an exotic flower from seeds is labor-intensive and does not always bring the desired results. When a gardener has such planting material in his hands, the question may arise: what kind of soil is needed to germinate spathiphyllum?
To renew the soil, sometimes replace the top layer in the pot
For producing seedlings, a sand-peat mixture is most suitable, as it is easier to maintain the required level of humidity and breathability. After the true leaves appear on the seedlings, they are dropped into the substrate with the addition of other components necessary for spathiphyllum.
In what soil should I plant an adult spathiphyllum? A mature specimen of a flower is transplanted into soil with a recommended composition close to natural.
How to ensure suitable soil when planting in open ground?
Sometimes gardeners use lush spathiphyllum bushes for landscaping their garden plots in the summer. When transferring the flower to open ground for the summer, dig a planting hole, drain it well and fill it with a suitable substrate.
What problems are caused by an incorrectly selected substrate?
Coming from South American forests, spathiphyllum is an unpretentious indoor plant. However, like many other flowers, it has its own nuances in growing. Both excessive watering and drought are contraindicated for it. If the plant is not planted in soil with moderate humidity, various pests may appear on the leaves, yellow and dark spots will appear. A lump of earth that does not have sufficient looseness will not allow the roots to breathe. Even proper watering will not avoid problems. Therefore, the choice of soil must be approached with all responsibility. When the leaves become stained or become a “residence” for pests, the problem lies precisely in the incorrectly selected substrate. To prevent this from happening, you need to immediately take the right soil.
Terms and rules of transplantation
The best time to transplant spathiphyllum is the end of winter - the beginning of spring. For young plants, the procedure is required annually. For three-year-old specimens, transplantation is carried out as needed, but at least once every three to four years. When the roots of the flower fill the entire pot, it is necessary to replant.
Features of plant transplantation:
- Before the procedure, the container is doused with boiling water. A drainage layer is placed at the bottom. Then comes filling with the nutrient mixture.
- The pot with the plant is placed on oilcloth and the bush is carefully pulled out. To pull it out faster, it is better to moisten the soil generously in the container.
- The root is freed from expanded clay crumbs and soil.
- Using scissors or a sharp knife, trim flower stalks, dry stems, and the bases of old leaves. If the bush is a very overgrown clump, then you can separate parts from it along with a healthy and strong rhizome for propagation.
All that remains is to plant the prepared bush of the plant in a new pot, sprinkle it with soil and water it generously. Replanting spathiphyllum means rejuvenating it, giving space for its further growth and flowering.
Preparation for use and soil laying technology
Before planting a flower, it is necessary to treat the pot, substrate and drainage. The pot is washed with soap, doused with boiling water and allowed to dry. Planting in a wet container is strictly prohibited. The soil is disinfected.
You can do this in 4 ways:
- Pour in a solution of potassium permanganate (1%).
- Heat in the oven or microwave at a temperature of +90…+100°C.
- Steam in a large container: pour 1/2 or 1/3 of water into it, place a colander covered with a cloth on top, add soil, cover with a lid. The soil should be kept above boiling water for 20–30 minutes.
- Freeze twice.
The drainage also needs to be treated, but only if it is prepared with your own hands. Purchased drainage material does not require treatment. The drainage is washed, poured with boiling water or boiled for 5 minutes.
What microelements does spathiphyllum need?
The plant has its own specific feeding requirements. In particular, it practically does not need organic substances, which are so necessary for many other indoor flowers. All he needs in this regard is a small amount of them for foliage growth in order to increase the vegetative mass. But if you overdo it even a little with organics, you can forget about the flowering of “female happiness.”
But this indoor flower needs a wide variety of minerals. In addition to the usual set (potassium, phosphorus, nitrogen and magnesium), it is advisable to include iron, copper, manganese, boron and sulfur in the fertilizer complex.
Which container is not suitable?
- A young spathiphyllum of a small plant cannot be planted immediately in a large container, since it will not be able to grow in it at all (how to plant spathiphyllum?).
- It is better not to use wooden or glass pots for growing this flower, otherwise there is a high probability of rotting of the root system.
- If you want to use a dark or transparent flowerpot, it is better to place it in a flowerpot to protect the roots from excessive heat.
- In no case should you choose a deep and narrow flowerpot, since the root system of spathiphyllum has a peculiarity: it develops in width and not in depth.
Spathiphyllum transplant
After purchasing “female happiness,” it is recommended that after 2-3 weeks you transplant it into fresh soil that has the necessary looseness and nutritional value. This procedure ensures good development of the plant.
Then the plant is regularly transplanted into a new pot, which is slightly larger in size than the previous container.
Until the age of three, it is recommended to replant spathiphyllum into self-made or purchased suitable soil annually. Then a three-year interval is made between transplants. The main criterion for the need to replace the pot is the appearance of roots in the drainage hole.
Before planting spathiphyllum in a loose, nutrient-rich substrate, a layer of drainage about 20 mm thick made of expanded clay, crushed brick or large pebbles (crushed stone) is placed on the bottom of the pot.
Then pour some fresh soil on which the roots of the flower are placed. When replanting, it is recommended to use the method of transshipment with an earthen ball so as not to damage the roots. Carefully fill the voids in the pot with soil, lightly tamping the layers.
The best period for transplantation is spring. If signs of disease or pest damage appear, the procedure is carried out at any time of the year. In such a situation, the plant will need to be watered well and then removed from the old pot.
In a separate container, prepare a disinfectant solution according to the instructions, in which the root system is washed, completely freeing it from soil particles. Cut off rotten and old leaves and damaged roots. Now the plant is ready for planting.
The transplanted plant is watered and left in the shade for a week, creating dormant conditions for better adaptation. Then the pot is transferred to a lighted place with protection from excessively bright sun, the leaf plates are sprayed with soft, settled water, and the condition of the substrate in the pot is monitored so that it is slightly moistened.
Popular articles How quickly boletuses grow after rain
An air humidifier is installed in the room while the heating radiators are operating. You can place a cup of water on the battery.
The flower is not fed for a month and a half. Then the standard scheme for applying ready-made mineral fertilizers is used for spathiphyllum. During the growing season, this procedure is carried out weekly. In the cold season, a monthly interval is observed.
How to choose a purchased mixture?
Ready-made mixtures are sold in flower shops, gardening departments, and on the market. There is a special soil for spathiphyllum. But it is also suitable for araceae, the family of which the flower belongs to.
However, it is worth considering that the mixture is not suitable for anthurium. It is also of the aroid family, but prefers low-lying peat. And all other related flowers love the mount. Such peat becomes compacted over time, which is detrimental to the root system of spathiphyllum.
Ready-made soils from different manufacturers vary in price and composition:
- There are completely natural soils, using natural components, for example, Russian-made “Biomaster” for aroids. Price per package of 2 kg from 50 rubles. It contains sphagnum moss.
- From cheap mixtures "Agrosver" for spathiphyllum. It is completely ready for planting and transplanting. The components are sterilized. For a package of 2 kg from 30 rubles.
- More expensive "Vermion" for aroids. It contains a lot of nitrogen, organic matter, potassium and phosphorus. Price per package of 2.5 kg from 40 rubles.
When choosing soil you need to focus on:
- to customer reviews;
- description of the composition (a bona fide manufacturer indicates all the components of the soil);
- what plants is it intended for?
- tips for use.
What should you consider when choosing?
The variety that is presented to customers in stores is seriously confusing. Therefore, before purchasing a container for spathiphyllum, it is better to arm yourself with information, and only then go to the store.
Size
- A pot with a diameter of 9–10 cm is perfect for spathiphyllums with a height of 5–10 cm. This size will be ideal for the rapid development of the plant’s root system.
- For flowers that are 2–3 years old, you can purchase a container with a diameter of 18–20 cm. The main thing to remember is that the spathiphyllum rhizome grows to the sides, not down, so the pot should be wide and shallow.
Material
Suitable materials for growing spathiphyllum include plastic, wood, and in rare cases glass and ceramics, but gardeners prefer the latter due to a number of advantages:
- Pots made of porous ceramics allow the plant to breathe and remove excess moisture from the substrate through the walls of the pot.
- This material is environmentally friendly, and therefore absolutely harmless to spathiphyllums and any other plants as well.
- Ceramics are perfect for any type of interior because they look expensive and solid.
The second most popular material is plastic. Its main advantage is its very low price, but, unfortunately, that’s where its advantages end. In such containers, plants will not be able to breathe, and they also often rot.
The difference between old and new containers
The new container for spathiphyllum should be slightly larger (in particular, 3 cm in diameter) than the previous one if it is being replanted regularly (once every 1 to 2 years), but a new pot may be required in other cases:
- When propagating a plant by dividing the rhizome, you need a pot that is 2–3 times smaller than the capacity of the plant divided into parts.
- Spathiphyllum, which has stopped its active growth, can increase the size of the pot by about two cm every 2–3 years, adding substrate if necessary.
Is it possible to plant flowers in transparent containers?
A transparent container for spathiphyllum can be made of glass or plastic. These materials cannot be called suitable for this plant, but its transparency will help novice gardeners avoid overwatering the substrate and thereby prevent rotting of the roots.
White deposits or traces of algae usually accumulate on the walls of the containers, which spoils the appearance of the plant, but this can be corrected by placing the pot in a flowerpot.
Folk methods of preparing fertilizers for spathiphyllum
How to fertilize spathiphyllum at home, if you do not use purchased fertilizers:
banana peel;
dried tea leaves;
coffee grounds;
eggshell.
These nutrients must be properly prepared and stored.
Banana peel
Contains a rich set of nutrients, especially potassium and various sugars, which the flower loves very much. The surest way to prepare an infusion is to feed spathiphyllum at home. For this:
Banana peels are washed with soap and dried.
Place in a three-liter jar and fill with water.
Leave for 4-5 days, then filter.
Dilute with ½ water and water the soil.
The mother liquor can be stored in the refrigerator for a month or more if the liquid does not ferment. Banana peel is a breeding ground for bacteria, so the water for the tincture is boiled and the jar is treated with steam.
You can make a preparation from dried skins. To do this, they are laid out on the windowsill, covered with gauze to prevent flies and wait until they darken and decrease in size. Then store in a fabric bag in a cool place or in the refrigerator. In the spring, one skin is ground into powder and added to the soil under the spathiphyllum.
Coffee grounds
It takes a long time for coffee grounds to dissolve in the soil, but the advantage is that there is no excess of nutrients - they are gradually released into the soil.
Dry grounds are used for mulching. This is suitable for spathiphyllum, since mulch protects the top layer from drying out. To prevent residual sugar from attracting midges and ants, it is washed with clean water and dried. Coffee grounds can simply be laid on the surface of the soil. The flower is usually watered in a tray, so it will not get wet or moldy.
Interesting! If a cat lives at home and likes to go to indoor plants to relieve itself, then coffee mulch will protect the plants
Tea brewing
Contains potassium and other trace elements - calcium, magnesium, sodium, iron. The most beneficial is loose leaf tea. It contains most of the unused nutrients that will benefit the flowers.
The advantage of tea leaves for feeding plants is that it contains microdoses of all the essential elements for flowering.
If you mix the tea leaves with the soil, this will improve air circulation, which spathiphyllum loves very much.
It is important that the brew is without additives - aromatic or flavoring. Green tea will also work
You can’t use wet sweet tea because it will attract midges. It is usually collected, washed and dried, then added to the soil. Under the influence of soil microorganisms, organic matter gradually dissolves.
Eggshell
Added to flowering plants as a source of calcium, phosphorus, potassium and magnesium, as well as drainage. After use, the eggshells are dried and stored in a cloth bag in a cool place. Before use, crush it a little so that it takes longer to decompose. It is enough to apply once a year in the spring.
Hello, dear readers! I am the creator of the Fertilizers.NET project. I am glad to see each of you on its pages. I hope the information from the article was useful. Always open to communication - comments, suggestions, what else you want to see on the site, and even criticism, you can write to me on VKontakte, Instagram or Facebook (round icons below). Peace and happiness to everyone!
Problems when growing spathiphyllum due to incorrectly selected soil
If you choose the wrong substrate for planting, the plant will immediately react to it.
Problems when growing due to improper soil:
- The lack of flowering is due to the incorrectly selected pot size and poor soil nutrients. The plant itself looks weakened and stretches strongly upward.
- Yellowing of foliage occurs due to lack of moisture in the soil. This occurs if the soil for the spathiphyllum was heavy. Gradually it becomes denser.
- Growth inhibition.
One of the most common problems is pests. This occurs especially often if the soil was mixed independently. If the soil and other ingredients were taken from the site, then the likelihood of the presence of larvae in them is very high. Therefore, if soil from the garden is used, it must be treated before planting. In general, Spathiphyllum is a fairly unpretentious house flower to care for.
Yellowing of foliage
If you plant a plant in improperly selected heavy soil, the soil will gradually settle, and because of this, moisture will accumulate and the air will stop circulating. This leads to rotting of the root system. As a result, the plant stops growing, inflorescences do not form, and the buds that have already appeared fall off.
Spathiphyllum is a rather capricious plant in terms of soil selection. If you choose the wrong substrate, the flower will immediately react to this by lack of flowering, yellowing of the foliage or its falling off, and other problems are also possible.
Subject Expert
Scientist in the field of agrochemistry, agro-soil science, general agriculture
Graduated from Omsk Agricultural Institute in 2004. He worked as an agronomist in seed production, a junior researcher at the Department of Agrochemistry, a junior researcher at the Laboratory of Agrochemistry at the Siberian Scientific Research Institute of Agriculture (SibNIISKh), Deputy Director of the Omsk Regional Design and Survey Station for Chemicalization of Agriculture, Head of the Laboratory of Agrochemistry, Head of the Department of Agriculture..
Choosing a pot
It is important to know what kind of pot is needed for spathiphyllum. Due to the wrong choice, it will get sick or stop blooming.
This plant prefers tight spaces, so you need to take an appropriate vessel - small and shallow. If there is a lot of space, flowering will not occur soon. It usually starts when the roots occupy the entire container.
When the spathiphyllum reaches a height of 30-40 centimeters, the transplantation should be stopped. For such a green pet, a container with a diameter of 17-20 centimeters will be optimal.
The material of the pot does not matter. But for large specimens it is advisable to take a more stable vessel. For example, a ceramic tub or pot. There must be drainage holes to allow excess water to drain away.
How to prepare the soil yourself?
For those who have just started growing indoor flowers, it is, of course, better to purchase a ready-made soil mixture. At home, you can also use purchased universal soil and, if possible, add sand. But first this sand must be washed or calcined for disinfection.
Experienced flower growers and hobbyists who have been growing flowers for many years prefer to prepare the soil themselves. Moreover, if you have a country house and a plot of land, and there is an opportunity to prepare various components for your special soil.
What are these components? First of all, this is gardening or turf land. Further, this is compost, rotted manure, coarse sand, crushed tree bark, rotted leaves or pine needles, peat (preferably high-moor, since low-lying peat is highly acidic), charcoal, ash. If we take the earth as a basis, then all other components in different variations are added in approximately a ratio of 1/10 (except for sand - you can add a little more of it).
Also currently on sale are components such as perlite, vermiculite, coconut flakes, and sphagnum moss. By the way, the latter, like charcoal, has bactericidal properties. Perlite is porous small granules of mountain-volcanic origin that add looseness and airiness to the soil. Vermiculite is a mineral from the mica group, which has a very complex chemical composition and, accordingly, enriches the soil with microelements.
When preparing the substrate for spathiphyllum, do not forget about fertilizers. The most convenient and simplest option is a complex fertilizer, which contains nitrogen, potassium, and phosphorus. There are a lot of such fertilizers available from different manufacturers.
What soil composition is necessary for a flower of female happiness
Soil for anthurium - what kind of soil is needed for a flower
Before buying soil, you need to carefully study the composition. But before that, you need to figure out which ingredients must be included in the soil mixture, and which should not be there. For successful cultivation, you need to know in advance what kind of soil spathiphyllum likes.
What soil is suitable for spathiphyllum and what should be included:
- sand, agroperlite or vermiculite;
- deciduous or turf land;
- peat;
- humus;
- superphosphate;
- charcoal.
Charcoal for soil
The base is deciduous or turf soil. There should be more of it in the composition. Peat and humus are added in equal quantities. Ingredients such as sand, agroperlite and charcoal should occupy no more than 10% of the total mass of the substrate.
Advice! You can use ground bricks and small pieces of tree bark as a leavening agent.
Soil for spathiphyllum: composition
The soil for spathiphyllum should be nutritious and loose. The flower removes many useful substances from the ground; adding them with each watering or simply increasing the intensity of fertilizing is not always convenient - this complicates care. For replanting, it is better to immediately use fertile components when preparing the substrate with your own hands, or enrich purchased soil with them.
Popular articles Description of the Polish mushroomLoosening elements
They have low nutritional value, but significantly improve aeration, some increase moisture capacity, others - water permeability. Some components shift the acidity of the earth in one direction or another. Increase:
- acidic peat – strong;
- pine litter – average;
- bark, sphagnum - unimportant.
Shift to a neutral reaction by diluting the soil:
- perlite;
- expanded clay;
- Red brick;
- coconut fiber;
- sand.
Pine bark
It improves the conductivity of water and air, contains a tiny amount of nutrients, and has a slightly higher acidity. It is better to choose bark with a fraction of 1-3 cm in the store - they sell it already disinfected.
Perlite
This material is free-flowing, lightweight, chemically inert, and is not contaminated by pathogens. It is an inflated volcanic rock. Used in almost all soils for indoor flowers.
Sphagnum
Peat moss with high moisture holding capacity and antiseptic properties makes the soil loose. It is not suitable as a soil base for planting spathiphyllum, but as one of the components it is very useful.
Expanded clay
It is produced by firing clay and comes in different fractions. Large ones are used as drainage, small ones are used to prepare flower soil. Lightweight porous material that absorbs or releases moisture as needed.
Coarse sand
Chemically inert material, increases the conductivity and looseness of the soil, does not allow moisture to stagnate in the pot. In indoor floriculture, fractions from 2 to 5 mm are used. Smaller ones stick the soil together and make maintenance more difficult.
High peat
It has an acidic reaction with a pH of 2.5-3.6 and a fibrous structure. It is in the initial stage of decomposition, moisture-intensive, and contains almost no nutrients.
Coniferous land
Thanks to the air structure and the inclusion of needles that have begun to decompose, it significantly increases the permeability of the soil. It is rarely sold in stores; it will take 3-5 years to prepare it yourself; if it is dug up in a pine forest, it needs to be disinfected. pH level 4.5-5.5
Coconut fiber
Pure organic material, chemically neutral, composed of approximately 30% short fibers and 70% coconut palm nut dust. Decomposes extremely slowly and is not prone to caking or settling. It retains its loose structure in any conditions. Increases volume 8-10 times when soaked.
Coco soil is a mixture of peat and coconut fiber. Both materials can be used as a base for flower soil.
Nutritional Components
The prepared soil usually contains enough fertilizer to replant the spathiphyllum and not need to fertilize it for 1-2 months. Those who like to make mixtures on their own should take care of the nutrition of the plant.
garden soil
It has high fertility, but can be quite dense. The soil is taken only from clean fallow where no herbicide treatment was carried out in the previous season. It must be clean, free of earthworms, insects, and weed roots.
Humus (rotted manure)
Waste from cattle or horses. Increases the nutritional value of the soil and promotes the growth of green mass. Completely rotted litter or rolled humus that has matured for several years is used, the acidity is about 8. It is disinfected before use.
Sod land
It is harvested from meadows and pastures overgrown with cereals or legumes. It has low fertility, passes well, but does not retain water.
Leaf ground
It is rotted litter with an airy structure, slightly acidic reaction and high nutritional value. Harvested under maple, fruit trees, hazel or linden. It is impossible to take soil under crops whose leaves contain tannins.
Proportions for composing soil
The soil for “women's happiness” must be loose and fertile. These are important conditions that must be observed when composing the substrate. So, what soil is suitable for spathiphyllum? There are several recipes:
1. Coniferous soils, sand, humus - in equal parts, garden soils - 2 parts, peat - 4 parts.
2. Garden soil and perlite - 2 parts each, peat and soil for orchids - 3 parts each.
3. Sod soil - 2 parts, leaf soil, peat, coarse sand - 1 part, charcoal, clay brick chips - half part.
4. Turf soil, river sand (or clay brick chips) - half a share, leaf soil, peat - 1 share.
5. Peat, humus, uncrushed leaf humus - 2 shares, a mixture of charcoal, crushed bark, coarse sand and brick chips - 1 share.
The given compositions are well suited for “female happiness”. The soil is nutritious, moisture-absorbing, oxygenated and not too acidic. To improve aeration, it is useful to add a little coconut fiber. There are other soil options for spathiphyllum. Which components are suitable depends on the flower itself and the conditions of its maintenance. The ideal recipe can only be found through experience. The main thing is not to forget about good drainage to avoid root rotting.
How to properly transplant spathiphyllum
Transplanting female happiness at home is not difficult, if you do not rush and act carefully, novice flower growers can do it. First, you should remove the plant from the pot, assess the condition of the root system, and see if the bush needs to be replanted.
Before starting work, it is recommended to prepare:
- pot;
- drainage;
- soil;
- sharp knife;
- crushed activated carbon.
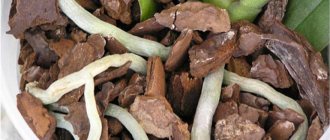
Spathiphyllum transplant after purchase
As soon as women's happiness is brought into the house, it needs to be removed from the pot and the earthen lump inspected. The plant has practically no stem, the rhizome is short, if it rots or the soil has turned sour, very soon there will be nothing to save. At the slightest sign of trouble, regardless of the season, a transplant is done with cleaning of the sucking shoots, washing and disinfection of the roots, and complete replacement of the substrate.
If everything is in order, the spathiphyllum is quarantined for 2 weeks. Next, depending on the state of the earthen coma, they act according to one of the scenarios:
- The root is healthy, but there is practically no soil left in the pot. This means: the substrate is not visible behind the tangled shoots, and not that they simply entwined the soil. The blooming spathiphyllum is transferred, trying not to disturb the lump at all, into a pot 2-3 cm larger than before. If there are no buds, first shake off a little of the old substrate, straighten some of the side roots, and remove the drainage.
- Spathiphyllum is healthy, the ground is clearly visible. In spring and the first half of summer, transplantation or transshipment is done. At the end of the growing season or during the dormant period, leave the plant until spring.
- The root is rotting, the substrate is spoiled. An urgent (emergency) transplant is needed. Peduncles must be cut off.
Transfer
The most labor-intensive of operations, especially if it involves dividing the bush. Usually it is successful even for beginners, the main thing is not to be afraid and to have a steady hand.
Step by step:
- Take the flower out of the pot.
- Use a long stick with a blunt end to remove excess soil. You need to help with your hands very carefully so as not to damage the fragile processes.
- Inspect the root.
- If it rots or is too old, the spathiphyllum is disassembled into sockets.
- Clean the sucking shoots. Cut off softened, decaying, shriveled sections of the rhizome. Leaves that have hopelessly lost their decorative effect along with petioles and remnants of peduncles are removed.
- Soak in a fungicide solution, for example, foundation, for 20-30 minutes.
- Sprinkle the wound surfaces with crushed activated carbon.
- Dry to form callus. If the cuts were made only on overgrowing shoots, 30 minutes is enough. When a knife was used to strip rhizomes or separate rosettes, it will take 1-2 hours.
- Plant in pots with drainage and fresh soil.
- Gently crush the substrate. You can tap the bottom on the edge of the table.
If the plant has undergone division of the bush, replanting is possible in two options:
- Place the rosettes in separate small pots.
- The shoots are planted in one large container - this will immediately result in a lush, beautiful bush.
Transshipment
This transplant is the easiest to perform, gentle, and the flower resumes growth almost immediately. Used for healthy spathiphyllum, which does not need to be divided. Step by step:
Remove the bush from the pot. Inspect the root. Remove old drainage. Free some of the lateral shoots from the soil
You need to act carefully, preferably with a stick with a blunt end. The lump cannot be destroyed. Take a pot 2-3 cm larger than before
Fill 1/3 or 1/4 with drainage and add 1 cm of fresh substrate. A plant is placed in the center. The free space is filled with soil. They are dying. Watered.
Transplanting a blooming spathiphyllum
It is better to perform the operation before the buds protrude. But the plant often produces them again in the fall or winter; choosing the right time is not always possible, given the crop’s need for annual replanting. It’s a pity to cut off flower stalks.
A healthy, well-groomed plant can be safely transferred to a larger pot during flowering. Wherein:
- they try not to disturb the earthen lump;
- the lateral roots do not straighten;
- further transplantation - as in the previous chapter, paragraphs 5-8.
Complete replanting with exposure of the roots, removal of the substrate, and stripping of the rhizome when spathiphyllum is flowering is not recommended. You need to choose from two options:
- wait until all the bedspreads grow old and turn green, cut them off;
- Before transplanting, remove young flower stalks and place in water.
Otherwise there will be problems. The plant simply cannot manage to bloom and restore damaged roots at the same time.
Problems in growing
Planting tulips in the ground in spring
Spathiphyllum, which is quite simple to care for at home, can still be affected by insect pests and diseases.
- Most often it is susceptible to invasion by aphids and spider mites. Affected specimens are wiped with soapy water. To improve the effect, you can add nicotine sulfate. During the treatment process, the soil must be protected from the ingress of this substance. 24 hours after spraying, the plant is washed, again covering the soil. To prevent the appearance of these parasites, the plant must be properly cared for by regularly wiping the leaves with a damp sponge.
- A fairly common problem that many gardeners face when caring for spathiphyllum is yellowing of the leaves. Most often this is caused by improper conditions for keeping the flower, violations of agricultural practices, as well as the appearance of a disease.
- This occurs due to the drying out of the earthen ball in the pot due to irregular watering. In this situation, the flower needs to be watered more often in small doses to completely soak the dry soil, while gradually increasing the amount of water.
- Yellowing of spathiphyllum can be caused by low air humidity. This problem can be corrected by frequently spraying the plant, as well as periodically adding water to the pan.
- Also, diseases in this flower can appear due to excess moisture. As a result, the leaves of the spathiphyllum darken and the roots die. Overwatering a flower can lead to its death. Such a plant can be saved if measures are taken in a timely manner. The flower is removed from the pot and the root system is examined. All rotten roots are removed and replanted in a new soil substrate.
- Blackening of the foliage of spathiphyllum can be caused by a lack or excess of nutrients. Most often this happens due to a lack of phosphorus-nitrogen fertilizers. This, like many other diseases, can be eliminated if you respond in a timely manner and carry out therapeutic measures.
- Not every gardener manages to achieve flowering of spathiphyllum. The reason for this is illiterate care. Perhaps the flower is planted in a pot that is too large. Until its roots fill the entire container, you shouldn’t even expect it to bloom. This situation can be changed by transplanting the plant into a smaller pot, then placing it in a cool place with a temperature of up to 13 degrees. This will encourage it to bloom.
Caring for this ornamental plant is not at all difficult, the main thing is to give it due attention and create all the necessary conditions for full growth