Why is weaving done?
Ficus benjamina is intertwined not only for the sake of the plant’s attractiveness, although this is also one of the goals of this procedure. Additional weaving tasks:
- ficus trees grow quickly. In order not to worry about increasing the growth of the stem, and not to construct awkward supports, you need to decorate it;
- the beautiful shapes of the flower trunk will fit perfectly into any composition of a small or large greenhouse;
- Those who like to tinker with indoor plants can pay a lot of attention to this kind of care.
Ficus in the interior
The main purpose of weaving is determined by the needs of the grower.
Photo
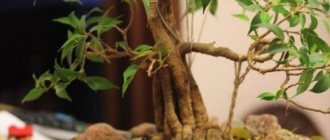
Look at the photo of what Ficus Benjamin looks like and how it grows at home.
Examples of photos showing how to braid trunks.
And a photo of how you can form a beautiful crown of a plant.
Types of ficus weaving
Pruning ficus benjamina at home
There are several options for ficus weaving, the choice depends on the preparation of the plant itself. There are several options for how to weave ficus.
Spiral
The most popular and simplest option for arranging a flowerpot with a beautiful ficus composition. Circular weaving is simple but effective. Produced by braiding a support. As it grows, the stem is bent along the contour of the selected base. After fixing the shape of the trunk, the support can be removed.
Spiral from the trunk
Hedge
This version of the composition is complex. First you need to plant the seedlings in a row. Next, the stems can be intertwined with each other according to different types.
Note! Honeycombs, diamonds, and ovals are often used.
Hedge
Pigtail
To weave a braid from Benjamin's trunk, you need to wait until the thickness of each seedling reaches 1 cm. Next, weaving is done according to the principle of how hair strands are folded.
Pigtail
Column
The difficulty may lie in merging adjacent trunks. Inexperienced gardeners can damage the flower too much, which can lead to the death of the specimen.
Column
Important! For each weaving option, an individual form of planting seedlings is produced. A beginner can handle spiral and braid weaving, but forming a hedge is more difficult. It is necessary not only to build the correct support, but also to splice the elements together.
How to prepare a plant
Transplanting Ficus Benjamin at home
In order to braid the trunk of a houseplant in the future according to the chosen pattern, it is worth preparing the seedlings correctly. This applies to planting, care, and weave formation. You can only braid the trunk of a young seedling, so you need to plant the sprouts, and then dull them for gradual processing. Stages of plant preparation:
- The trunk can be intertwined until the sprout reaches more than 10 cm in height. With a gradual increase in the plant, it is possible to splice adjacent trunks in accordance with a certain technology.
- To create an individual composition, you should use at least three seedlings. But it is better to plant more than five in one pot. For planting, it is recommended to use a container with a large diameter. It is preferable to use a square or round tub. The size of the container directly depends on the number of copies.
- It is worth creating compositions from shoots that have the same stem diameter. Otherwise, the final picture will look sloppy. To avoid the growth of one specimen and the depletion of another, you need to do the same watering, fertilizing and pruning.
- The seedlings need to be planted in March in order to begin the ficus weaving procedure in mid-May. Prepare soil rich in microelements and place a drainage layer on the bottom of the pot.
Principle of plant preparation
Note! Additionally, the trunks can be spliced as the ficus grows and develops. It is necessary to cut off parts of the already lignified trunks and press them tightly against each other.
If one of the plant preparation factors is not taken into account, the trunks will not intertwine, or the composition will turn out sloppy.
How to braid the trunk of a ficus benjamina without harming the plant?
You've probably seen beautiful Benjamin ficuses with intertwined trunks in the store more than once.
This process can take quite a long time if it is carried out at home.
The main thing is to know how to braid a ficus yourself so that its trunks and crown are smooth and beautiful. To do this, you need to know a few basic points in ficus weaving.
Weaving rules
To form an unusual trunk shape, it is recommended to plant at least three young ficus trees of the same height, no more than 15 centimeters, in one container. Their trunks should be half lignified.
As they grow, we will give them the necessary shape. To twist the trunks into a spiral, two plants will be enough, but with three this weaving will look more impressive.
The braid of their three ficus shoots begins to be braided when they reach a height of 13 centimeters.
Each next turn must be done as the plant grows. During the first time, we will need a soft woolen thread to tie the trunks so that they do not unravel. The thread needs to be rewound over time.
Typically this will happen every 2 months. If you notice white milk while rewinding the thread, then the plant trunk is already damaged. Just don’t rush to get upset. Nothing bad happened. Ficus will soon resume its strength. The trunks must be tied with threads strictly at an angle of 45 degrees.
If your ficus braid is high enough, then it is recommended to install additional support that can be removed over time.
Pigtail
We will need small ficus benjamina seedlings of the same height. Their thickness should vary from 1 to 1.5 centimeters.
- Young specimens need to be planted in one container next to each other. Such actions will allow us to carefully and beautifully braid the pigtail in the future.
- First of all, we remove all the small branches on the sides of the stems, leaving only the tops.
- Before weaving, be sure to water the plant well. If the soil is sufficiently moist, the stems will be as flexible as possible. A certain time interval must be maintained between watering and weaving. Watering in the evening - weaving in the morning.
- Surely everyone has an idea of how to braid a braid correctly. With ficus, things are a little different. We will have to braid the braid in parts, as the stems grow. Don't forget to tie the braided part of the plant.
- You can adjust the strength of the weaving solely at your discretion. If you weave the stems a little looser, gaps will appear between them, which will look very decorative on adult ficus trees. To ensure that the holes are the same, experts recommend inserting identical pencils between them.
Do you want the stems to all grow together into one? In this case, you need to carefully remove the bark from the trees in small parts at the joints. After approximately half a year, the trunks should grow together.
Spirals
To form a spiral from Ficus Benjamin, you just need to install a strong support near the planted cuttings and, as it grows, carefully braid the stem around it. Do not forget to remove side shoots. Over time, the support will need to be removed and you will have an amazing tree.
It is also possible to weave two or even four trunks.
Hedge
As soon as you can form a spiral even with your eyes closed, then you can start growing a real hedge. To carry out this fascinating process, you need to plant identical seedlings in one row, preferably at the same distance.
It is possible to plant seedlings in a circle. Young ficus Benjamina can be intertwined.
Lattice
For this type of weaving we will need from 6 to 8 seedlings. The main thing is that the number is even. Now we take a cardboard pipe and insert it into the middle, thereby crossing all adjacent trunks.
To form a lattice or a dense flat fence, we need to plant young plant specimens strictly in one line at a certain distance. Once the trunks reach the desired height, it is necessary to guide them into the desired position using polyethylene or coiled wire.
Remember to periodically loosen our clamps to avoid harming the plant.
The constant moisture of the coconut column will provoke the active development of air layering, which over time will intertwine and grow together. Also, do not forget about proper care of ficus benjamina.
(4 4.75 out of 5)
How to weave a ficus
How to care for ficus benjamina in a pot at home
To intertwine plant stems, you need to know some rules. There are several basic ones that relate to carrying out the procedure at an almost professional level:
- regardless of which weaving option will be used, you need to plant the seeds at a distance of 3-5 cm from each other;
- to make the trunk even more pliable and soft, you need to water it 12 hours before the procedure;
- During the growth process, you need to trim off the side shoots. The crown is formed at the very top;
- during work, you can control the force of weaving, evenly positioning each element of the composition. To achieve this, it is advisable to prepare a base frame;
- then you need to carefully lay the flexible stems according to a given pattern. If necessary, threads can become temporary fixation;
- Braiding must be done carefully so as not to overtighten the plant. Otherwise, the sprouts may die due to improper circulation of juice. The threads are applied at an angle of 45°.
Features of splicing
Important! The ficus grows quickly, but still it is necessary to start forming a new weaving element no earlier than after two months.
Artificial bonsai using beading technique
Another tree that will not need to be looked after as carefully as a living one can be made from beads. To create your own beaded bonsai you will need:
- Beads of several shades – approximately 80 g.
- Beaded wire 0.35, 1 and 3 mm.
- Brown threads for winding the trunk and branches.
- Glue.
- Plaster or alabaster.
- Brown paint.
- Decorations for supplying wood - moss, pebbles and more.
beaded bonsai
Master class on beaded bonsai step by step:
- First of all, make the branches. You need to start with the smallest elements of the crown. To do this, cut 45 cm of wire with a diameter of 0.35 mm, collect eight beads on it and form a loop from them. Repeat the same procedure on this piece of wire eight times.
- Twist the two resulting ends of the wire together, thus forming a small bud of loops. Trim the resulting stem to a length of 10 cm. In total, you need to make 150 of these buds.
- Select three small blanks and assemble them into one larger one, as in the photo. The result will be 50 buds.
- From the obtained parts you can already begin to form the branches of the future tree. Twist the three pieces together and wrap them with thread for a few centimeters. This results in the top of the branch and its base. In the same way, connect several more pieces of two or three stems. Attach the resulting bundles to the sides of the base a few millimeters below the top. The first, top branch of the bonsai is ready.
- Make a few more branches in the same way. Take 12 cm of single wire and tie them to the base. In this way, the second level of branches is formed, which has four branches.
- Below, attach two more formed branches with an additional bunch of leaves. This results in five branches. In fact, you can shape the trunk in any way you like and give the branches your own desired shape.
- Once all the branches are ready, you can begin assembling the tree itself. If you have any difficulties with how to make branches correctly, you can watch a video that describes the process of creating a bonsai in a very step-by-step manner. Take the thickest, three-millimeter wire and screw the branches of the first level to it. In the same way, attach the second and third level of branches to the improvised trunk. Wrap the trunk and joints with brown threads. Bend the remaining end of the thick wire downwards.
- An ordinary ceramic bowl or plastic mold is suitable for the role of a stand. Wrap the future stand in a plastic bag, prepare a plaster or alabaster solution and pour it into a plate or mold. Fix the woven tree in the solution and wait for it to harden.
- Mix some alabaster or plaster with glue and coat the trunk and branches of a beaded bonsai with the resulting mixture. When it dries a little, use a toothpick or needle to apply grooves to the main part of the tree, imitating bark. Dry the product completely.
- Holding the bag, remove the frozen plaster base from the mold.
- You can move on to painting the barrel. First, paint it with brown paint, then apply additional bronzer using a stiff brush or sponge.
- All that remains to be done is to decorate the finished bonsai. At this stage of work, the creator is given enormous scope for imagination, which will allow him to turn a tree made with his own hands into a real masterpiece.
It is not at all necessary to use only green beads when weaving your small artificial tree. You can, for example, replace it with yellow, and then you will get an autumn bonsai. You can turn a coniferous artificial tree into a cherry blossom tree or simply add a few blooming flowers.
Treatment of plant trunk
To make the weaving seem more attractive, you need to form the correct crown. To do this, trim off excess sprouts and shoots. If this is not done, the leaves will begin to weigh down the shoots and bend down.
For your information! If you do this correctly, the flower will develop normally, but additional processing is also needed.
How to trim
You cannot cut more than five branches at a time. The cut site must be treated with an antiseptic or activated carbon powder. Do not use too much product to cover exposed areas.
Further flower care
It is not enough to plant a flower correctly and decorate the trunk beautifully; you also need to take care of the ficus. The plant loves abundant watering and spraying of the crown. Therefore, it is important to wipe the leaves with a damp cloth at least once a week.
Caring for intertwined ficus
Braided trunks must be constantly inspected for damaged areas, the tightening force of the threads, and the principle of bending the trunks must be checked. The plant should be placed in partial shade to prevent the leaves from wilting.
You can decorate your home with a completely unique flower, creating a beautiful composition by intertwining the trunks of several ficus trees. The Benjamin variety is suitable for this. The principle of creating figures from plants is carried out thanks to the correct crease and bend of the trunk.
XXI CENTURY Candy Fudge Scented water
266 ₽ More details
Video baby monitor Motorola MBP36S (white)
12900 ₽ More details
Maternity raincoats
Possible problems
What to do if it doesn't grow?
There can be many reasons why a plant does not grow and feels poorly. Foliage may fall off and turn yellow as a result of improper care of indoor flowers. To ensure comfort for the plant, it is important that the lighting is bright, but diffused.
If you compare it with other flowers, the ficus foliage is small and thin. This means that the cause of the painful condition may be the rays of the sun. They lead to moisture evaporation and dehydration, and when the plant is deprived of this, it stops growing.
Reasons for slow growth
If you notice that your ficus is growing very slowly, this may be due to the following reasons:
- Insufficient light.
- Inconsistency of temperature conditions.
- Unsuitable air humidity.
- Frequent change of place.

