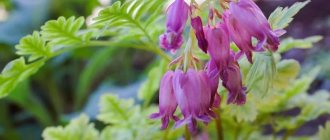
What is a fern
Ferns or mosses are among the most ancient representatives of the plant world of planet Earth. They once grew as tall trees, but today they grow as low shrubs, about 1 meter high. Reproduction of ferns, such as ostrich, horsetail, and bracken, occurs with the help of spores that form on the back of the leaf blades.
Indoor fern - decorative foliage plant
How do ferns reproduce in nature?
The development and reproduction of ferns in the wild takes a little longer than at home. The plant reproduces by spores or brood buds. Each season, plants of the Fern class form spores and go through sporophyte and gametophyte cycles.
Scheme and description of fern propagation naturally independently in nature:
- the formation of sporangia on fern leaves, within which spores form;
- after their complete formation, they are separated from the plates and spread in the water or around the area with the help of the wind;
- under good climatic conditions, a shoot grows from them, which, with the help of its rhizoid, is fixed in the ground;
- on the underside of this growth female and male reproductive cells appear, within which fertilization occurs;
- soon a zygote is born, which forms its root system and grows into the soil.
Note! Spores form only on spore leaves, and ferns also have sterile or asexual plates.
Structure and development of ferns
The appearance and structure of ferns differs from flowering plants. The most noticeable part of a fern is its fronds. They are large and dissected, many of them extend from the shoot of the plant, forming a rosette.
The shoots vary in structure depending on the type of fern . They can be quite tall or creep along the ground. Ferns have well-developed roots that form on their shoots. Some species form powerful rhizomes.
Their development cycle takes place with a change of 2 generations - sporophytes and gametophytes. A perennial specimen that has leaves and produces spores is called a sporophyte.
Ripe spores are carried by the wind and germinate in moist soil, giving rise to a new generation of ferns - gametophytes.
These are small green growths similar in appearance to moss. Male and female reproductive cells mature on them, which, under favorable conditions, merge with each other, forming a fertilized cell on the underside of the germ. The future sporophyte develops from it.
Basic ways to get a new plant at home
At home, ferns can be propagated in the garden in many ways. As a rule, they belong to the vegetative and spore method. Mosses propagate vegetatively by rooting lateral aerial shoots, planting brood buds and dividing the mother bush into several parts. The spore method involves collecting formed spores and sowing them in the ground.
Which method is the most effective
All methods are widely used by fern owners, so it is difficult to say exactly which one is more effective. If you choose a method with a higher survival rate, then it is spore sowing. However, it takes a long time.
The effectiveness of the method is determined by the type of fern, since each variety differs in its morphological structure.
Separation of the root system of an adult bush
Which method is more effective?
The easiest way to propagate ferns is vegetatively. These methods guarantee almost 100% survival rate of shoots, so they are usually the only ones used for indoor propagation of most plant species.
The easiest way to propagate ferns is vegetatively!
Sowing spores is a complex and time-consuming process .
It requires constant maintenance of the required temperature and soil moisture; even if the soil in the container dries out once, the entire crop dies. Therefore, propagation by spores in apartment conditions is ineffective. This method is used extremely rarely and only for species that do not produce layering and have a single growth point.
How and when to divide a bush
One of the most effective and shortest vegetative methods of propagation of club mosses is the division of an adult bush. Before carrying out this procedure, it is necessary to water the bush generously with water at room temperature in order to easily pull it out of the ground without damaging the root system.
How to propagate indoor fern by dividing the bush:
- Dig holes 40-60 centimeters deep in advance. Their bottom is covered with drainage material, and the top is sprinkled with soil mixture.
- Pull the plant out of the old soil and divide it into several equal parts.
- Each of them is planted in a separate hole or pot.
Thorough root watering is carried out once a week and watered from above twice using a watering can.
Important! You cannot divide a young bush with one root rosette.
Spores on the underside of leaves
Manifold
There are several types of indoor ferns that take root well at home:
- Maidenhair. This plant has thin, strong stems and graceful fronds. It prefers warmth, shade and moisture. It is advisable to grow this species in winter gardens and terrariums. Names: Radi, Delicate, Fine-haired, Venus hair.
- Asplenium. This type of indoor fern likes to be in the shade and in moist air. At home, several species are bred that are not similar to each other. These are Nesting and Bulbous, Viviparous.
- Nephrolepis. The plant needs space. The fronds are dissected, which ensures an original openwork effect. Nephrolepis sublime is commonly grown and is very easy to care for. Reproduction is carried out by dividing a large bush or by shoots.
- Blekhnum. The crown is 1 meter in diameter, and the rigid fronds are similar to a palm tree. Commonly grown blechnum humpback and brazilian.
- Davallia. The plant has thick rhizomes. That's why it is called hare's or squirrel's feet.
- Platycerium. The fern has large, showy leaves, like the antlers of a deer.
- Disconia. A mature plant can be 3 meters tall, so it is suitable for spacious rooms.
- Pelley. The plant prefers dry habitats. Pellea Roundifolia and Green are in demand.
- Polypodium. The leaves of the plant are heavily dissected.
Large plants look original in hanging pots and stands. Their feathery leaves are used to decorate bouquets. Torn fronds are quickly restored.
Features of care
How to care for ferns at home? The plant needs regular watering and maintaining comfortable humidity. Almost all types of ferns are drought intolerant. Optimal temperature and lighting are important. It is necessary to properly transplant and propagate ferns. In the absence of competent maintenance, it dies.
If the plant is located near other house flowers, you should check that its openwork leaves are not squeezed. The fronds are fragile and need free space. Damaged and dry leaves should be removed in a timely manner, ensuring the free development of young shoots.
How ferns reproduce by spores
This method is most effective in the spring after the soil has warmed up. Sowing in a pot is done in autumn or early spring.
How fern reproduces using spores at home:
- Moisten the soil with a spray bottle.
- Sprinkle spores on top.
- Sprinkle a 3-centimeter layer of soil on top.
- Cover the top with glass or plastic containers, since it is necessary to create a greenhouse effect.
- When sprouts appear, you will need to remove the cover every day for 2 hours.
How to root side shoots
Arrows in the form of tendrils appear on the leaf blades of garden ferns, which can be rooted in the ground. Next to the plant in which this green arrow has formed, you need to place a separate container with a nutrient substrate. It is important that this container is either the same height or slightly lower than the pot with the mother plant.
Two containers are placed side by side and a side shoot with a healthy and stable tendril is bent towards the ground. Lightly dig it in with soil. If necessary, secure with a pin or wire. After this, it is thoroughly moistened and both containers are left in a well-lit place.
How to propagate fern using brood buds
Another vegetative way by which a fern can reproduce at home is by planting formed buds on the leaves in the ground. Fern-like plants have the ability to grow lateral shoots on the petioles of their leaf blades. You cannot plant an unformed bud; it must produce small roots.
Carefully separate one shoot at a time and place them in a box with substrate. Moisten the soil and place it in a warm and bright place. It is necessary to create a humid microclimate for the growth of buds, so at first they can be covered with film.
As soon as the seedlings have 2-3 leaves, you can remove the film and plant them in separate containers.
Important! You should not immediately transplant the seedlings into a huge pot. During the first years of growth, the fern will still have to be moved to larger containers each spring.
Features of caring for sprouted ferns
Subsequent care of the fern after reproduction consists of the following activities:
- Air humidity. Small seedlings after transplantation are especially sensitive to humidity. It is necessary to try to maintain it at high levels, especially in winter with additional heating of the room. Every day you need to spray the bushes with a spray bottle, and if the air is particularly dry, the procedure can be repeated several times a day.
- Regular watering on schedule. You cannot violate the regime and ignore this procedure, but there is no need to overwater the plants. Young seedlings are especially susceptible to root rot due to stagnation of water in the soil. When planting, it is recommended to first cover the drainage at the bottom of the pot and only then fill in the substrate. Also, do not forget to drain excess liquid from the pan.
- Feeding. It is better to apply fertilizers in liquid form, dissolving the preparations in plain water and in low concentration. The procedure is carried out once every two weeks. It is necessary to use complex mineral preparations for fern-like shrubs. During this period, all minerals are necessary for the normal development of the plant, especially nitrogen, which helps to build up green mass.
- Lighting should be long, but slightly diffused, so as not to burn the delicate leaves. You need to place the box with seedlings on the south window in winter and move it to the east or west side with the arrival of warm, clear days.
- Temperature conditions. The most optimal indicators during this period are considered to be 22-25 ℃.
House ferns easily take root after propagation at home
Indoor ferns are decorative deciduous evergreen shrubs that have a pleasant appearance and can refresh any dull interior. It is placed in offices and other rooms to add coziness. Propagating ferns is an easy and effective process that can be done in many ways. The main thing is then to provide the seedlings with attentive and proper care so as not to completely lose all the planting material planted.
Source
Light, humidity and temperature for the plant
In order for the shrub to quickly develop and grow its ground crown well, it is recommended to adhere to certain requirements:
- Lighting – ferns of any variety require a large amount of diffused light. The bush can live in the shade of other plants, but then its appearance will not be so bright, noble, and the shade will not be saturated. But at the same time, the direct rays of the luminary scorch the delicate petals of the plates. Therefore, it is recommended to choose a location for the flowerpot so that the sun’s rays fall on the plant in the morning and evening, and in the heat of the afternoon the bush remains in the shade.
- Temperature – the most suitable temperature for a fern to live is +16..+23 C. In winter and summer, the degrees in the room where the plant is located increase noticeably. Therefore, it is worth spraying the area next to the bush. This will saturate the leaf plates with nutritious moisture. The minimum temperature at which a fern can survive is +5 C. A further decrease in degrees will only lead to the death of the bush.
- Humidity - spraying the plates must be done every day, especially in winter, when the room is overdried by heating devices. To increase humidity, you need to take a small towel and place it on the radiator after wetting it.
Not only will the formed microclimate be suitable for the plant, it will also be favorable for people.
What is a fern
Along with the usual rhizome organ for plants, ferns (Polypophyta), instead of stems, leaves, peduncles with seed pods, have developed a leaf-like shoot, scientifically called frond. Spores are formed on the fronds, with the help of which one of the methods of reproduction and development of ferns occurs.
Fern imprint on stone
Currently, about 10 thousand species of perennial ferns have been identified on Earth. In the temperate climate of Russia, they grow in moist, shady forests and are grown as a garden crop. The most common European species of Polypodiophyta include ostrich, bracken, and shieldweed. Bracken fern is harvested in early spring, soaked, dried and used as a food product.
How do ferns reproduce in nature?
The propagation of ferns has become the subject of study not only by botanists and plant growers; spore, vegetative, and asexual methods of propagation of ferns with diagrams and descriptions are taught to students in grades 5-6 in high school.
Spore reproduction of Polypodióphyta is divided into two cycles. They involve two genetically identical species of the same plant. At the first stage, fronds grow from the rhizomes, sporangia are formed on the lower surface of the shoots, and spores are formed in them. Clumps of sporangia with spores are collected in sacs (soruses). They are clearly visible on the lower sides of the fronds. Spores from them spill out onto the ground after ripening.
Sori with mature sporangia on the reverse side of an ostrich frond
At the second stage, a small, thin plant plate - a prothallus - is formed from spores on the surface of the earth. It contains sperm and eggs separated from each other by plant fibers. They can unite into a single cell only under the external influence of water.
During the rains, mature male cells swim to the eggs and form zygotes. The strongest of them forms an embryo. The embryo draws strength from the growth, which gradually dies. The embryo forms the root system and gives life to a new plant.
Note! The rhizome of Polypodiophyta is the underground part of the stem in which plants accumulate nutrients.
In some species of ferns, spores are not formed on all fronds. In the Ostrich feather fern, spores are formed in sporangia located on special fronds collected in the center of the plant. They differ in size, fabric thickness, and are collected in a bundle. Some people mistake these branches for flower stalks.
Ostrich with central fronds
Reproduction by rhizomatous tendrils
Rhizome tendrils do not grow in all types of ferns. Outwardly, they look the same as strawberry mustaches. Deepen the mustache into the soil, and after rooting, separate it from the mother plant and replant.
Determine
the kitchen or living room : at night, ferns emit carbon dioxide.
Protect it from direct rays, and among a group of plants, set aside a lower tier for it. To ensure that your young plant gains strength and growth, learn more about caring for ferns at home. And your efforts will be rewarded by contemplating a fountain of green branches of a descendant of the most ancient plant!
Note for those who like to know everything, you can additionally watch a video about the propagation of ferns. https://www.youtube.com/watch?v=t5sfCwbsSuc
How fern propagates at home
Indoor propagation and cultivation of Polypodióphyta is possible in several ways - by spores, planting shoots and vegetative methods:
- division of rhizomes;
- rooting of shoots;
- separation and rooting of brood buds.
The most common methods of propagation are spores and the separation of rhizomes and root shoots. In open ground conditions, for the propagation of fern-like crops, they mainly use the division of bushes during transplantation to a new growing location.
The structure of the root system and surface shoots of Polypodiophyta
How to propagate a fern by dividing a bush
The division of root shoots and rhizomes of plants in the garden is carried out in spring or early autumn. Indoor overgrown ferns can be propagated throughout the warm period by combining replanting with dividing the bush.
In the garden, the area for new cuttings is pre-prepared. For ferns, the best place to grow is in an area of the garden where the plants can be in partial shade.
Important! Bright sun and dense shade are not suitable for fern crops.
The soil for plants should be loose, fertile, and well-permeable to moisture. A special soil mixture can be purchased at a garden store or made independently from leaf soil, sand and peat (ratio 2:1:1). For indoor Polypodióphyta, a drainage layer is poured onto the bottom of the pots. The soil is moistened before transplanting plants.
The soil in the pot with the plant that is going to be planted is moistened 2 days before replanting. The procedure begins by turning the container with the fern on its side and starting to roll it on a flat surface, thus separating the earthen lump from the walls of the pot.
Holding the plant with one hand, turn the pot upside down, using rotational movements to pull out the bush along with the lump of earth. Inspect the condition of the roots and rosettes. The bush is divided in such a way that each division contains 2-3 rosettes with well-developed roots and growth buds.
Selecting soil and growing containers
In order for the planted sprout to take root well, it is necessary to select the optimal pot and soil in which the plant will grow. Soil can be purchased either in a specialized store or made independently. But in order to sow spores into the soil, you should make sure that there are special components in the soil.
For the optimal composition of the soil substrate, the following list of ingredients will be required:
River sand and leaf soil are taken in identical proportions (1:3).
For good rooting and rapid development of the root system, you can also use soil for violets. It contains the optimal amount of all nutrients required for planting a young fern sprout.
It is imperative that the planting soil be loose, well-permeable to nutrient oxygen and moisture.
To plant spores, the soil requires specific preparation. Initially, the earth is sifted, all large stones and solid particles, and various debris are removed from it. Experienced gardeners recommend disinfecting before rooting.
To do this, you need to wash the soil with a weak solution of Potassium Permanganate and place it in one layer on a baking sheet in the oven. The soil should be sterilized within several hours. Only after this can you prepare the planting container. If fern propagation is carried out by spores, then for sowing you will need a shallow, rectangular pot made of plastic or glass.
When planting plant sprouts in regular peas, you can choose any options. A clay container works great. It has the ability to absorb moisture. And, as needed, give it back to the soil. But you shouldn’t overwater the flowerpot. This situation can provoke the development of a fungal infection, which is very difficult to remove from a clay pot.
You can also use plastic containers for planting. But you need to remember that it is very unstable and does not allow air to pass through. Therefore, it is worth selecting large pots, but so that they are half the size of the total volume of fern branches. And in order for the plant to receive a sufficient amount of air, it is worth loosening more often.
How to propagate indoor fern by spores
Many gardeners treat Polypodióphyta spores as the seeds of ordinary indoor and garden flowers. Spores in different types of ferns mature at different times. A sign that the spores can be used as planting material is a change in the color of the sporangia to brown or brown.
The sporangia along with the spores are cut from the fronds and placed in a paper bag. You can start sowing after the spores have completely dried.
Attention! They will begin to fall out to the bottom of the bag as a brown powder, so the bag must be handled carefully to avoid spilling the seed material.
For planting, prepare shallow planting boxes and pots with drainage holes or a layer of expanded clay and small pieces of polystyrene foam. A soil mixture with the addition of coarse river sand, leaf soil, and peat is placed in the boxes. The spores can also germinate well in violet soil.
The soil is well moistened several days before planting. Before planting, the soil is compacted, the spores are placed on the surface of the soil, and they are not sprinkled with anything. Transparent caps made of plastic bags are put on the planting containers or covered with pieces of glass, that is, mini-greenhouse conditions are created. Periodically, the soil must be moistened and the boxes ventilated.
Important! The soil in the container with the sown spores must be constantly moistened, otherwise the process of fertilization of the eggs will not occur.
The process of spore germination is very long. The first stage of spore development is the appearance of moss-like growths. The root system will begin to form in a few weeks from the formed embryo, and until then the shoots receive moisture and nutrition through rhizoids - hairs formed on them after spore germination.
Rhizoids in the lower part of the shoots
Features of reproduction by spores
Growing a plant with spores is a rather labor-intensive and problematic way to obtain your own specimen. It is usually used by experienced breeders. The method is divided into several stages:
- Preparation of planting material - seeds can be purchased at a flower shop or online store. You can also collect spores yourself. They are collected from an adult plant, simultaneously with sporangia. Assembly is carried out at the moment when the sporangia acquire a brown tint. To ensure that they are fully ripe, immediately after harvesting they are placed in a paper envelope or bag. After a short period of time, the spores ripen and fall out on their own.
- Planting spores - drainage is placed on the bottom of containers prepared in advance. The soil substrate is poured on top, which is carefully leveled, compacted and moistened. After this, the spores are sown. Place glass on top of the container. This is required to create a microclimate for the plant for rapid germination.
- Caring for sprouted seedlings - you need to maintain +22 C, and also humidify the air well. It is forbidden to disturb the formed moss until the first true leaves appear.
The entire process from the beginning of planting to the germination of leaf blades takes about 2 months. Therefore, you need to be patient and persevering. The main thing is to follow optimal conditions during germination.
The rapid propagation process of ferns
Ferns can be quickly propagated by separating brood buds and side shoots.
Side shoots are thin tendrils that the fern forms along with the fronds. Their purpose is to provide the main plant with nutrients. The plant is capable of reproducing with its mustache on its own. When they come into contact with moist soil, the shoots grow into it and take root. The shoots take root within a month. They are separated from the mother bush and planted in specially prepared pots.
Brood buds are formed in some species of Polypodiophyta in the axils of leaf petioles. Under natural conditions, they fall off and take root in moist soil. At home, fronds with brood buds are bent to the ground, pinned with a V-shaped fastener, and sprinkled with moist soil. The buds send out shoots. When 3 young leaves are formed on the shoots, they are planted in individual containers.
Brood buds in the axils of the petioles