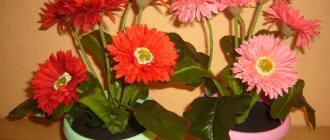
Replenishing the collection or the need to replant an overgrown plant forces novice gardeners to study propagation methods. They often wonder whether it is possible to propagate an orchid from a leaf. Experts give a clear answer: this is impossible. The only possible option is a leaf with a section of the trunk and a dormant bud. If it grows, you can get a baby and transplant it. But for this it is important to create suitable conditions for reproduction.
Structural features of orchids
Representatives of the Orchid family have special features that are characteristic only of these tropical plants. They are divided into two large groups according to growth types:
- monopodial;
- sympodial.
Orchids belonging to the first, monopodial type grow leaves at the top of the stem, developing upward. Each new leaf plate is larger in size than the previous one. Plants have a single growth point - the apical one.
The sympodial type is distinguished by the fact that the growth vector of flowers is directed not only upward, but also to the side. In such plants, the rhizome, which is scientifically called a rhizome, constantly produces young shoots. When they mature, they cease their development forever. Orchids can have several growth points. They arise from new shoots that turn into pseudobulbs over time.
It is not possible to propagate orchids from leaves; larger parts of the plant are suitable for this: lateral shoots and layering, pseudobulbs, seeds or apical cuttings. All of them have a growth point, which is absent from the leaf blade.
Propagation of orchids by leaf
Orchid leaves do not have cuttings. They cannot take root. Therefore, the answer to the question whether it is possible to grow an orchid from a leaf is clearly negative.
Why is this not feasible?
An indispensable condition for reproduction is the presence of a growth point. Unlike most indoor flowers, representatives of the Orchid family do not have a growing point on the stem from which leaf blades are formed. For example, violets can be grown from leaves for two reasons:
- the growth point is on the rosette;
- the leaves have cuttings that are dipped in water or a stimulating solution to produce roots.
Important! The orchid has leaves without stems. They consist exclusively of leaf plates that are not capable of producing roots.
With part of the trunk
Despite the absence of growth points on the leaves, it is possible to restore plants from one leaf blade. But this requires that in addition to it, the section of the trunk to which it is attached must be preserved.
Experienced gardeners call such areas “heels.” They can be rooted and new orchids can be obtained. The likelihood that part of the trunk with the leaf will take root is high. But for this, the flower must be provided with suitable growing conditions.
In nature, the plant is most often found in the tropics, where certain air humidity and temperature are maintained. When keeping at home, it is necessary to recreate natural conditions as closely as possible:
- Humidity. This figure should not fall below 50%. However, humidity above 80% has a detrimental effect on orchids and should be avoided.
- Temperature. Heat-loving inhabitants of tropical thickets feel comfortable at an air temperature of at least +280C.
The likelihood of successful heel rooting can be affected by the condition of the plant and the season. The most successful results are observed in spring or at the end of the flowering phase.
Important! Only healthy specimens are suitable for reproduction. An exception may be diseased plants that cannot be saved. In such situations, you can try to propagate the orchid by leaf.
How to propagate an orchid at home
It is not only possible, but even necessary to propagate an orchid at home, because over time the adult flower will grow so large that it will have to be transplanted into a larger pot. In the process, you will definitely have cuttings or parts of the bush left that can be transplanted into separate containers.
There are several ways to obtain a young culture. Each of them has its own characteristics, so let's look at the details of each method in more detail.
Vegetative propagation
This method is considered the simplest and is used for almost all indoor plants, including orchids.
The pot with the plant, which is used as a source of planting material, needs to be watered. This will make it easier for you to remove the flower from the soil. Carefully remove the plant from the container so as not to accidentally damage its roots. Next, we clean the root system from soil residues and cut it into pieces (Figure 1).
There should be at least three false bulbs left on each of them. All cuts must be treated with crushed charcoal (preferably charcoal) and the resulting seedlings must be planted in separate pots. It is not recommended to use seedlings with fewer pseudobulbs, since in this case there will be a risk that the seedlings will take too long to root.
Figure 1. Bush dividing method
This method is excellent for those who are planning to transplant an orchid or for flowers whose pseudobulbs have begun to emerge from the substrate.
Cuttings
The cutting method is more complex and is only suitable for certain varieties (Vanda, Epidendrum).
To get a new plant, you need to cut cuttings 10-15 cm long, using side shoots, faded flower branches or elongated stems (Figure 2). The cuts are made with a disinfected knife, and the edges of the cuttings must be treated with crushed coal, not only on the cuttings, but also on the mother plant.
Figure 2. Growing a plant from cuttings
The cuttings are immersed in a pot with a nutrient substrate and subsequently cared for in the same way as an adult plant.
Peduncle
The varieties described above can also be propagated from wilted flower stalks. But you should wait until the buds completely wither so that the development of a new plant does not become stress for the mother crop (Figure 3).
Reproduction by peduncles is carried out as follows:
- Make a cut at the base of the shoot and divide it into several cuttings so that each growth has one node with a bud.
- All prepared sprouts are treated with a fungicide and laid out on the surface of damp moss, immersing the bud in it.
- Cover the pots with cuttings with film and leave them under cover until a rosette forms.
Figure 3. Growing an orchid from a peduncle
While the cuttings are kept under the film, they must be sprayed regularly, avoiding over-moistening, in order to prevent rotting of the roots. If you don’t have moss, you can simply root the cuttings in water, but in any case the container should be covered with film so that a stable temperature and humidity regime is maintained under the shelter.
Children
Some varieties throw out side shoots (babies). These are already full-fledged small plants that can be used for planting in separate containers (Figure 4).
Young shoots are formed only if the room temperature is high and the soil contains enough nitrogen fertilizers. If you notice such a shoot on your orchid, just spray the flower and wait until roots appear on the baby. After this, it can be separated, treated with charcoal and planted in a separate pot with a nutrient substrate.
Seeds
This method of reproduction takes a lot of time and is rare at home. The unpopularity of the method is also explained by the fact that it is difficult to get seeds to germinate at home. The fact is that they do not have their own nutrient tissue, and they receive nutrients from the root sponge, so the necessary nutrient medium must be created independently.
Figure 4. Reproduction of a flower by “children”
Seed germination will take about 9 months, and small sprouts will turn into full-fledged plants only after three years, and the first flowering will occur after at least another 4 years, although sometimes this process takes about 10 years.
If you nevertheless decide to germinate the seeds yourself, you should fill the pots with crushed moss mixed with leaf soil and thoroughly moisten the mixture. Then the seeds are laid out on the surface and sterile conditions are established for them, while maintaining high humidity and temperature at +22+25 degrees. When the sprouts produce the first leaf, they are plucked, and when 4 full leaves grow, they are transplanted into pots.
Using Knudson's nutrient medium to awaken the growth point
When breeding orchids, Lewis Knudson's nutrient medium is used. Among inexperienced gardeners, there is a widespread belief that it can be used to root plants and awaken their growth points.
The purpose of any nutrient solution is to grow certain microorganisms. Knudson's medium is intended only for germinating seeds of representatives of the Orchid family. In rare cases, it is used for cell cloning.
This substrate is prepared on the basis of agar-agar, which is obtained from red and brown seaweed. Dissolving in water, it acquires a jelly-like consistency.
Advice! In order to awaken the growth point, you can use cytokinin paste. It is applied to the dormant bud with a clean needle or toothpick.
In the substrate
This rooting method is suitable for orchids that have at least a small part of the roots remaining. In this case, moss, vermiculite or a mixture of them can be used as a substrate. They proceed as follows:
- Select a wide, closing container. For example. You can use an empty aquarium or build an impromptu greenhouse from a plastic container or a large cut-off bottle.
- A layer of expanded clay is poured onto its bottom.
- A layer of pre-moistened moss is laid on top of the expanded clay.
- The orchid is placed on the moss so that its root collar is exposed to the air, and the intended place of root formation is in contact with the moist substrate.
When rooted, moss is an almost ideal substrate; it easily releases and accumulates moisture, the main thing is not to over-moisten it. The degree of moisture content can be determined as follows: a small amount of moss is squeezed in a fist. If moisture begins to release, it should be squeezed out. If your hand remains slightly damp, then everything is fine.
In the absence of moss, vermiculite is used as a substrate. It is also capable of releasing and storing water well. It allows you to quickly grow roots without the development of pathogenic microflora. This method can also be used if you need to grow the roots of a baby orchid.
Experienced gardeners also use special root formation stimulants. For example, kornevin is very suitable for rooting orchids. This product is available in powder form. It's very easy to use. A small amount of root is simply applied to the intended location of root formation.
Another secret to successful rooting on the substrate is high air humidity. That is why the rooted plant should be placed in a greenhouse. If, despite this, the orchid's leaves still begin to wrinkle, it needs to be helped by providing nutrition through the leaves. To do this, the orchid is immersed in warm, clean water with the addition of a small amount of sugar for several hours. After removal from the water, before placing it in a greenhouse, the plant should be dried.
Reproduction of orchids by children from leaf axils
This method of reproduction is one of the most common and simplest. Most often, dendrobiums and phalaenopsis are bred with its help. In plants that have reached two years of age, growth points appear in the axils of the leaves and on the peduncles. Children can develop from these buds. They are formed independently or as a result of stimulation. This procedure is carried out in February and consists of:
- reducing watering;
- cancellation of fertilizing;
- reducing night temperatures to +170C;
- maintaining the temperature during the day at about 270 C;
- protection from direct sunlight.
From the awakened buds, children develop with their own roots. This process takes from 5 to 8 months. After the baby grows 3-4 leaf blades and its own root system at least 5 cm long, it is separated from the mother plant and transplanted into a new pot:
- dry for 2-3 hours;
- treat the sections with activated carbon;
- pour substrate for orchids into the planting container;
- drop off the baby;
- place the pot in a mini-greenhouse.
How to propagate orchids at home using cuttings (Step by step)
- Using a sharpened knife, cut off the top of the old long stem so that the resulting cutting has at least 2 living aerial roots.
- We treat the cut with fungicides to avoid infection, and sprinkle it with powdered activated carbon.
- Then it is recommended to cover the injured area with garden varnish: this will speed up the healing process.
- Finally, the cuttings are planted in the prepared pot and placed in a greenhouse.
Long stems that have already bloomed can be cut into separate parts and on each of them leave 2 buds in the leaf axil. The resulting blanks are laid out on sphagnum moss or wet sand without burying them in the substrate. After this, the container with the cuttings is covered with glass or cellophane, resulting in a kind of greenhouse with high humidity. (It is imperative that this greenhouse is kept warm.) The cuttings themselves are cut into pieces of 10-15 cm.
After tiny white roots appear, the seedlings need to be planted in separate transparent containers, filled with water, which is changed every 1-2 days.
You should not place several “offsprings” in one glass, as their roots are intertwined, and separating them can cause harm to living organisms. To make the cuttings grow faster and gain strength, add a little special fertilizer to the water. If you notice that the shoots are developing too slowly, they can be treated with a special solution or phytohormone.
As soon as the root of a young plant grows to 4–5 cm, the flower can be placed in a pot with substrate and subsequently cared for as an adult orchid.
Immature orchids are more sensitive to sunlight, so they are kept in the shade.