General rules for cuttings
You can cut geraniums from February to September, but do not forget that survival rate and flowering depend on the chosen time. In March and September it is 80-90%. This is due to the fact that during these months the plant begins a period of growth and dormancy.
If the gardener wants to see flowers this year, then it is worth rooting it in March. Since a cutting planted a month later will bloom only the next year.
| Reproduction process | February | March | April-July | September |
| Efficiency | average | high | above average | high |
| Bloom | in summer | in July | next year | next year |
| Careful care | needed | not needed | not needed | needed |
| Survival rate | low | high | average | high |
When is the best time to take cuttings?
Cuttings of geraniums at home must be carried out within a certain time frame. Then the new young plants will take root well. If you want to get flowering bushes this year, then it is better to start propagation in the spring (March).
A delay of just a month will postpone the flowering period of the bushes to next year. For indoor plants, propagation by cuttings can be carried out all year round, but in winter the survival rate is reduced by half. In September, efficiency is high - at this time the bush begins to actively grow and develop. However, in this case, flowering occurs within a year.
Preparatory work
Cuttings are taken from an adult plant that has grown greatly and needs pruning. This procedure not only makes it possible to propagate planting material, but also to rejuvenate the crop. Since after a “haircut” a large number of young shoots appear, on which flowers form over time.
Cuttings for planting should be of the following height:
- 8-10 cm for tall varieties;
- 2-5 cm for short people.
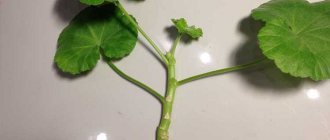
For propagation, shoots with 3-4 apical leaves directed at right angles to the main trunk are cut. Cutting is carried out with a sharp, disinfected knife or scalpel.
The cuttings are removed in the shade until the cut dries. The degree of readiness for planting can be determined by the appearance of a thin film. The cut area is treated with charcoal or brilliant green.
If a cutting with inflorescences or buds is chosen for cutting, they must be removed before rooting, otherwise the formation of roots may be delayed.
Plastic or peat pots with a volume of 200 ml are suitable for planting. A drainage hole is made at the bottom to allow water to drain out.
The planting substrate must be well-drained and nutritious. You can buy it at the store or prepare it yourself. The soil for geraniums should consist of peat, sand and perlite in a ratio of 1:1:1. For better rooting and disinfection, it is spilled with boiling water or a weak solution of potassium permanganate.
How to root geranium cuttings in the fall. Cuttings in spring and autumn
The principle of cutting geraniums in the fall does not differ from a similar spring procedure. The material is harvested before the start of active growth and maturation, so the March seedlings quickly take root and take root.
It is better to cut from healthy and developed plants that require planting after the winter period. Spring pruning of cuttings helps the flower form new shoots and promotes the formation of flower stalks. The strongest branches are shortened to 12-15 cm, leaving 3-4 leaves at the top. The cut areas should be treated with crushed activated charcoal or charcoal. The cuttings are dried at room temperature for 3-4 hours, and then they can be planted in the mother liquor. Flowering of young growth will begin by the first days of summer.
The queen cell is constructed from a plastic or wooden box; you can also propagate the plant in a large, but not deep, pot. The container must have holes. A layer of high-quality drainage is poured onto the bottom, then soil is laid. For geraniums, universal soil or a composition prepared independently is suitable. The mixture contains the following ingredients:
- 1 portion each of charcoal and sand;
- 2 parts turf and leaf soil;
- 2 servings of peat and leaf humus.
The components are thoroughly mixed. Before planting, the soil must be saturated with moisture and excess water allowed to drain. Charcoal can be replaced by treating the soil with a fungicide or a pale solution of potassium permanganate. Such measures will prevent the cuttings from rotting.
The shoots are planted in the mother plant in rows with intervals of 3 cm between them; the same distance should be maintained from one plant to another. The soil around the seedling is lightly pressed, no additional watering is required.
Plantings can be moistened only when the surface layer of soil has dried. If the indoor air is too dry, pelargonium requires regular spraying. The optimal temperature for germination is from +18 to +24°.
Greenhouse conditions for cuttings are extremely undesirable. High air humidity in the greenhouse contributes to rotting of the base of the shoot and the appearance of fungus. In a month, the young growth will begin to take root and several young leaves will appear at the top. After another month, the plant can be replanted in its main place.
If you propagate geraniums by cuttings in the fall, the plantings will begin to bloom next spring. New shoots can be harvested from a young and lush bush. Cutting flowers in winter is less favorable than at other times, but it can be done. To do this, you need to take care of installing additional daylighting and maintaining optimal temperature. Daylight hours should be between 12 and 14 hours to allow the plant to develop.
Rooting in the ground
A layer of drainage is placed in the prepared cups. It can be expanded clay, pebbles or foam. Cover with disinfected soil and install the cutting to a depth of 4 cm. The soil is compacted and shed generously. The cups are placed in the shade for several days for quick adaptation.
To ensure that root formation occurs quickly and efficiently, each cutting is sprinkled with Kornevin or Epin before planting.
After 3-4 days, the seedlings are transferred to a south-facing window, shaded from direct sunlight. For better rooting, the temperature in the room should be no higher than +16 degrees and no lower than +14. Watering is carried out only through a tray to avoid moisture getting on the leaves and the appearance of a black leg.
If the cutting develops well, then there is no need to cover it with film. But when limp and yellowed foliage appears, a microclimate is created for the plant by covering it with a jar or cellophane. After a short time, the flower will recover and begin to form.
Rooting time depends on the variety. On average, from the moment of planting until the roots appear, it takes 4-6 weeks. In transparent cups, the roots are clearly visible through the walls. And in peat containers, the formation of roots can be determined by the intensive growth of young foliage.
Caring for cuttings
Bright lighting is the key to success, but in the first days it is better to place the cuttings in a secluded place. Pelargonium cuttings in the future (during the entire rooting period) should not be placed in direct sun, but a lack of lighting will only lead to the loss of planting material. The brightest window sill with a diffuse screen, an eastern or western window - any option for a soft but bright light mode will do.
Pelargonium requires any room temperature above 18 degrees (ideally +21...+23 degrees). If plants are cut during the heating season, additional spraying or other measures to increase air humidity will not hurt.
You need to moisten the soil carefully, by bottom watering or along the edges of the pot, with a minimum amount of water. The main thing is to maintain light humidity and not allow the substrate to dry out completely. It is impossible to soak the cutting itself, stem and leaves, as well as allow dampness and waterlogging.
Rooting in water - step-by-step instructions
This is a simple and quick rooting method that even an inexperienced gardener can handle.
| Photo | Step-by-step instruction |
| We soak the prepared cuttings for several minutes in a growth stimulator. | |
| While the plant is being processed, prepare a jar or plastic cup. In a container with settled water, you need to dilute crushed activated carbon. It is necessary to prevent root rot and microbial development | |
| We lower the cuttings into water to ½ length | |
| We put the cups in a bright, shaded place from the sun. To prevent the water from blooming, we change it every 2-3 days, not forgetting to add coal | |
| After the roots appear, the cuttings need to be planted in a prepared substrate. |
In order for the plant to bloom beautifully, cuttings are planted in groups at a distance of 15-17 cm.
Propagation of geranium at home, video:
Preparation of planting material
We recommend that you read
How to propagate geraniums from cuttings at home? How to choose shoots? Such types of pelargonium as ivy-leaved (ampeloid), royal, zonal and fragrant are propagated by cuttings. Roots form on the stems cut from these flowers.
Many people think that it is better to propagate geraniums in the spring, since it is at this time that the plant’s dormant period ends and life processes become more active. But it is recommended to propagate pelargonium in the fall: from late August to early September. The fact is that during this period plants are pruned after flowering. Therefore, you can select strong cuttings for further rooting.
The disadvantage of autumn-winter propagation of geraniums is the slow formation of young roots and elongation of shoots. During the dormant period, flower buds are formed. It is better not to prune in spring, as pelargonium is preparing to bloom.
Since pelargonium can be propagated incorrectly, when cutting cuttings you must adhere to the following rules:
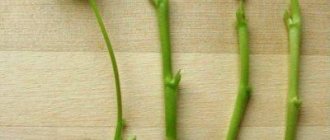
- 1For rooting, choose healthy and strong shoots. Shoots should be 7-15 cm long.
- 2The stalk is cut with a sharp blade or knife under the node. Before use, instruments are disinfected with alcohol or a weak solution of potassium permanganate. Under no circumstances should the escape be broken off.
- 3The top 2-3 leaves are left on the stem, and the rest are cut off. Large leaf blades are shortened by half to reduce the consumption of nutrients necessary for root formation.
- 4The shoot is left in a shaded place for 2-3 hours so that the cut dries. During this time, a film should form on it. Then the cut site is powdered with a root growth stimulator, for example Kornevin, or coal dust.
If cuttings of pelargonium are carried out in the spring, all buds on the plant are removed. This is done so that the beneficial substances are spent on the formation of new roots, and not on flowering. In a cut shoot, the cells begin to lose moisture due to the lack of a new portion of liquid. To survive, the cutting grows new roots. Therefore, it is placed in water or planted in moist soil. For geraniums, propagation by cuttings is the best method, which preserves varietal characteristics.
Care after rooting
After rooting, the young plant is transplanted to a permanent place. To do this, take a small pot, since in a spacious container it will intensively grow the root system to the detriment of flowering. Drainage is placed at the bottom, covered with nutritious, well-drained soil and a seedling is installed. The soil around is carefully compacted and spilled.
After planting, the crown is pinched to give the crop the shape of a bush. The pot is placed in a well-lit place, protected from direct sunlight and drafts. Watering should be moderate, after the top layer of soil has dried. Pelargonium does not tolerate spraying well, so it is better to moisten it through a tray.
Fertilizing is applied during the formation of buds. For this purpose, phosphorus-potassium fertilizers are used. For lush and long-lasting flowering, remove faded inflorescences in a timely manner.
Read about an interesting type of flower - Ficus Natasha.
Growing zonal pelargonium: care and reproduction
Everyone knows pelargonium. A regular on window sills, it delights with flowering from early spring to late autumn. When keeping zonal pelargoniums at home, you must remember that they come from South Africa and they will not bloom fully in the shade. Its maintenance is minimal: it needs an optimal amount of soil, sunlight and timely watering.
First of all, I would like to warn against purchasing rosebud, tulip, carnation and other types of varietal pelargoniums offered by the Chinese market or unscrupulous sellers. The varietal characteristics of pelargoniums are not transmitted during seed propagation; this is a huge selection work and is possible when special conditions are created.
Caring for zonal pelargonium
The most important thing when caring for indoor pets is to achieve their lush, bright, abundant and long-lasting flowering. Therefore, in order to get a beautiful flowering plant, a number of conditions must be met.
- Choose an initially healthy and strong plant.
- Choose a small pot for pelargonium. It is recommended to replant an adult specimen every 1-2 years, and possibly earlier depending on the condition of the root system (change the top layer of soil by adding fresh).
- Provide the flower with good natural light or artificial light for at least 6 hours a day. Pelargonium feels good on southern, western and eastern windows.
- Water and feed pelargonium in a timely manner as daylight hours increase.
- Ventilate the room where you grow pelargonium; it requires access to fresh air.
It is possible to keep pelargonium in open ground - the delicate inflorescences will enliven the veranda and create a bright color background. After the threat of frost has passed, it is advisable to plant the flowers under a canopy-shelter - to protect them from the scorching summer midday sun. Pelargonium can withstand short-term shading. For planting, it is better to choose areas on the south, east or west side.
Pinching pelargonium
To get a charming flowering bush of zonal pelargonium, in spring and summer you must pinch out the main stems. You don’t want to end up with a long, elongated stick with a couple of flowers covering the entire window, do you? Pinch your pet, and it will shoot out many lateral shoots, from which not 1-2 flowers can bloom, but at least 5.
Fertilizer for pelargonium
Fertilizer for flowering plants will help pelargonium absorb substances to form beautiful and juicy buds. The main rule when adding fertilizers is to thoroughly moisten the soil in the pot. Dry soil is not suitable for adding nutrients; before doing this, it must be watered with clean water.
Fertilizers must be applied regularly, in parallel with increasing daylight hours, once every 2 weeks until the end of August. Then we take a break until spring. A newly transplanted or diseased plant cannot be watered with fertilizers, otherwise you risk losing it forever.
Pruning pelargonium
We remove fading inflorescences and yellowing leaves without regret throughout the life of the pelargonium. In the spring, with the appearance of the first bright rays, the stems are radically trimmed to rejuvenate pelargonium. However, please note that this technique is only suitable for zonal pelargoniums. Extremely unsuitable for “royal” pelargoniums.
Soil for pelargonium
You can use ready-made soil for pelargoniums or make it yourself. The soil for pelargonium can be prepared from ordinary garden soil with the obligatory addition of fine river sand. Drainage in the form of expanded clay or whatever is on hand is also desirable - broken brick or fine gravel is quite suitable.
Watering pelargonium
Watering is regular, but do not forget that pelargonium is a South African guest, and overwatering is detrimental to it. It also does not require spraying. In winter, pelargonium is kept on a cool windowsill with minimal watering.
Reproduction of zonal pelargonium
Pelargonium is propagated by seeds and vegetatively by cuttings and leaves. Pelargonium cuttings have become most widespread. This is a relatively simple and affordable way for gardeners to get a new plant of the desired variety. Through seeds, F1 hybrids can be grown in an annual crop. This method is suitable if you plan to plant pelargonium in the garden or use the plant for landscaping city and park areas. Leaf propagation, due to its complexity and poor plant survival rate, is practically not used in amateur floriculture.
Propagation of pelargonium by cuttings
The best time for cuttings from zonal pelargoniums is spring and late summer. We select a strong stem without signs of woodiness, about 10-15 cm in size, cut at a right angle with sharp pruners (or whatever you have). The main thing in this process is to avoid the cut end of the stem from becoming terry. Dry the cut a little and place it in water for rooting. We are waiting for the formation of a slight thickening of the end of the stem, the appearance of the so-called. callus - root primordia. This usually happens within 5-10 days. You can, of course, immediately plant the cuttings in the ground, bypassing the rooting phase in water, but this requires a certain skill and some luck with the selection of soil.
Then we plant it in a pre-prepared pot with a diameter of 5-7 cm. Drainage is required, watering as it dries out. During the period of intensive growth of the root system, pelargonium cannot be placed in bright sun. The development of roots will be indicated by the appearance of new leaves on the plant. Then you can transplant it into a larger pot.
Propagation of pelargonium by leaves
Leaf propagation is possible, but extremely difficult and requires extremely highly qualified specialists. Used for propagation of very rare and valuable varieties of pelargonium. Almost inapplicable for the average gardener.
Propagation of pelargonium by seeds
Propagation by seeds is the easiest and most affordable way to grow a garden of zonal pelargoniums at home or in the garden. Nowadays there are a lot of seeds of a wide variety of pelargonium varieties on sale. Typically, these are hybrids that are used for one season. Their biggest drawback is the flowability of the flower petals themselves, since they were created specifically for gardening flower beds in outdoor conditions, and their flowability is determined by the characteristics of the variety. Otherwise, they are extremely cute and unpretentious, they bloom very readily.
Growing pelargonium from seeds
The best time to sow pelargonium seeds is January. You can plant in disposable transparent plastic cups with holes in the bottom - this makes it easier to observe the process of root formation. You can use soil special for geranium plants, for example, “Garden of Miracles for Geraniums.” Soil for cacti and succulents and any other soil with poor organic matter is also suitable.
Seeds germinate in 5-10 days at a temperature of 20°C. Seedlings do not tolerate flooding and the greenhouse effect. When germinating from seeds, additional lighting is desirable during the entire germination period for at least 6 hours daily.
Picking is required when two true leaves appear. After picking, when the fifth leaf appears, be sure to pinch the main stem, otherwise an elongated specimen with a thin stem is guaranteed. Next, when growing green mass, transfer it into a pot with a diameter of 5 to 12 cm, depending on the size of the root system.
To form a beautiful shape, you need to regularly turn the pots towards the light source and do not forget to pinch each emerging stem at the level of 2-3 pairs of leaves.
The period for the appearance of the first flowers during seed propagation of zonal pelargoniums is 6 months, so January seedlings will bloom no earlier than June. The best varieties for seed cultivation are F1 series hybrids.
Photos courtesy of “White Flower. Ufa"
Common Mistakes
Usually, beginners complain about the lack of flowering and the death of the plant. Although it is unpretentious in care, it still requires some attention. Common errors are presented in the table.
| Actions | Flaw | Surplus |
| Watering | Drying out of the earthen coma leads to the death of the flower | Root collar rotting |
| Fertilizers | Poor development, lack of flowering | Brittle and elongated stems, abundant flowering leads to rapid depletion of the plant, which leads to death |
| Trimming | Loss of decorative appearance | Lack of flower stalks |
Types of geraniums with a brief description
There are a large number of varieties of pelargonium. They vary in color, shape of leaves and flowers. Among the variety, four species are especially popular.
| Species name | Short description |
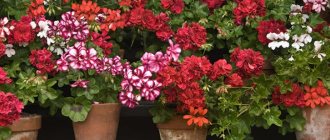
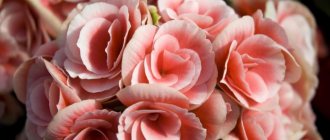
| The species is easy to care for and blooms profusely with bright inflorescences of various colors. Some varieties are darkened in the center. The leaf blade is rounded, with slight wavy edges. The number of petals depends on the variety: simple has 5 petals, semi-double has 6-8, double has 10 or more. With good care, blooms all year round. But it depends on the volume of the pot: the smaller it is, the more flower stalks the plant will produce |
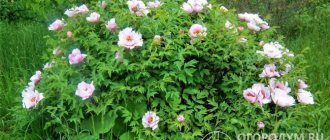
| Large-flowered species. The diameter of the flowers can reach up to 15 cm. They can be of various colors. But there is one peculiarity - each petal is decorated with a dark stripe. The plant grows up to half a meter and blooms for 4 months. Flowering occurs in the second year, the variety is very demanding in care |
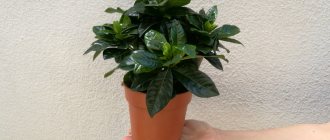
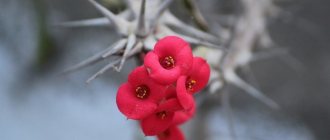
| Very fragrant look. When the leaf is damaged, the room is filled with a lemon, strawberry or ginger smell. The inflorescences are small, pink or purple. This species is used in cooking, cosmetology, medicine and for oil production. |
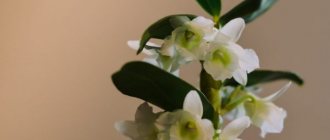
| The species reaches a meter in height and has thin and fragile shoots. Dark olive star-shaped foliage. Double or simple flowers of a wide variety of colors. Flowering occurs in summer, the flowers are small, 5 cm in diameter, last up to 4 months. The plant looks beautiful in hanging pots |
Geranium is a special and fragrant plant that even a novice gardener can grow. Knowing how to properly root a crop, you can supplement your flower collection with a wide variety of species and varieties. The flower is undemanding in care, but if you surround it with care and love, it will reward you with abundant, friendly and long-lasting flowering.
An interesting beautiful plant is the prominent sedum. Read about it at the link.
Geranium in indoor floriculture
The plants in question belong to the genus Pelargonium from the Geraniaceae family. The genus includes up to 350 species, distributed in South Africa. In nature, they are perennial, beautifully flowering subshrubs with a height of 20 cm to 1 (1.5) m. The leaves are kidney-shaped, round, whole or dissected, pubescent with glandular hairs containing essential oil or simple hairs. The flowers are white, red or pink, collected in a small inflorescence umbrella. The genus name Pelargonium means crane in Greek, due to the fruit's resemblance to a crane's beak.
Work on breeding these plants began at the beginning of the 19th century in England, then continued in France, the USA, and Germany. As a result of long-term selection work, the shape, size and color of the flower have changed, the diameter of the inflorescence has increased, and varieties with double corollas have appeared.
Quite often, pelargonium is commonly referred to as geranium, although in fact this plant is of a different genus Geranium (Geranium), also belonging to the Geranium family, widespread in the temperate zone of the Northern Hemisphere, where they are quite often found in meadows, forests, steppe and mountainous regions Europe, the Caucasus, Central Asia, Siberia and the Far East.
Unlike pelargonium, these are mainly herbs, often perennial, with palmately dissected leaves and purple flowers. Many members of this genus are medicinal plants, for example meadow geranium or blood red geranium. Some are decorative, and in recent years they have been increasingly used in the design of flower beds, landscape plantings, and low-growing species in alpine hills.