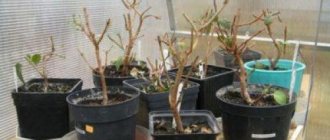
Schefflera at home care photo
In this article we will talk about such a plant as sheflera, learn how to grow it, care for it, and also tell you how to form a crown for sheflera.
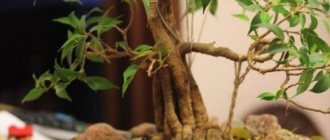
Schefflera is a capricious, but incredibly beautiful indoor plant. It has the shape of a tree and leaves that resemble umbrellas. If you care for it correctly, it will bloom and grow up to 2 meters high. It is difficult to maintain such a giant in a city apartment, so flower lovers resort to a trick and cut off its branches. When everything is done correctly, Sheflera does not grow in height, but forms a lush crown. You will have your own exotic tree in your home or office. The formation of the crown of the plant should be treated with caution; when pruning is done at the wrong time or in the wrong way, the plant will die
How to properly trim a plant at home?
When pruning ficus at home, you must adhere to the basic rules:
- Disinfect tools with vodka or cologne. Wash your hands thoroughly with soap.
- When inspecting a plant, outline in advance which branches need to be trimmed and which ones should not be touched.
- Dry branches are removed first. Next comes work on creating the desired shape.
- It is recommended to mark the cutting boundaries with chalk so as not to accidentally cut off too much.
- Sections are made just above the kidneys.
- The resulting shoots are left for plant propagation.
For sanitary and preventive purposes
If the ficus is sick, it is necessary to carry out sanitary pruning. This will remove damaged or diseased shoots and stop further death of the plant. After preventive pruning, the ficus directs all its efforts to its restoration. Trimming is done in the following sequence:
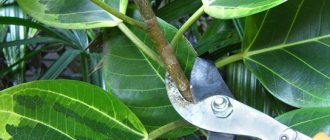
- Use garden pruning shears that have been previously disinfected. If you don't have pruning shears, you can use scissors.
- We find all diseased or dry branches of the plant.
- We remove all damaged branches, use tweezers to trim hard-to-reach branches.
- Trimmed shoots are burned or disposed of. They should not be used for compost, as this leads to the development of infectious diseases.
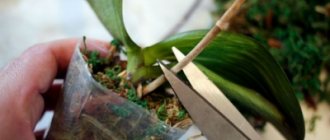
Sanitary pruning of ficus must be carried out not only for branches, but also for roots. And it is performed according to the following algorithm:
- Carefully remove the plant from the pot.
- Slowly remove the soil from the roots. We inspect the root system for the presence of black or rotten roots. Healthy roots are always light in color.
- We cut off all diseased roots. The cut should be made with a margin towards the healthy root to prevent further spread of diseases.
- We prepare new soil and plant a tree in it.
For rejuvenation
From time to time, ficus needs rejuvenating pruning. You need to do it like this:
- First, a check is made on the care of the tree, its living conditions and watering.
- We make sure there is sufficient lighting and a comfortable temperature for the plant.
- We mercilessly remove all dried, diseased branches and leaves.
For a ficus to live comfortably as it grows, it is necessary to select a pot of the appropriate size so that there is enough space for the growth of the root system. You should not overuse fertilizing; it is enough to do it once a month.
In addition, as the plant grows, you should transplant it into a larger container where its roots will have enough space to grow and receive nutrients. You should also not forget about feeding the ficus; it is usually carried out monthly throughout the year.
Shefflera propagation
Schefflera propagates in two main ways: cuttings and layering.
Shefflera propagation by cuttings
Semi-lignified cuttings from the top of the shefflera are suitable for propagation. They are cut at an angle with a sharp knife. The lower leaves are removed. There should be 3-4 leaves left on the cuttings.
After treatment with a root formation stimulator (Epin or Zircon), the cuttings are planted in a mixture of peat and sand (1:1). The container is covered with polyethylene and placed in a warm (22 degrees) place. The soil must be regularly moistened so that it does not dry out, the cuttings must be sprayed every other day, and the greenhouse must be ventilated daily.
Rooted young specimens can be transplanted into separate pots after 3 months.
Reproduction by layering
A large, healthy plant is suitable for producing cuttings. In early spring, two circular cuts are made on the semi-lignified trunk, the distance between which will be 3 cm.
The bark between the cuts is removed. This place is wrapped in moss moistened in a solution of a growth stimulator (Zircon or Epin) and wrapped in plastic film. You should wet the moss with water from time to time to keep it moist.
After 3-5 months, roots should appear. After they grow and become stronger (another 1.5-2 months), the film and moss are removed, and the trunk of the plant is carefully cut below the level of root growth. The young specimen is planted in a new pot.
The remaining part of the “mother” plant is cut off at the root and continues to be watered. After some time it will give young shoots.
Ficus weave
Ficus benjamina is beautiful in any form. It's not just plants with a crown that are interesting. Trees grown by ficus weaving can be called a real work of art. Such plants have bare trunks intertwined with each other in a special pattern. Such ficuses are valued because of their beautiful trunks. The crown of plants is usually formed in the form of a ball.
To obtain such a beauty, all varieties of ficus with thin shoots are suitable. But the Viandi variety is absolutely not suitable because it has thick and crooked stems.
To obtain intricacies, several seedlings (their number can be large) of the same size are planted in a pot. Both plants must grow at the same time. The seedlings must be of the same variety, because then they will grow at the same speed. There are various ficus weaving patterns. The simplest ones are the spiral and the braid.
How to braid Ficus Benjamin to get a spiral? To do this, you need to plant two seedlings in a pot. But for the braid you will need three young plants. There are also more complex schemes. Sometimes up to 20 seedlings have to be planted to bring them to life. Only real professionals can grow such trees. To weave trunks, it is necessary to remove side shoots. All weaves should be fixed with copper wire or woolen thread. The shoots are fixed above the plexus. In the future, the ficus is cared for as usual. As soon as the cuttings grow a little, another weaving is done.
The fastening points should be checked every two months. Sometimes they need to be weakened, because during growth the trunks gradually thicken. If the fixation is too strong, it may damage the plant bark. Once the braid or spiral reaches the desired length, you need to fasten the trunk from above. The attachment point will be securely hidden by the crown, so it will not be visible. After a few years, the stems will grow together and turn into a single whole. At this point, all fasteners can be removed. They are no longer needed.
Ways to braid a shefflera
You can get a beautiful crown by planting several sprouts together, preferably vines - their trunks are more flexible:
- Double helix. A support is installed between two young shoots and the stems are wrapped around it. Carefully secure it at the top with a clamp, leaving a gap so as not to damage the stems.
- Pigtail. Braid from 3-4 young plants, also using support.
- Lattice weave. A flower lattice-support is installed next to 2-4 sprouts, they are entwined with flexible shoots, guiding them randomly.
Remember! The seedlings that will be woven are planted of the same variety, the same height and degree of development. This way the composition will develop most harmoniously.
What varieties are found?
At home, they grow eight-leaf bush sheflera, which has an elegant appearance. Its drooping petioles are cream-colored. They bear shiny, dark green, lancet-shaped leaves. Their length reaches 40 cm. The plant is light-loving, and does not have enough color days to bloom on the windowsill. Under artificial light, a flower appears that resembles a light green sea mollusk in shape.
Schefflera eight-leaved
For bonsai lovers, Schefflera arborescens is suitable. You can grow the Amate variety with green leaves or the Gold Capella variety. This variety of sheflera looks like a miniature palm tree with variegated leaves, which are about 20 cm long.
Schefflera arborescens
Schefflera radiata (or star-leaved) has a brown trunk and elongated shiny green leaves. The Nova variety is distinguished by its leaf, similar in shape to oak leaves.
Schefflera radiata
Types of homemade shefflera with photos and names
Schefflera actinophylla
It has a powerful branching stem and elongated leaves on elongated petioles, with 14-16 lobes, 10-15 cm long. The color of the leaf plate is olive-green, golden-yellow or yellow-green.
Schefflera octophylla (Schefflera octophylla)
In young plants of this species, elongated leaves with a light vein have 6-8 lobes, in adults - up to 16 lobes. The color of young leaf blades is light green, old ones are dark green.
Schefflera arboricol
A tree-like liana with unpaired pinnate leaves with rounded ends, having 7-15 lobes. The plant practically does not branch, but produces shoots from the roots. There are varieties with green and variegated leaves.
Schefflera elegantissima
Grows up to 2 meters in height. Dark green leaves are planted on a thin gray-brown trunk, dissected into 8-12 thin lanceolate lobes, the length of which reaches 15 cm. The species practically does not branch.
Schefflera digitata
It has palm-shaped leaves, dissected into 7-10 lobes, 15-35 cm long. Oval-shaped lobes, pointed at the ends, 4-6 cm wide, 6-8 cm long.
A little knowledge, time and attention and a small shefflera will turn into a luxurious tree with a lush, dense crown!
Schefflera flower care at home crown formation - Growing and care at home
Like any home flower, sheflera is demanding of air humidity and uniform watering. The plant needs moderate lighting, without direct sunlight.
Schefflera flower: home care, crown formation, pruning, propagation
Some tips on keeping Sheflera
- Place the flower on south-east or south-west windows; keep the plant on the south side in winter. It is worth remembering that variegated sheflera is more light-loving, and if there is not enough light, the leaves will lose their bright colors.
- Try not to overwater the flower; the soil in the pot should be moderately moist, and the water for watering should be settled. If the indoor humidity is low, for example on hot summer days or when the central heating is on, try misting the plant periodically. Place the flower pot on expanded clay immersed in a container of water.
- The suitable temperature during active plant growth ranges from +22...+27C. In winter you can reduce it to +18C, as the plant needs a period of relative rest.
Schefflera flower - home care crown formation
Correct pruning and crown shaping
When growing a flower such as a shefflera at home and providing it with proper care, you are faced with the need to form a crown and pruning. This procedure is carried out in early spring, pursuing the following objectives:
- Form a compact and aesthetically beautiful bush.
- Give impetus to the growth of young shoots on already lignified plant stems (rejuvenating pruning).
- Take young cuttings for propagation.
- Carry out sanitary pruning after the winter dormant period.
Schefflera flower - home care, pruning
Advice from experienced flower growers
- When pruning and shaping plants, use only sharp, good quality pruners; do not wound the plant with scissors.
- Schefflera, although not a demanding flower to care for, requires proper crown formation at home. To create it even and beautiful, the branches of the plant that are too long are cut off by 1/3, and if necessary, more, leaving the top bud looking outward of the bush. If the thickness of the cut branches is more than 1 cm, cover the cuts with garden varnish or warm wax to prevent infection from entering.
- In adult plants, over time, crown growth may go to the periphery (top), to avoid this, pinch the ends of the shoots in a timely manner for greater branching and growth of young leaves.
Schefflera flower - home care, propagation
General rules for shaping and trimming
Pruning shefflera does not always end with the formation of a fork. In place of the old crown, a new one may simply stretch out; little will change in the appearance of the tree. And the owners believe that they tried to form a crown, but nothing worked.
Helpful information:
- You only need to work with a sharp, sterile instrument.
- The more the trunk is shortened, the more dormant buds will wake up.
- Pruning of healthy leaves should not be carried out, even if the concept of forming a shefflera requires exposing the trunk and skeletal branches. It is necessary that they fall off naturally, as they are responsible for the redistribution of plastic substances. Early loss of leaves leads to thinning of the trunk.
- When forming shefflera, the cuts should be made straight. Approximately 1 cm is removed from the node if the shoot is thick, 5 mm - on elongated thin branches.
- A wound surface with a diameter of 5 mm or more is covered with garden pitch or treated with an antiseptic, for example, crushed activated carbon.
- You can only pinch off the ends of the green branches of the current year. Pruning them usually ends with the drying out of a few extra centimeters of the shoot.
- To awaken the kidneys in the right place, you should do kerbovka. Additional use of cytokinin paste gives good results.
- Light is the best assistant when forming a shefflera. Without its even distribution, no pruning can make the crown beautiful.
- When weaving, it is recommended to splice the trunks naturally, tying them together, but without specifically damaging the bark. The crop often suffers from rot, and there is a high probability of wound infection.
Growing problems
Very often, during the growing process, flower growers encounter various difficulties. Most often, beginners complain that Benjamin's ficus drops its leaves. There are many reasons for this behavior of plants.
If a bush sheds its leaves in autumn or winter, this is a natural process associated with a dormant period. In this case, there is no need to worry.
Another reason for leaf fall is a change in usual conditions. Houseplants do not respond well to rearrangement, drafts, or lower temperatures. Therefore, the ficus must be kept in its usual conditions.
Excessive cold or heat also affects the foliage of the plant. Temperature conditions and its stability are one of the main conditions of detention. During periods of active growth, ficus needs feeding. The lack of microelements affects the beauty of the crown and decorativeness.
There are many reasons for leaf fall. If you encounter such a problem, you need to find out the reason. And then it needs to be eliminated. After this the situation returns to normal.
Features of flower care at home
Depending on the type, you can purchase a more or less light-loving plant. But general care recommendations will allow you to keep the tree in comfortable conditions and enjoy its decorative properties all year round.
Temperature and light
The right light is important not only for the development of the plant, but also for the expression of colors. It is better to avoid northern and southern windows, since in the first case there will be insufficient light (or choose varieties with green leaves), and in the second there is a risk of burning the plant.
In the summer, you can shade the pot or place it on some hill next to the window so that direct rays do not burn the leaves. In winter, it is recommended to protect plants from heating devices, as this can cause leaves to drop, and to additionally illuminate the pot due to the short daylight hours.
Note!
It should be remembered that the tree is a resident of the tropics, so a comfortable temperature in summer will be 20 °C +/- 2 °C, and in winter 14 °C +/- 2 °C without drafts.
Humidity, watering and fertilization
Humidity needs to be given special attention. Regular spraying is recommended, especially during hot periods. You can also use a shower or tray with wet expanded clay. Another option is to purchase a humidifier.
Watering is moderate, the soil should not be allowed to dry out, it should be moist. Excess moisture is harmful, as it will cause rotting of the root system. Water for both irrigation and spraying should be taken soft, settled, and at room temperature. Due to aggressive, cold water, the flower may begin to shed its leaves.
The type of fertilizer is selected based on the growth phase. It is better not to fertilize a young or recently transplanted plant. During the growth stage, you can use complex fertilizers, and during the period of active growth of greenery, switch to nitrogen-containing ones.
Shefflera pruning and crown formation
Schefflera does not respond very well to pruning; to preserve its decorative appearance, you need to plant several seedlings of the same development and size in one container.
In order for several plants to visually form one, their trunks are intertwined as they grow. It can be a double spiral of two sprouts or a braid of three. Weaving is carried out on a support, since the young tree still has flexible branches.
When the desired height is reached, the tops of the trunks are pinched and then new shoots are formed. In order to form a lush, spherical crown, the growth of lateral shoots is stimulated by cutting the apical shoots down 5 internodes.
Possible problems with cultivation and their solutions
The following are the main problems that gardeners may encounter:
| Problem | Cause | Solution |
| Dropping leaves | Violation of temperature or water conditions, draft | Check and eliminate factors such as: air temperature below 12 degrees or above 27, direct sunlight, drafts, waterlogged soil, temperature and softness of water when watering. |
| Spots on leaves of white and yellow flowers | Exposure to direct sunlight | Change the location of the pot or shade it. |
| As the stems stretch, the color of the plant fades | Lack of light and fertilizer | If the issue cannot be resolved by changing the location, then add artificial lighting. |
| Leaves are drying | Excess heat and/or lack of moisture | Increase watering, regularly irrigate leaves, add wet expanded clay to the tray. |
| Root rotting | Excess moisture and/or heat | Reduce watering, lower the room temperature. |
When to pinch shoots from an apple tree
If in some place of the crown you need to form a branch that is small in size and well covered with generative formations, pinch a strongly growing shoot approximately above the fifth true leaf. It can be a little shorter or longer. Do not pinch short shoots and shoots of continuation of the main branches.
Time the pinching to coincide with the time when there are 2-3 weeks left before the end of shoot growth. It's not worth it before. The 1-2 buds closest to the pinching site will awaken and give off strong shoots. And this is undesirable. They may not ripen and will freeze very much in winter. And in general, the goal will not be achieved. A later pinching is also not suitable: it will not give any effect.
Remove the tops of the shoots with whatever you want: pruners, scissors, fingernails. If after this short shoots such as ringlets and spears grow from the axillary buds, that’s good. Leave everything as it is. If one strong shoot grows from the top bud, pinch it off above the third to fifth leaf. If many strong shoots form, cut the pinched branch above the lowest one, and in turn pinch it above the fifth or slightly higher leaf.
Pinching does not always have an immediate effect. Here is the culture, the variety, and the condition of the plants, and believe it or not, the character of the gardener has an effect. Therefore, master pinching shoots slowly and thoroughly. In some cases this technique is simply irreplaceable.
Sanitary pruning of plants
Sanitary pruning of barberry is carried out annually. In the process, you can also begin to form a crown. It is recommended to trim only healthy shoots, but do not be too zealous. Weak branches are removed completely.
The crown can be formed only in the second year of the plant’s life. In this case, it is worth familiarizing yourself with the diagram in order to make the correct haircut and not damage the flower. The procedure should be carried out in the spring, before the buds bloom, and before winter, when the harvest has already been harvested.
Next spring it is recommended to shorten the shoots to 10 cm above the ground. The procedure will increase the density of the bush, it will begin to branch. At the 3rd year of life, 15 cm of shoots are left above the soil level. For a single plant, this method of cutting barberry will allow it to be kept in a ball shape for a long time. Border plantings and hedges require this procedure.
Scheme of sanitary pruning of barberry
Scheffler's home flower, description
Schefflera (Araliaceae family) pleases with a variety of natural forms - tree, bush, liana. Particularly interesting are the leaves, similar to wide-open palms, colored in emerald green; some varieties have a variegated color. They are especially popular. Types suitable for home floriculture:
- radiate leaf (Shefflera actinophylla);
- eight-leaved (octopus, Sh. Octophyla);
- tree (Sh. Arboricola);
- palmate (Sh. Digitata);
- most graceful (Sh. Elegantissima);
- Veitch (Shefflera veitchii).
The plant remains decorative all year round, although home conditions are not conducive to flowering.
Basics of plant care.
Sheflera came to our latitudes from the hot and humid subtropics. Under natural conditions, it blooms beautifully and even bears fruit. Do not rush to rejoice, the decorative species has practically lost the ability to bloom at home; it is an exception to the rule. But you still have a chance to enjoy all the beauty of sheflera, all you need to do is:
- Maintain optimal temperature. It fluctuates in the range of 18-23°C.
- Provide adequate lighting. To do this, it is enough to place a pot or tub with a tree near a window on the east or west side.
- Monitor the humidity level. The plant can be saved from pests by regular water treatments and spraying.
- Feeding with minerals will be very helpful. Especially in the spring and summer.
If these rules are strictly followed, you can move on to the next stage - crown formation.
How to form a crown: popular methods
There are several types of crowns that can be formed by pruning ficus. The most popular of them:
- bush;
- standard;
- spiral;
- arc;
- fence;
- braid
Let's figure out what kind of crowns these are and how to form them.
Bush
- To form a crown in the form of a bush, 2-3 cuttings are planted next to each other.
- When the cutting reaches a height of 15 cm, pinch it from above, leaving more than 5 leaves. This is a stimulating effect for the appearance of 4-5 side shoots.
- When the length reaches 15 cm, the side shoots are cut so that the upper buds are directed outward of the crown. Don’t forget to treat all cuts with charcoal.
- When shoots of the third level reach a length of 15 cm, you will already have a dense bush. If it turns out to be very thick, then it can be thinned out by removing several branches from the middle.
Important! When growing a bush-shaped crown, it is necessary to change the side of the ficus facing the sun so that the crown develops evenly.
The easiest way to green a room.
Stamb
- It is necessary to plant one cutting, during the growth process we remove all the lower shoots, leaving only the 3-4 top ones. With a tree height of 0.5 m, the length of the trunk at the bottom without branches should be 20 cm.
- When the desired height is reached, the top shoot must be pruned by 6-10 cm.
- Next, we begin to form the crown. To do this, we intensively grow side shoots within the crown, and remove everything outside.
- Further formation proceeds like a bush; when pruning, the outer buds should face outward.
Reference. The standard crown can be of different shapes. The most popular are spherical and oval shapes. If you form a spherical shape, then do not forget that the shoots must be the same length.
The standard crown is suitable for houses with high ceilings.
Arc
- When the plant reaches sufficient height, cut off the top.
- Now you need to bend the plant and secure it, being careful not to break it. In this position, the shoots begin to grow upward.
- When the required shape is acquired, the fixation can be removed.
Spiral
We'll need one escape. Weaving is carried out as follows:
- We plant the cuttings in a pot.
- Depending on the width of the required turns, we select the diameter of the support, which we will install next to the handle. A bamboo stalk or some kind of tube may work for this.
- At a height of 15 cm, the stem is wound onto a support. To obtain uniform turns, inserts are used for a short time. We leave the inserts for a short time so that they do not begin to grow into the stem.
- As soon as the tree reaches the required height, the support is removed.
The spiral looks unusual and decorative.
This video shows how to form a spiral crown:
Scythe
For a braid, you need to braid several plants at a distance of 5-10 cm from each other, or you can use one tree with 3-4 side shoots. Work on the desired shape begins when the tree reaches a height of 15 cm:
- If there is one plant, then it is necessary to change the direction of growth of the outer parts of the braid from the central one in opposite directions, tying them to a branch. If there are several plants, then this action is omitted.
- We take the right shoot and throw it over the middle one at an angle of 45 degrees.
- We secure it in this position using threads.
- We wait until the plants stretch out.
- We cross the resulting center with the left shoot.
- As we grow, we repeat the steps.
Make sure that the loops are the same.
This video shows how to braid a ficus crown:
Fence
For the fence, trimmed plants are used. The shoots are planted in a box in one row. In young plants, the top layer of bark is cut off, the juice is wiped off and the stems are connected by tying them. The trees will begin to grow together, the more light there is, the faster they will grow together.
This video shows how to weave a ficus fence:
Forming an umbrella tree at home
They form a flower according to their wishes: a slender tree with a fluffy crown, a branched tree, a bush, weave trunks, etc.
How to trim the top correctly
Pinching the tip is usually necessary to force the plant to produce side branches. A peculiarity of all shefflers is that the axillary buds sleep until they receive a stimulus to awaken - the removal of the upper part of the trunk.
If you cut 1-2 leaves from the top, the upper eyes will wake up and growth will resume only upwards. Therefore, the crown is removed, counting out at least 5-6 petioles, and several equivalent buds are obtained that are capable of producing side shoots.
Know! You can cut the top to any height, but the buds located above the rest will wake up first.
There is an interesting way to force a wayward tropical tree to branch: the tree is carefully bent down and fixed. After some time, the eye located above the rest will wake up and begin to grow. The cut part is usually rooted, i.e. used for reproduction.
Types of pruning Kalanchoe
There are several stages in this process and each of them has different goals.
It’s worth paying attention to this, because both the appearance of the plant and its health depend on timely and competent pruning and formation of the bush.
Forming a bush correctly
This procedure has its own subtleties that should be studied in more detail.
- Before you start pruning, you need to know exactly the varietal identity of the plant. The features of crown formation also depend on this.
- If you have just recently purchased a flower, then you should not start pruning right away. The plant must take root in its new location. Take a break.
- In winter, when Kalanchoe is dormant, pruning is not recommended.
- All instruments must be disinfected before and after procedures to avoid infection. The knife, pruning shears or scissors must be sharp.
- If you manually pick off the leaves and inflorescences, the Kalanchoe may begin to fade.
- It is recommended to carry out the pruning procedure either in the morning or in the evening. During this period, try to place the pot with the bush in a place where the sun's rays do not fall on it.
- When you have trimmed, the cut areas should be immediately sprinkled with crushed charcoal or activated carbon.
- If the flower has just been transplanted, wait a few weeks to prune it so that the plant can take root and adapt.
- When you see that a bush is suffering from an invasion of pests, then only after they have been completely destroyed is it worth pruning.
First trim
It is carried out for preventive purposes. The most suitable period for this procedure is spring. Here's what you need to know.
- When the flower wakes up, after 30 days the first pruning should be done. At this stage, several leaves at the tops of the shoots are removed.
- After the procedure, it is not recommended to place the bush on the south or southeast side of the room so that it does not begin to grow too actively. The appearance of the Kalanchoe will then quickly lose its neatness.
Sample for preventive purposes
As the plant grows quite actively, this type of pruning is relevant. There are several reasons why this procedure is necessary.
- In places where shoots and leaves were previously cut off, new shoots begin to form in the axils and buds. It is also necessary to remove several leaves from them so that the crown remains formed according to your idea.
- Inspect the plant regularly and remove all dry or rotten parts immediately, then the Kalanchoe will be healthy and you don’t have to be afraid of the appearance of various rots.
- The lower shoots of the bush gradually shed their leaves and become bare. The view is unattractive. Therefore, the recommendation is this: as the flower grows, remove the bare lower branches. In this case, only fresh and juicy green young foliage will remain.
- In summer, the upper shoots begin to stretch out very actively. In order for the laterals to grow and the shape of the bush to be lush, the tops should be pinched.
If the top shoots have grown to 10 - 12 cm, then they can safely be used for propagation. This is very simple and does not require any effort - placed in water at room temperature, the leaves and cuttings sprout roots after a while. You can plant a young plant in the ground.
What to do after flowering
The active flowering period of this decorative flower begins at the end of winter and continues into the spring months. The specificity of the development of Kalanchoe is such that peduncles are formed precisely at a time when daylight hours are short.
- In the case when the second half of the spring period has already begun, but flowering does not occur, then 3 - 4 upper leaves on each shoot are pruned - this procedure will force the bush to develop flower stalks more actively.
- There is no need to wait for all the branches to dry out and all the petals to fall off after flowering. Prune as soon as you see the flowering has finished. Then, at the cut site, young branches with leaves and new buds will immediately begin to form. It is better to remove faded shoots at the root to prevent the entire plant from drying out.
- After pruning the Kalanchoe after the flowering period is completed, it is necessary to give it time to rest and rest. To do this, place the flower in a dark and cool place where there is no sun and the air temperature does not exceed + 15 - 17 degrees Celsius. At this time, you need to water very little - only once every 20 days.
Caring for shefflera at home. Details
Scheffler's care at home does not require too much care. Even a novice gardener can grow it. It takes root well in modern apartments if you give the plant a little time and attention.
Planting shefflera
Time for sowing seeds: mid-January - end of February. To improve germination, it is recommended to soak them in a growth stimulant, for example, Zircon or Epine.
The soil consists of equal parts of turf, leaf soil and sand. Another option is sand and peat in a 1:1 ratio. The seeds are sown to a depth of 5-6 cm, at a distance of 3-5 cm from each other. It is recommended to cover the container with a plastic bag and place it in a warm (20-25 degrees) place. The greenhouse should be regularly ventilated and watered so that the soil does not dry out.
When the seedlings have 3-4 leaves, they are transplanted into individual pots with a diameter of 10-12 cm. For 3 months after transplantation, it is recommended to keep the plants at a temperature of 19 degrees.
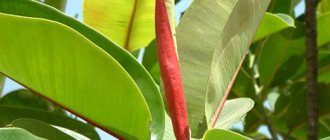
Bloom
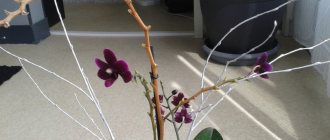
Schefflera blooms with inconspicuous white, cream, greenish or red flowers collected in paniculate, racemose or umbellate inflorescences.
Outwardly, they resemble tentacles. They have no decorative value. At home, the umbrella tree blooms extremely rarely. Does not require special care during this period.
Temperature
Homemade shefflera feels great at normal temperatures in the apartment. She does not need to create special conditions. In summer, the optimal thermometer readings for it are 20-25 degrees, in winter – 18-20 degrees. Varieties with green foliage normally tolerate temperature drops of up to 12 degrees, variegated ones - no lower than 16 degrees.
In winter, it is better to place the plant away from heating devices, since hot, dry air causes leaves to fall off. The umbrella tree is also afraid of drafts and sudden temperature changes.
Spraying
Schefflera prefers high environmental humidity. Regular spraying with a fine-grained spray bottle will help create such conditions. In summer, it is recommended to carry out the procedure 2-3 times a week, in winter, with the heating on, every other day. Soft filtered water is used.
To increase air humidity, a pot with a plant can be placed in a tray with wet pebbles or expanded clay. Another way is to place a container of water near the flower.
Shefflera leaves should be wiped from dust with a damp cloth once every 3-4 weeks.
Lighting
Schefflera is a light-loving plant . In autumn and winter, the optimal place for it will be a southern window sill, in spring and summer - an eastern or western one. When the sun is especially active, direct rays can cause burns on the leaves. In this case, the plant should be shaded with a translucent curtain or placed on a bedside table near the window.
With a lack of lighting, variegated varieties lose the brightness of their leaf color. In this case, it is recommended to illuminate them with phyto- or fluorescent lamps.
In summer, the shefflera can be taken out onto the balcony or into the garden, having previously prepared a place for it protected from the wind and direct sunlight.
Watering scheffleras
Schefflera at home needs regular but moderate watering. In summer it is more frequent - 2-3 times a week, in winter (if kept cool) it is scanty - once every 7-10 days.
The need for regular watering will be indicated by the dried top layer of soil. If we talk about extremes, then the plant tolerates overdrying of the earthen coma better than its waterlogging. The latter is fraught with rotting of the root system and blackening of the foliage.
For irrigation, rain or settled water at room temperature is used.
Shefflera pot
The size of the pot depends on the size of the flower. For the first time, seedlings can be planted in plastic cups, and when the root system fills the entire space, transplanted into pots 2-3 cm larger in diameter and height.
An adult plant is transplanted into a pot, the diameter of which is 3-5 cm larger than the previous one. The pot should always have holes to drain excess water.
Soil for shefflera
The soil for shefflera should be nutritious and light, well permeable to moisture and air. Of the store-bought substrates, soil for ficus or palm trees is best suited. If you have the opportunity to prepare the mixture yourself, you can choose one of the options:
- Turf soil, coarse sand, peat, humus and leaf soil in equal parts;
- Turf soil, leaf soil, river sand and humus in a ratio of 2:1:1:1;
- Turf soil, humus, sand (2:1:1).
Feeding and fertilizer
To fertilize schefflera, it is recommended to use liquid complex fertilizers for decorative foliage plants. The frequency of fertilizing in spring and summer is once every 2 weeks, in autumn and winter – once every 2 months. The concentration should be 2 times weaker than indicated on the package.
Fertilizers are applied only after watering, so as not to burn the roots of the plant.
Shefflera transplant
The frequency of transplanting a Schefflera depends on its age. Seedlings are transplanted once every six months, as the space of the pot is filled with the root system.
Young plants - once every 2 years, and adults - once every 3-5 years. It is recommended to replace the top layer (about 5 cm) of soil annually. When transplanting, a drainage layer must be placed on the bottom of the pot. The safest and easiest way to transplant is transshipment together with an earthen clod.
Trimming
Schefflera flowers, as a rule, do not need pruning at home. The exception is when the plant has become too elongated and has lost its decorative appearance. Then long branches are shortened to promote the appearance of young shoots. The optimal time for such pruning is spring.
To give the shefflera a bushy shape, you need to pinch the tops of the shoots. The tree-like form often requires support.
Rest period
Schefflera does not have a clearly defined rest period. However, like most plants, in winter it slows down or completely stops growing.
During this period, it is necessary to reduce the frequency of watering and move the pot to a bright, cool place (16-18 degrees). Such a “rest” will increase the immunity of the umbrella tree and promote active growth and development in the spring.