Why gloxinia does not bloom: the main sources of the problem
Before you worry about the lack of buds in gloxinia, you need to find out about the period and frequency of its flowering. It pleases the eye with flowers from April to August in two stages with a break in early July. To do this, you need to cut off the remains of the buds at the end of the first stage so that it blooms again.
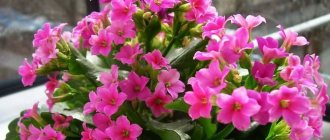
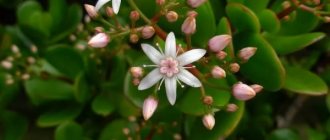
Lush flowering of healthy gloxinia
For your information! Young gloxinia will not bloom until it grows a tuber. If the transplant was in the spring, the first buds will appear by autumn, but may not turn into full-fledged inflorescences. Only after surviving the winter in a pot will gloxinia please the grower, during which time it has become stronger at the root.
If buds do not appear in March, it’s time to wonder why gloxinia does not bloom at home. Among the common reasons why gloxinia buds do not open:
- old age of the flower or damage during transplantation;
- soil or fertilizers are contaminated;
- irregular watering or excess watering;
- the flower was in the shade without light for a long time, it was not taken to a sunny place;
- arid microclimate with high air temperatures, being near heating radiators;
- tuber disease. It will have to be pulled out of the ground and inspected for damage;
- the use of unsuitable fertilizers or violation of the terms of their use;
- the appearance of insect pests, provoked by high humidity and the presence of diseased flowers nearby.
If a gloxinia tuber is damaged, it will spend all its energy on growing the stem and foliage, leaving no energy left for flowering.
Important! Do not transplant the tuber into a pot that is too large. The plant will grow at the root, but the outside will remain frail and dry out.
What influences the lack of flowering
The main reason for the lack of flowering in gloxinia will be improper care for it. Much depends on following the basic rules for keeping a flower. The main factors influencing flowering include:
- Gloxinia tubers have become old.
- Excessive overfeeding of the tuber or its contamination.
- The presence of harmful microorganisms in the soil.
- Low illumination at high temperatures.
- Lack of fertilizing.
- Incorrect processing
- Rolling flowers
- Poor humidity
- Failure to comply with landing requirements.
If you purchased a flower with an old tuber, you can get it to bloom through good watering. It happens that tubers receive too much fertilizer or, in the worst case, they become infected. As a result, the flower becomes weak and simply does not have enough strength to bloom.
Gloxinia can get sick because of the soil. The presence of pests in it does not allow flowering to occur. In this case, only a transplant can help. In addition, its correct composition is important. The best one will be one that includes coniferous and leaf soil, humus, sand and peat. To remove harmful microelements in the soil, it is calcined in the oven for half an hour.
The plant is demanding of good lighting, so its lack will necessarily affect the flowering of gloxinia. And if at the same time the temperature is even higher, the flower will begin to stretch out, and will bloom much later, or may not even begin to bloom at all. In winter, artificial lighting can be used for gloxinia using fluorescent lamps.
The soil of an indoor flower must contain sufficient amounts of useful microelements, so flowering will directly depend on regular fertilizing. It is also important not to overdo it, since excess fertilizer will not be beneficial to the flower. In any case, in a flower, both excess and deficiency will affect the lack of flowering. In addition, the foliage may turn yellow. The best fertilizers for gloxinia are phosphorus-potassium fertilizers; nitrogen fertilizers should be avoided.
Gloxinia blooms in waves. The absence of a second wave of budding may be affected by improper processing, which is carried out after the end of the first.
If there are drafts in the room and the temperature is low, the flower buds will curl.
Gloxinia is demanding on indoor humidity. Its deficiency can delay the flowering of the plant.
Gloxinia cannot be planted in a large planting container. As a result, the tuber will begin to actively grow, and flowering will be poor. The ideal option would be a low and wide pot with a small diameter.
Why do gloxinia buds dry out without blooming and fall off?
Gloxinia - home care
Most often, the problem why gloxinia buds dry out without blooming lies in improper care. After all, if they appeared, it means that an obstacle to their further development appeared later. For example, there is a lack of nutrients, so be sure to feed the flowers in the summer. Buds usually appear at the end of March, and if in winter gloxinia was forgotten somewhere in the shade, a beautiful head of flowers is out of the question. During hibernation, it should not be left without regular watering and sunlight, as it must gain strength.
You can reanimate flowering using the following scheme of actions:
- Increase the humidity in the room (for example, turn on a humidifier).
- Ventilate the room, avoiding drafts.
- Place the flower on the eastern windowsill.
- Fertilize with phosphorus-potassium fertilizer.
- The soil after watering should be loose and slightly moist.
- Plant in another pot.
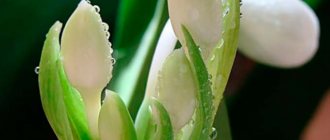
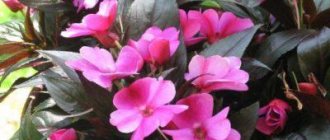
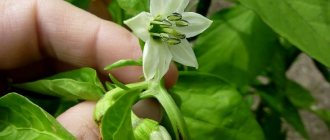
The appearance of a gloxinia bud
Dry soil, pests, stale air in the room and low humidity may also be causes. Among fertilizers, preference should be given to phosphorus-potassium fertilizers without nitrogen. It is the gradual correction of these factors that is the answer to gardeners’ worries about what to do if gloxinia’s buds dry out.
Flowering process
Most indoor flowers bloom in the summer, there are varieties that bloom in the fall, and some can remain beautiful all year round. In order to understand whether there is a problem at all, let’s figure out what time and how long gloxinia blooms.
When?
Under ideal conditions, gloxinia can bloom as early as March , but most often the buds are still forming at this time. Flowering continues through September-October.
How many?
Gloxinia blooms in 2 stages, about 3 months each. That is, the first flowering takes place from March to June, the second – from July to October. Between flowering, the plant is pruned, and it again grows flower stalks and forms buds.
When will this happen to a leaf plant?
One of the propagation methods is rooting a leaf or its fragment (more information about planting gloxinia from a leaf can be found here). In order for a young plant to produce flowers, it first needs to grow a tuber .
Therefore, if a leaf was rooted in the spring, then only by autumn it can bloom. There won't be many flowers, and they won't last long. However, if you leave the tuber in a pot for the winter, then until next year it will gain mass, which will provide the plant with strength for full flowering.
Why do the buds turn gray and become soft?
Gloxinia from seeds at home - how and when to sow
If the flowering is abundant, there may not be enough nutrients to open the buds. It is important to remember that gloxinia itself will not bloom magnificently; it needs feeding. Pests such as spider mites or thrips may also be involved in softening the buds. To remove them, you need to wash the plant with soapy water, removing the damaged areas. Low humidity and unstable lighting are unacceptable.
Note! If the flower is in a country house or in an unheated house, it cannot be left there until frost.
It is recommended to revive the plant in the following ways:
- daylight hours for gloxinia should be at least 12 hours;
- as soon as the buds appear, a mineral complex of fertilizers with a high content of phosphorus and potassium is needed;
- if watering occurs through a tray, it is better to use two copies. Put gravel in one, expanded clay in the other;
- if gloxinia foliage stretches upward, it does not have enough sunlight;
- If it is impossible to move the flower from a place with an excess of light, you can cover it with gauze or tulle.
To prevent gloxinia from drying out, you can place a container of water next to it. If the plant has little foliage, you need to increase fertilizing with nitrogen fertilizers. This will not contribute to the blooming of gloxinia, but may be useful for the growth of green mass.
Types of fertilizing
Gloxinias need nutrients:
- nitrogen - to increase green mass;
- phosphorus - for laying buds and abundant flowering;
- potassium is responsible for how long the corollas remain decorative;
- microelements support the health and beauty of the plant.
Organic
For some reason, some gardeners believe that it must be an infusion of mullein or bird droppings. But there:
- too much nitrogen;
- it is impossible to control the content or proportions of elements;
- there must be foreign inclusions;
- Pathogens or pest larvae may be present.
In indoor floriculture, waste from poultry or livestock is used extremely rarely. For gloxinia, like any other bulbous, tuberous crops, they are not suitable at all.
Feeding a flower with organic matter means giving ready-made preparations containing humates or peat extract, enriched with basic nutrients. They are bought in specialized stores. Well-established brands:
- Stimovit;
- Reasil;
- Stimulus.
Mineral
For gloxinia during flowering, growth and before retiring, complex mineral preparations with microelements are usually used:
- at the initial stages of development - universal fertilizers for ornamental leafy crops containing a lot of nitrogen;
- As soon as the buds appear, you should switch to fertilizers that include more potassium and phosphorus, intended for flowering indoor plants.
To properly feed gloxinia, you need not only to look at what is shown on the package - a leaf or a flower, but also to study the composition and instructions. It is better not to use fertilizers that strongly acidify the substrate - for hydrangeas, azaleas, conifers.
You can feed gloxinia with the following brands:
- Agriline;
- Blank sheet;
- Kemira (Fertik);
- Master;
- Florovit;
- Agricola;
- Rosasol;
- Royal Mix;
- Hylea;
- Biopon;
- Barrel;
- Mister Color;
- Plantion.
There are fertilizers with other names; flower growers must choose the preparations themselves. Those that work well in specific conditions are suitable.
Closer to the dormant period, the plant requires potassium and phosphorus. For gloxinia, you can use the following drugs, diluted 2 times more than recommended:
- Pekacid;
- potassium monophosphate.
Some gardeners prefer to use slow-release fertilizers, which gradually release nutrients over several (usually 4 to 12) months. They are placed in the substrate when transplanting gloxinia tubers. TMs performed well:
- Plantacott;
- Osmocote;
- Blank sheet.
Why do buds turn black and rot?
Why clivia does not bloom at home - care
High nitrogen content in the soil and excess moisture are the main answers to the question of why gloxinia buds turn black. If you water a flower too often, rot will appear on the tubers and then spread to the above-ground part. Therefore, fertilizers for flowering house plants should always have a low nitrogen content.
Healthy gloxinia buds
It is also easy to explain why gloxinia withers even with the correct use of fertilizers. The answer is simple - it reacts poorly to cold weather and drafts, it is necessary to protect it from temperature changes. Its indicators should not fall below 18-20 °C on the windowsill and below 12 °C in winter if the tubers are stored in a dark place.
If the buds turn black before they bloom, you need to act quickly:
- Treat the tuber with epin. It has an anti-stress effect for plants.
- Make the air more humid; gloxinia should not dry out.
- Keep the plant away from direct sunlight during the day.
- If the soil is old, replace it with new soil.
- Adjust watering, do not water until the top layer of soil begins to dry out.
Important! Young plants overwinter in pots in their usual place; they do not need to be specially prepared for winter.
You can spray indoor gloxinia with regular warm water, but not more than 2 times a week. In this case, moisture should not get on the buds. Excessive use of the procedure will lead to rotting of the leaves and buds.
There are several ways to solve the problem of rotting before blooming:
- limit watering until the top layer of soil is completely dry;
- Water only through the tray, do not spray. Change the water in the pan;
- if the soil is too acidic (due to nitrogen), replant gloxinia with a complete replacement of the soil;
- if these measures do not help, remove and inspect the tuber: cut off the brown spots, coat the cut with activated carbon powder.
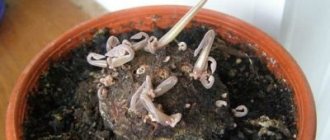
Gloxinia tuber needs proper wintering
If rot is found on tubers or foliage, you need to carefully remove the damaged areas and fertilize the plant with suitable products. There is no need to wait for the blackened bud to dry out on its own; you need to trim it yourself.
Gloxinia did not wake up after wintering
The storage area for gloxinia tubers should be cool and dark. If the gloxinia tuber is mature and healthy, then as soon as you put it in the light and water it little by little, shoots begin to grow. Sometimes gloxinia wakes up on its own, and when you take it out into the light, it already has a shoot. However, in practice it does not always work out as it should.
Gloxinia does not wake up on time due to the fact that the rest period was too short, less than 4 months. It is quite possible that the winter was too dry and the tuber dried out. But in any case, gloxinia wakes up on its own. It just takes patience.
To avoid overdrying of the tuber, pots with gloxinia in winter should sometimes be lightly watered or sprinkled with water. Or you can place gloxinia tubers in plastic bags, adding a little soil or damp moss. Close the bags or seal them tightly. The bag will maintain constant moisture, and due to the fact that the bag is transparent, you will have the opportunity to observe the gloxinia tubers in winter. At the first appearance of leaves, you can immediately plant gloxinia in a pot.
If gloxinia does not wake up after wintering , it means that the gloxinia was sent to wintering too young, which did not have time to form a tuber, or the tuber has rotted.
If a gloxinia tuber was purchased in a store and it did not wake up from hibernation after last year’s flowering, it is possible that the tuber was sold of very low quality. Many gardeners complain about this problem. Outwardly, the tubers look quite safe, but in reality it may turn out that they are already old, or infected with some kind of infection or pests. The strength of such tubers is only enough to bloom for one season.
Dig up the tuber, examine it: if it is very wrinkled, then most likely it is lost. Break or cut it: the tuber should be slightly yellowish or pinkish when cut. If this is the case, then dry the sections, sprinkle with crushed coal, you can treat them with regular brilliant green or fucorcin (raspberry liquid, a strong antiseptic, has an antifungal effect, sold in pharmacies). You can treat the tuber with epin or zircon to increase the vitality of the tuber and stimulate it to form shoots.
If the gloxinia tuber is brown on the cut, then most likely it is gone. If the brown color is only on one edge, cut off all the rot, treat the tuber as described above and plant in new soil.
If you want the purchased tubers to be able to survive the winter without problems, then immediately after purchasing gloxinia tubers at home, treat all planting material in a solution of potassium permanganate or phytosporin. This treatment is aimed at preserving gloxinia tubers from rot.
The next step is to treat the gloxinia tubers with Actellik or Fitoverm. These drugs will help get rid of thrips, spider mites and other pests of indoor plants.
If you purchased gloxinia in a pot, change the soil and treat the tuber. The soil that is sold in pots along with plants is very poor.
Perhaps the tuber is already old and has simply died. Gloxinias live for three to four years. If you really value this particular variety of gloxinia, try to root a cutting or leaf in advance.
Why do gloxinia have empty buds?
The main advantage of gloxinia is its charming flowering, which begins in June and lasts until August. That is why the plant is bought during this period to appreciate its beauty. The more beautiful the flower, the more disappointed the grower will be if the buds turn out to be empty. If it was blooming when you bought it, and then such a problem occurs, the reason why the gloxinia buds do not bloom lies in improper care.
Repeated flowering of gloxinia is not so lush
You can solve the problem as follows:
- Trim the stalk of an empty bud, otherwise a new one will not appear.
- Fertilize the plant according to plan, wait for the appearance of a new bud.
- After opening a new flower, spray gloxinia with epin according to the instructions.
The plant should be pruned only after it has finished flowering. Also, barren flowers can be a result of too dry air or pest attack. They suck the juices from the leaves and buds, thereby preventing them from opening.
Important! Do not expose gloxinia to drafts or water it with cold water. It is better to put it in bottles and let it sit for several days; this action will help release harmful substances.
Causes of the problem
There are not only the reasons discussed above, but also diseases and pests that prevent the plant from blooming.
Briefly about why it doesn’t bloom:
- Bad light.
- Lack of nutrients.
- Inappropriate pot.
- Unsuitable temperature.
- Excess nitrogen in the soil.
- Dry air.
- Lack of a full rest period (you can find out more about when to retire gloxinia in this material).
Diseases
Most often, indoor plants are affected by fungal infections, which inhibit development and can completely destroy the plant. It looks like wilting with various spots and rotten areas.
You can try to save the plant:
- Remove affected areas.
- Carefully remove the plant from the soil.
- Inspect the root.
- Cut off the rotten areas on the tuber with a sharp knife and treat with crushed coal.
- Spray the plant along with the tuber with fungicides.
- Plant in clean soil.
If the root collar has rotted, then the only salvation will be the existing growth point. If there is no such thing, there is no point in saving gloxinia.
Attention! The cause of diseases is improper care and living conditions. This is especially true for watering and air temperature.
You can find out more about diseases of gloxinia here, and you can read in more detail about what types of leaf diseases the plant has, in this material.
Pests
Gloxinia can be affected by any indoor insect pests: spider mites, thrips, aphids and others. If insects are found in the ground or on a plant, it is necessary to treat with insecticides. Be sure to check the rest of the plants in the house to avoid re-infestation.
If thin, dry areas appear on the leaves, carefully examine the back of the leaf, perhaps even with a magnifying glass . Some pests are microscopic in size.
As a result of their vital activity, insects harm the flower: they suck out the juice, depriving the plant of some nutrients, and also cause mechanical damage. Therefore, a plant affected by insect pests may not bloom.
How to make gloxinia bloom again
After gloxinia fades, its above-ground part dies off, leaving only the tuber. It is important to properly prepare the plant for winter; two options are acceptable:
- place the dry tuber (previously cleaned of rot) in a pot with soil or river sand. Place in a cool place and moisturize twice a month. Avoid hypothermia;
- put the tuber in a bag with soil and vermiculite in equal proportions, store in the vegetable compartment of the refrigerator.
In February, it is necessary to transplant the tuber into a larger pot. If in April a problem arises as to why the gloxinia buds did not open, the wintering was carried out incorrectly.
After the plant has blossomed and flowered at the end of June, you can prepare it for the reappearance of the flower stalk. To do this you need to follow a simple procedure:
- Trim the foliage, leaving 2-4 lower large leaves.
- Leave a couple of the largest stepsons in the axils of the leaves.
- Feed twice during the period of appearance of stepsons, then fertilize once a month with products for flowering plants.
Important! Repeated flowering is usually not as lush as the first, and this does not mean that the flower is sick. Proper feeding will help the gloxinia buds bloom.
Blooming gloxinia is a real decoration of the windowsill, harmoniously combined with other representatives of the home flora. With improper care, problems begin with the buds, which are successfully solved by carefully correcting errors. After recovery, the flower will delight you with double lush blooms.
Suitcase Lacase, Plastic, 52 cm, 30 l
2724 ₽ More details
Drill-driver DEKO GCD12DU3 Li-ion, 1x1.5Ah, Replaceable battery, 12 V, 32 Nm, 1 battery
1697 ₽ More details
Short prom dresses
Reproduction of Gloxinia
Leaf
Propagation of gloxinia by leaves does not take much time, and the cutting will take root quickly and without disease. To do this, take a medium-sized leaf from an old flower. The stem is cut off with a sharp knife, leaving a small fragment of 2-3 cm. To make the leaf sprout faster and give roots, it is fashionable to put it in water for a couple of days. The water must be changed daily. After this, the leaf can be planted in a soft substrate. The main thing is that it is free of lumps and well moisturized.
The leaf is carefully placed in the ground, lightly sprinkled and watered with warm water. It is better to plant a small leaf in a small pot, and then simply replant the flower as it grows. Next, it is better to cover the pots with gloxinia cuttings with film, making a kind of greenhouse.
After this, you can leave the flowers untouched for a couple of days, but simply water them as the soil dries out. The main thing is not to forget to periodically ventilate the pots by opening the film. Otherwise, young shoots may rot or become sick. Watch a video about propagating gloxinia by leaves and cuttings.
By dividing the tuber
It is quite difficult to propagate gloxinia in this way; the survival rate of part of the tuber in the new land is very low. But with careful care, this method still works. Only a healthy tuber, without signs of disease or rotting, is selected for division. Using a sharp knife, the tuber is divided into 2 parts, so that a small shoot remains on each half. Next, the cut must be treated with charcoal or placed in a weak solution of potassium permanganate.
The tuber is placed in loose soil, sprinkled a little on top and watered. When propagating gloxinia using the tuberous method, it is important not to forget about daily watering of the soil. This will help the tubers take root faster and the plant will grow faster.
Stepchildren
After gloxinia has faded, a pair of strong stepsons remains on it. It is better to propagate gloxinia using this method closer to autumn, when the plant has stopped blooming. To do this, use a sharp knife to cut off the flower's shoots and place them in water at room temperature.
After a few days, new roots will begin to form on the shoots - this is the first sign that the flower is ready to be transplanted into the ground. The soil should be moist and loose. The small gloxinia is carefully placed in the ground and lightly sprinkled. Next, the flower needs moisture every day.
Important! If the leaves of a flower have not risen a couple of days after planting, then the flower does not have enough moisture or sun. If the leaves rose and straightened, the gloxinia took root.
Seeds
Perhaps the most difficult way to propagate gloxinia, because even experienced breeders are not always able to raise a flower from a seed. But if you need to propagate the plant in this way, it is better to select granulated seeds. Be sure to pay attention to their expiration date.
The seeds are poured into a well-drained substrate and lightly sprinkled with earth. For faster germination, the pot with seeds should be covered with a plastic bag and placed in a warm place, as if making a greenhouse. In just a couple of weeks the first shoots will appear. It is worth remembering that with this method, gloxinia does not always turn into a luxurious flower. I suggest watching a video of gloxinia propagation by seeds.
Spots appeared on gloxinia leaves
Spots on gloxinia leaves may appear from too bright lighting. Shade the gloxinia, otherwise it will get sunburn. Spots on gloxinia leaves can appear from excessive watering, as well as if you water with too cold water. Spotting of gloxinia leaves can be caused by drafts. Small spots on gloxinia leaves may indicate the presence of pests on the plant. Insecticide treatments are needed. In addition, gloxinia can be affected by various viral diseases, for example, tomato ringspot virus.
Flower maintenance conditions
As we found out above, the main reason why inflorescences die (rot, dry out) is violations in the care of the plant, which then entail the occurrence of a number of diseases and the appearance of pests. Therefore, in this section we will briefly consider the main points of growing gloxinia.
Location. The flower pot must be placed on the windowsills on the east and west sides. During short daylight hours, he is provided with additional lighting.
The optimal temperature for growing the plant is 18-20 degrees. Often in apartments it is a little higher, so the window sill is a good place for flowerpots.
Watering is carried out along the edge of the pot so that water does not get on the flower or through the tray (the pot is placed in water for 15-20 minutes, then the liquid is removed). Water once a week, spray once every three days with warm, soft water.
It is important to properly send the plant to rest. When the flower fades, they stop watering it, and the entire surface part dies. It must be placed in a dry and dark place where the air temperature should be between 10-18 degrees. Tubers can be stored in winter either in pots or placed in river sand. They need to be protected both from drying out and from excess moisture.
It is necessary to take into account the fact that young annual plants are not sent to rest. They spend the winter on the windowsill.
In February, adult tubers are planted in specially prepared soil and placed in a warm and bright place. The pot should be wide, but the depth should be average. The drainage layer is laid down, and then the soil. You can buy it in a store or prepare it yourself. Considering any gloxinia to loose and pH-neutral soil.
These are the key points that novice gardeners should know so that the capricious and demanding plant pleases the eye.
Gloxinia shoots have become very elongated
Gloxinia shoots become very elongated after wintering, when the room is too warm and there is insufficient lighting. Add lighting, periodic air spraying and wet cleaning will help reduce the temperature in the room. Strong stretching of shoots can also occur in insufficient lighting plus overfeeding with nitrogen fertilizers. Add light, do not feed with nitrogen fertilizers.
Gloxinias can elongate due to varietal characteristics; some varieties of gloxinias are prone to elongation of shoots. It is advisable to trim the elongated shoot. The tuber will give a new shoot. The cut shoot can be rooted, and it will also have time to bloom. If an extended shoot is left, it will most likely fall and take root. It will receive nutrition from its newly formed roots, and in addition draw nutrition from the tuber. A new shoot may grow on the tuber, but it will be weak, will not bloom, and the tuber will become weakened and may not survive the winter.