The plant comes from South America, from where it was brought and first propagated by the French breeder C. Plumer (XVII century), hence the name Plumeria from the Kutrov family.
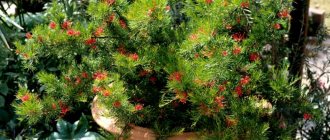
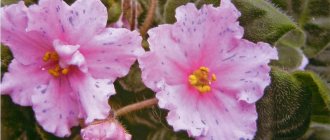
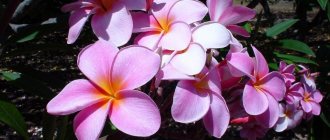
The plant is unique for its various representatives: bushes and trees. Flower growers strive to grow plumeria because of the beautiful delicate flowers of white-pink or yellow.
Flowering lasts all summer, the flowers themselves are large up to 10 cm. They are rare, because the plant grows up to 2 m, more often it can be seen in greenhouses.
Light
Plumeria loves light very much; it only needs southern windows, even in the greenhouse. It needs more than 6 hours of sun a day, otherwise the plant will not bloom. As a last resort, you can grow on the east or west side.
When it warms up, you need to take the plant outside, but getting used to direct sunlight should be gradual.
Important! Drafts and rain are excluded and should be brought into the house. From a sudden transition from the apartment to the sun, the leaves can get burned.
Pest and disease control
Plumeria is almost never affected by pests, but sometimes spider mites can be found on it. Wipe the leaves with a cotton pad and soapy water and use homemade insecticides. To prevent the problem from recurring, we recommend increasing the air humidity.
If you take a flowerpot out into the garden for the summer, inspect it at least several times a week. When the first suspicious symptoms appear, spray with special preparations.
Like all tropical plants, when overwatered, plumeria suffers from fungus. To prevent this, it is enough to follow the watering regime and occasionally carry out preventive spraying with gentle fungicides.
Photo: domashniecvety.ru
Spathiphyllum: home care, propagation and transplantation
Watering
Indoors should be watered after the top layer of soil has dried with soft water (settled). Then plumeria flowers will give you aesthetic pleasure.
In winter, reduce watering, do not overdry the soil.
Excess moisture is also harmful, so be careful when watering.
Rooting in the ground
Some plant species do not grow roots in water. They can stand in it for a month and not sprout a single root, while they will appear in the ground within a week. The general rule is this: plants from swamps and tropical rainforests take root easily in water; species from arid areas are best planted in the ground.
Petunias, large-flowered pelargoniums, fuchsias, begonias, hydrangeas, and hibiscus are rooted in the soil.
Soil for rooting
What soil should I use to root cuttings? Loose, able to retain moisture well, with neutral acidity. For most crops, a simple mixture is most often used: peat in half with coarse sand. Or other inert soil that is not prone to rotting. You can add perlite and vermiculite and coconut fiber to peat. Sphagnum moss is useful, it has disinfectant properties and retains water well. Too loose soil dries out quickly.
Soil sterility. The soil for rooting cuttings of indoor plants should not contain fungal infections and insect pests. Many flower lovers steam garden soil, fry it or freeze it. The safest thing to do is buy ready-made soil at garden centers and add roasted sand to it. This purchased land is treated with fungicides and insecticides, which reliably protects the plants for some time.
Soil acidity. The acidity of the soil affects rooting. Usually they buy soil with neutral acidity from the store. Most types of indoor plants take root best in it. Hydrangeas need acidic soil; their cuttings root most effectively in slightly acidic soil. The general rule for most plants is this: the acidity of the soil for rooting should be close to that required for an adult plant of this species, but slightly closer to neutral.
Rooting dishes
Disposable plastic cups are good for rooting cuttings. If one cutting rots, the rot will not spread to other cuttings. Through the transparent walls you can see the emerging roots. Be sure to make a drainage hole in the bottom of the cup. It is advisable to place a little perlite or pieces of polystyrene at the bottom to allow excess water to drain freely.
The downside of the cups is their small volume. If you missed a glass when watering, the cutting may dry out.
Conventional seedling boxes or special pallets (cassettes, trays) with cells are convenient for rooting a large number of cuttings. In the boxes, moisture is distributed more evenly, the cuttings are arranged more compactly and are easier to care for.
For small cuttings, plastic food containers with a transparent lid are considered the most convenient option. They are quite rigid, the lid is easy to open when ventilated, and it is easy to make drainage holes in them.
When choosing dishes for rooting, follow these rules:
- If the plant does not tolerate transplantation well, take cups;
- If there are a lot of cuttings, their survival rate is low - choose boxes or pallets.
Cuttings of citrus fruits, myrtles, and oleanders are usually planted in boxes. The crowns of these plants need to be molded and pruned, after which many branches remain, quite suitable for cuttings. Not all of them will take root, but some of them will still take root.
How to plant a cutting
The question seems simple. At first sight. Some plants have roots that grow along the entire length of the stem buried in the soil. The deeper you plant, the more roots there will be. In others, they appear only from a thickening at the cut site, and new shoots will grow from there. This place should not be very deep from the soil surface.
A universal method is to plant cuttings not strictly vertically, but obliquely, at approximately an angle of 45 degrees. Then the lower end of the cutting is not located deeply, and a fairly large part of the shoot is in contact with the soil.
Some plants (scindapsus, syngonium, monstera) have large distances between nodes; the length of the cutting can be 20-30 cm. They are unstable when planted in the ground. Tall plastic glasses or bottles with the top cut off are convenient for them. The soil is poured onto the bottom of the vessel, and the walls serve as support.
Some indoor vines are capable of growing aerial roots; they take root easily when in contact with the ground. Cuttings of Wood's Ceropegia and Philodendron can be rooted if you simply place them on moist soil, pressing them down with pebbles at the nodes, and spray them regularly.
Air humidity
Systematic spraying is recommended during active growth. Soft water that has stood for a day is ideal for watering and spraying.
To increase humidity, a little small pebbles (expanded clay) are poured into the pan, after which water (soft) is poured.
Important! The bottom of the container should not come into contact with the water in the pan. You need to spray the plant carefully; flowers do not like water.
Caring for plumeria at home
Provided proper maintenance conditions are met, frangipani is not too demanding to care for.
Watering
Water the plant with soft water that has settled for at least a day. In winter, watering is required less often, and in summer - more often, but in any case it is worth monitoring the condition of the soil.
It should not be allowed to dry out, nor should it be over-moistened.
The amount of watering also depends on the amount of sunlight - more water is required on cloudy days than on sunny days.
Hydration
To maintain the required humidity, it is recommended to regularly spray plumeria with a spray bottle. In this case, the water used is the same as for irrigation - settled and soft.
During flowering, spraying is prohibited - flowers cannot tolerate drops of moisture on the petals. In such cases, moisture can be achieved by placing fresh moss or expanded clay watered in a tray around the pot.
Fertilizer
Fertilizers are applied to the soil along with water for irrigation. In the spring, when plumeria acquires fresh foliage, fertilize with mineral complexes for flowers a couple of times a month.
In the summer, phosphorus fertilizers are added, and in the fall, the frequency of fertilizing is reduced. In winter, during the dormant period, feeding is not needed.
Rest period
In winter, plumeria enters a dormant period when it loses its foliage and goes into a short hibernation. It lasts about a month, depending on the plant variety, after which active growth of young greenery begins again. During this period, watering should be done rarely and with a small amount of water without fertilizers, and falling leaves should be removed in a timely manner.
Quiet time
In apartments, plumeria needs rest for 3-6 weeks in winter. The leaves fall, and in the spring a new stage of growth and flowering begins.
Important! The poison in plumeria juice, if it gets on the skin, can cause severe irritation. Immediately hold the sore spot under running water for a long time.
When is it necessary to change the soil?
In order for Schlumbergera to actively grow, develop and delight with abundant flowering, it is periodically necessary to change the soil in which it grows. Young plants are usually replanted annually, adults - once every 3 years. Decembrist, which has reached a large size, is replanted once every 5 years.
Also, the soil must be changed immediately after purchasing a zygocactus at a flower shop. The substrate in which the plant is placed is intended for transporting the flower, but not for its permanent location. The soil is absolutely devoid of any nutrients, and a plant that remains in it for a long time is in danger of dying.
A Decembrist who suffers from infectious diseases should definitely change the substrate. Infection with fusarium, phytium, and late blight occurs most often through an infected substrate.
If signs of damage to the flower by fungal infections are detected, the zygocactus should be urgently transplanted into new soil, and the root system and the entire plant should be treated with special preparations.
Transfer
In March-April, a young tree is replanted every year, only an adult tree is replanted after 2 years. Choose a container slightly larger than the previous one (2-3 cm). When there is no suitable pot, you need to trim the roots by 5 cm.
The bottom of the container is covered 1/5 with drainage (broken brick, expanded clay or eggshells). Then add the mixture: peat, turf, humus and sand (1:2:1:1).
How to grow plumeria from seeds step by step
Preparing seeds for sowing
Plumeria seeds are lionfish seeds that look like maple “spouts.” The seed is quite large and easy to work with. The seeds can be light brown or dark brown. Both are acceptable. The dry light tail is very fragile. In nature, it serves so that the seed can be carried by the wind to a new place of residence. When sowing at home, the presence of a tail is not important. Therefore, if the tail crumbles during transportation, it’s okay: this does not affect the germination of the seeds in any way. When sowing at home, there is only one benefit from the tail: it helps to determine where the top and bottom of the plumeria seed are. The tail is the top.
This is what plumeria seeds look like.
Plumeria from seeds at home
Plumeria seeds
Plumeria seeds can be sown directly into the ground, but we recommend pre-soaking them in warm water (around 30 degrees) until they swell. For what? The seeds arrive from the tropics well dried to avoid rotting in transit. Therefore, in order to speed up the slow germination process, you can stimulate the seed a little.
How long and how to soak? From several hours (3-6) to several days (2-3) is enough, at your discretion. For us, the criterion that a seed is ready for planting is swelling and slightly increased size. You can add a stimulant to the water (for example, “Zircon”), but the stimulant does not globally affect the rate of seed germination.
Swollen plumeria seeds after soaking
It is convenient to germinate on a damp cloth or cotton pad. Because the seeds are large enough, the fibers of the cotton pad do not interfere, as happens with smaller seeds. Place a damp cloth in a saucer or container and place it in a warm place. A radiator is not a good idea because a hot radiator can cook the seeds. A temperature of 42-45 degrees is enough - and the risk of losing a seed increases greatly. You can use reptile mats, or place the container not directly on the radiator or heater, but at some distance. The most comfortable temperature for seed germination is 30-35 degrees .
Planting seeds
What soil should I choose for plumeria?
You can plant seeds in: Soil - it is better to choose slightly acidic soil; A universal one is also suitable - for example, Terra Vita, Aurica Gardens, etc.
You can also add perlite and vermiculite to the universal soil in approximately a ratio of 3:1:1. Vermiculite slightly acidifies the soil - this will not harm plumeria.
Perlite – it is good to germinate in perlite, but perlite itself does not have any nutritional elements, so after the seedlings emerge, the seedlings will need to be transplanted into the ground. In general, young plumeria seedlings are of good size, so there will be no problems with replanting.
Lechuza or other granules are already nutritious soil, so replanting after germination is not required. For our taste, most granules are too large for seed germination, but in general the results of germination in granules are usually quite good. Try it.
How long does it take for plumerias to sprout? Quite long - on average 2-3 weeks. Therefore, do not panic if there are no shoots after 2-3 days. The seed should be planted vertically, with the tail facing up. The seed may stick out outside; the seed itself needs to be buried about 1.5 cm and sprinkled with soil (perlite, granulate) on top.
A plumeria seedling has appeared. Now you can remove the film
Place the planted seeds in a greenhouse - you can simply cover the top with film or a lid - and place it in a warm place. Recommendations for choosing a warm place are the same as for germination: do not overheat! Light is not necessary at this stage - you don’t have to add additional lighting, you can place it away from the window. Be sure to ventilate the greenhouse 1-2 times a day for a few minutes to avoid too much air pollution. At the same time, keep the soil moist.
Plumeria shoots
Shoots appear in 2-3 weeks. You can help the sprouts free themselves from the brown seed film if they do not get out of it on their own. If the peel is difficult to remove, wet it with warm water using a cotton pad. After a few minutes the skin will come off easily.
Seedling care
How to care for plumeria seedlings? After the shoots have appeared, there is no need to make a greenhouse anymore. Now light is very important for the plant. Without light, the seedlings will stretch out and be flimsy. If the season is warm and daylight hours are long, nothing additional needs to be done. It is enough to place the seedlings on the window. If the season is cold and there is little light, it will be optimal to illuminate the seedlings with a phytolamp or an ordinary white spotlight for 10-12 hours a day. The optimal temperature at this stage is 28-32 degrees. You can use bottom heating with mats for reptiles, and a lamp will add a few necessary degrees from above.
A young plumeria seedling against the background of older plants Plumeria from seeds, age 1 month from the date of sowing
In the first month, you don’t need to use fertilizers, but good results are achieved by using stimulants, in particular, HB-101, succinic acid, and “Athlet.” Two treatments - once every 2 weeks - will be enough.
From about a month you can start feeding with fertilizer. At this stage, it is important for seedlings to develop the root system (phosphorus, element P in mineral fertilizers is responsible for it) and increase green mass (nitrogen, element N is responsible for it). Therefore, choose fertilizers with an NPK ratio of 20:20:12, 20:20:20. These are approximate figures, just pay attention to the ratio - either equal or more nitrogen and phosphorus than potassium.
You can feed - leaf by leaf - i.e. spraying - watering.
Frequency – once every 2 weeks. You can alternate - a week of spraying with fertilizing, a week of watering with fertilizer.
Plumeria from seeds
In general, this fertilization scheme can be maintained continuously until the seedling is one and a half years old, if your plumeria lives in “eternal summer” - with additional lighting and reheating. If you give the plant a cold winter - the temperature is below 22-25 degrees and without additional lighting, then stop feeding during the winter. At this time, the plant may shed its leaves - this is a normal reaction to coolness and lack of light, there is no reason to panic. In the spring, with rising temperatures and longer daylight hours, plumeria will again grow foliage.
From about one and a half years, you can increase the potassium content in fertilizers. Fertilizers with a minimum nitrogen content and a high potassium content, for example, NPK 8:20:26, are suitable. It is not necessary to look for these exact numbers. Just try to follow the logic: less nitrogen (first number), more phosphorus and potassium (second and third numbers). As a rule, mass-brand fertilizers for orchids (for example, Agricola) have a suitable ratio of elements.
How often should seedlings be replanted?
Transplanting a seedling from a 100 ml glass into a larger pot (200 ml)
It is worth replanting plumeria seedlings as needed, when you see that the current container is becoming cramped: the soil constantly dries out, the plant is inhibited in development, the leaves become small. It’s better not to let it get to that point and work proactively.
It is convenient to germinate seeds in 100 ml disposable cups/transport containers. This volume is enough for a couple of months, then it is better to transplant the seedlings into a larger pot.
Plumeria from seeds, 4 months old
For replanting, you can use 200 ml disposable cups, but this is not very convenient, because the root system of plumeria is fibrous, i.e. It grows not in depth, but in breadth. It is better to select a pot of approximately the same diameter and height, even if it is the same volume of 200 ml. This way the roots will develop the soil evenly.
Plumeria root system
Plumeria root system
The next transplant will be required at approximately 6 months. Use the repotting to add a slow-release fertilizer to the pot. This may be osmocote or similar granules that gradually release beneficial substances into the soil. If you are using a slow-release fertilizer, you can omit watering with fertilizers to avoid overdose, but leave foliar feeding.
Plumeria transplant
Propagation by cuttings
In the last weeks of winter, cuttings can be carried out in early spring. Cut only at an oblique angle. Then wet the cut with water and in a solution, which activates the formation of roots.
The pot is first filled with the mixture (for replanting), 1/3 with perlite, then again with the mixture.
When planting, the cut of the cutting should be in perlite.
The optimal temperature for the development of a young plant is +25-28o C. Good lighting and maintaining stable heat are a must. A fluorescent lamp will do.
Muraya: types, description, care and cultivation at home. 140 photos and video instructions for maintaining a bushTea tree: growing at home. Indications and contraindications for the use of medicinal plants (115 photos + video)
- Clerodendrum: proper care at home and the nuances of maintaining a shrub (130 photos + video)
Leaves appear after 10-12 weeks, then watering is increased. You will be able to see blooming plumeria in a year, sometimes earlier.
When will plumeria bloom from seeds?
Plumeria from seeds is ready to bloom in about two years.
However, this does not mean that it will bloom in two years. It happens that plants refuse to bloom after 5 or 7 years. Why? This means only one thing: plumeria does not like growing conditions, namely:
– temperature regime, – light regime, – soil, – watering.
The reason for failure to bloom may be pests - most often spider mites or mealybugs.
Let us repeat again: from a biological point of view, under suitable growing conditions, a plant from seeds is ready to flower in two years. If you grow other tropical plants, for example, orchids or adeniums, and know how to warm up and add additional light to plants in the cold season, then the chances of getting flowering plumeria from seeds 20-26 months after sowing are high.
Varieties
Plumeria alba is found in the Antilles, up to 10 m tall, has fragrant flowers and narrow leaves.
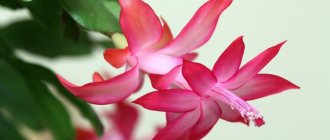
Red plumeria grows in Mexico and Venezuela up to 5 m with larger leaves and flowers of various colors: snow-white, pink, bright yellow and red.
An exotic tree with delicate flowers of various shades and a wonderful aroma will bloom for a long time.
The photo shows plumeria of different types and varieties.
Selecting a variety and purchasing seeds
Many online stores will gladly sell you the seeds of this beautiful plant. They remain viable for a long time, so there is no need to look for a fresher product. Which variety should I choose? Are all varieties of plumeria suitable for keeping in an apartment? Choose your plumeria based on size, desired shade, intensity of flower aroma and leaf tone.
Plumeria flowers lack nectar. Insects, deceived by the appearance and aroma of flowers, do not find food in their corollas.
You can adjust the size of the plant by pruning the roots and shaping the crown. Therefore, you should not be afraid that the flower will grow excessively. Nevertheless, there are dwarf varieties of plumeria, which are more convenient to maintain than full-sized plants.
Dwarf and semi-dwarf varieties of plumeria:
- Plumeria alba (white);
- Plumeria cubensis (Cuban);
- Plumeria obtusa var. sericifolia (silk-leaved);
- Plumeria pudica (bashful);
- Plumeria rubra Aphrodite (red Aphrodite);
- Plumeria stenophylla (narrow-leaved).
All varieties of plumeria bloom with fragrant flowers.
It is known that white and yellow plumeria flowers have a stronger scent than purple, pink and red ones.
The following varieties of plumeria have white, orange and yellow flowers:
- Plumeria rubra JL Pupukea Crepe;
- Plumeria rubra JL Rim Fire;
- Plumeria rubra Summer Moon;
- Plumeria rubra Sweet Fragrance;
- Plumeria rubra Vanilla Pudding;
- Plumeria rubra Cindy Moragne;
- Plumeria rubra Moragne #23;
- Plumeria rubra Beautiful Thailand;
- Plumeria rubra Orange Unique;
- Plumeria rubra Star Dust.
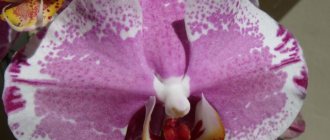
Plumeria with flowers of red, pink, purple shades
If you want to grow a plant not only with beautiful flowers, but also with beautiful white-green or yellow-green leaves, choose a variegated plumeria variety.
- Plumeria rubra Loi Kratong;
- Plumeria rubra Luan Manee;
- Plumeria rubra Passion;
- Plumeria rubra Petra;
- Plumeria rubra Sangwaan Tabtim;
- Plumeria rubra Silk Road Spice;
- Plumeria rubra 4646;
- Plumeria rubra Allure;
- Plumeria rubra Aphrodite;
- Plumeria rubra Charlotte Ebert;
- Plumeria rubra Chompoo Wang;
- Plumeria rubra Compacta Rosa;
- Plumeria rubra Courtade Pink;
- Plumeria rubra Deep Desire;
- Plumeria rubra Delicate Bouquet;
- Plumeria rubra Festival;
- Plumeria rubra Fire Rain;
- Plumeria rubra Francoise;
- Plumeria rubra Fujisan;
- Plumeria rubra Hin Muang;
- Plumeria rubra Muang Ongcarak;
- Plumeria rubra Purple Serendipity;
- Plumeria rubra Siam Lavender.
Garlands of plumeria flowers accompany all significant events in the life of aborigines in tropical countries: births, marriages, funerals. In Bali, plumeria flowers, as an integral attribute of funerals and weddings, symbolize the transition from life to death and vice versa. Therefore, the plant is planted at temples and is called a temple tree.
Not all varieties of plumeria are listed: there are many more. Selection work is constantly being carried out to develop new hybrids. Order seeds from an online store, focusing on advertising catalogues, but don’t be too upset if the plant does not grow very similar to the chosen picture.
Spectacular specimen with yellow-green leaves
Photo of plumeria
General description and types
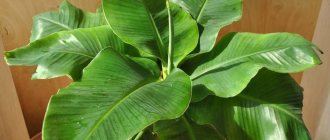
The beautifully flowering tropical plumeria tree belongs to the Kutaceae family; it can reach large sizes, up to 2 meters in height, if it is provided with proper quality care. The flowers exude a pleasant scent throughout the summer: a mixture of the aroma of gardenia, spicy spices, jasmine, lily of the valley, and citrus. This tandem formed the basis of many perfume products.
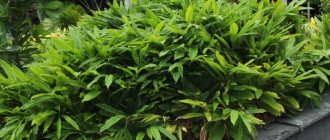
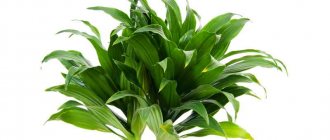
The foliage is collected in rosettes and has a bright green color. Suitable for making wound-healing ointments, natural aphrodisiacs, antipyretics and laxatives, and natural anti-wrinkle cosmetics.
In its natural environment, plumeria is found in Laos, Vietnam and Mexico, the tropical islands of the Pacific Ocean. In Thailand, it is considered a sacred flower and is called “temple magnolia.” This is a branched shrub or tree with elongated oval or round leaves, bare grayish branches, sophisticated and exquisite five-petaled flowers with one-color or two-color petals: white-pink, white-red, white-yellow, white-lilac. In India it is considered the “green favorite” of Krishna, and in Peru it is still used for religious ceremonies. In Laos and Bali, plumeria is the national flower.
Breeders have identified more than 65 species of this ornamental plant, but only a few plumeria have become widespread in indoor floriculture:
- Red.
- White.
- Obtusa.
- Dulled.
Red White Obtusa Dull
Insects love the sweet scent of the flowering shrub, but it does not produce nectar or pollen. At the end of flowering, fruits are formed in the form of pods with seeds inside. They are dried and used for propagation.
When damaged, the leaves release a very poisonous juice that looks like a white viscous liquid and can cause severe skin burns. This is important to consider when growing plumeria at home. It is better to keep it away from pets and small children and carry out pruning with gloves.
Lighting and temperature
To successfully cultivate a tree in a greenhouse or in an apartment, you will need an average air temperature of +20-25 degrees. In winter, coolness negatively affects the crop; the leaf plates begin to darken, become thinner and elongate. You can’t leave the pot in a draft; the beautiful flowers simply won’t open.
The level of illumination has a great influence on the development of culture. Plumeria loves bright sunlight, under which active photosynthesis occurs. You can safely place it on a southern or eastern window sill and not leave it in the shade at lunchtime. In the summer heat, the tree is usually placed on an open balcony or terrace, and in autumn and winter it is provided with additional lighting using a special phyto-lamp.