For beginning gardeners, a violet rooted from a leaf is akin to a miracle—one minute there was just one leaf, and now there is a whole flowering bush.
Few people know how to grow a full-fledged plant from the leaf of their favorite violet (Saintpaulia). Often the planting material turns black, rots, or does not want to take root. To avoid this and achieve positive results, you must strictly follow the planting and rooting technology.
The most popular methods of propagating Saintpaulia
- propagating Saintpaulia by leaf or part of it is the easiest and most reliable way to get yourself any specimen you like;
IMPORTANT! Some varieties (chimeras) may not retain their varietal characteristics when propagated by leaves.
- propagation of violets by dividing the bush . This method is suitable for any variety of Saintpaulia. Rooting rosettes almost always ends with the rooting and survival of the seedling;
Reproduction by dividing the bush.
- propagating a plant with a peduncle is the most labor-intensive method. Suitable when the characteristics of the variety are not preserved when propagated by leaves.
Features of flowering, growth and reproduction
The violet is not capricious, it takes root quickly and produces several children . But from this variety you can expect sports with a slight pink tint of flowers. Therefore, you should wait until all specimens bloom.
Varietal characteristics are transmitted well , the percentage of genetic mutations is low, no more than 10%.
Propagated by leaf cuttings and side shoots. 10-12 months to grow a young plant .
Peduncles are tall, branched, thin. The buds hold well. The variety always produces bouquet flowering . One bud lasts more than one month.
How to root violet leaves quickly and easily?
The best time for this activity is the warm season - spring or summer.
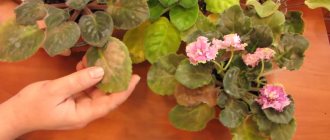
The choice of leaf that we root must be approached in detail:
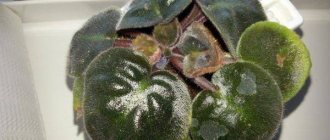
- the leaf should be healthy, uniform, bright in color ;
- It is better to take a leaf from 2-3 rows from the center of the flower .
It is better to cut the leaf stalk with a sharp sterile object (scalpel, knife) at a distance of 5 mm from the rosette. The cut should be clean, at an angle of 45 degrees .
The cut of the mother plant should be treated with crushed activated charcoal or charcoal to prevent rotting.
The stem of the cut leaf should not be longer than 40 mm , as it will be difficult for it to take root.
Before planting the material, it needs to be prepared :
- If more than 2 hours have passed between cutting and planting the cutting, it should be kept for a couple of hours in warm water with a drop of potassium permanganate;
- Some gardeners advise disinfecting planting material using a bleach solution: 50 ml of warm water per 5 ml of bleach. Leave the cutting for 5 minutes, then rinse it with warm water;
- If the cut of the cutting does not inspire confidence, you need to refresh it by cutting off ½ cm;
- Professional flower growers place prepared cuttings in Epin solution (Epin-extra) at the rate of 1 ml of product per 2 liters of warm water for 10 hours. The solution helps the plant survive stress safely.
This is followed by direct planting of the material into soil or other soil . For this you will need:
- a couple of small disposable cups;
- boiled water at room temperature;
- drainage material (foam plastic, expanded clay, sphagnum moss, perlite);
- priming;
- scalpel or sharp knife;
- the planting material itself.
Prepare everything you need right away.
Leaf planting process:
- Make drainage holes in one of the cups;
- Spread drainage evenly onto the bottom;
- The next layer is soil, it does not need to be compacted, just water it lightly;
- Plant the cuttings to a depth of 10 mm, cutting off 1/3 of the upper part of the leaf for earlier shoots;
- Place one cup in another, without holes.
Next, the glass should be covered with film to create a greenhouse effect. The greenhouse should be ventilated periodically to prevent mold from growing in it.
IMPORTANT! The cups should be kept in a warm place, such as on the refrigerator, but not exposed to direct sunlight.
How long a leaf takes root depends greatly on the care and variety, but usually after 5 weeks you can expect the babies to appear.
If there is no cutting
It happens that during transportation the petiole of a leaf breaks off. We tell you how to root a leaf without a cutting:
- prepare a glass with holes, pour drainage into the bottom (in the cold season it is better to use polystyrene foam for these purposes, as it does not heat up);
- pour moistened soil onto the drainage. When planting a leaf without a petiole, the soil should be especially fluffy and crumbly;
- the place where the petiole is attached should be generously powdered with activated carbon or charcoal powder;
- deepen the sheet 10 mm into the ground and support it on both sides with matches or toothpicks so that it does not fall;
- For successful rooting of the leaf, loose soil is very important, so you should not water it ;
- Cover the glass with film or a transparent lid, place in a warm place and wait for germination.
If the rooting of the leaf is successful, it will produce many more children than its counterpart with a petiole.
From a fragment of a leaf plate
If a Saintpaulia leaf breaks during transportation or you need to get the maximum number of children from one leaf, you can divide the leaf into several fragments. Depending on its size, the leaf plate can be divided into 3-6 parts.
The sheet is divided into no more than 6 parts.
After each cut on the leaf, the cutting tool should be disinfected , especially if the leaf is not fresh.
If there are fragments with rot on the plate, they must be carefully cut out, and the leaf sections should be disinfected with a solution of potassium permanganate.
Sprinkle the cut fragments with crushed coal and begin planting. Instructions on how to root with leaf fragments:
- Make drainage holes in a small (0.2 ml) plastic cup and fill with a layer of drainage and soil. a mixture of sphagnum and vermiculite to germinate leaf fragments - sphagnum is known for its antiseptic properties. This mixture turns out loose and crumbly, which is what is needed for plate fragments;
- The mixture must be slightly moistened with warm water or Fitosporin solution (use options and preparation method are written on the package);
- Treat the sections of the plate with Kornevin powder and carefully deepen them 10 mm into the ground;
- Cover the glass with film and do not forget to regularly check pieces of leaf for mold. If mold is found, there is no need to cover the glass;
- Place the glass in a warm place and wait for germination.
ADVICE! When we root the leaves, it is advisable to make an inscription on each glass about the variety of violet (or where it was “obtained”) and the date of planting in order to know the approximate date of appearance of the children.
Violet flower - description
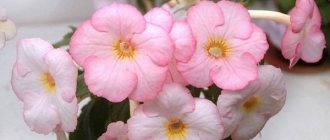
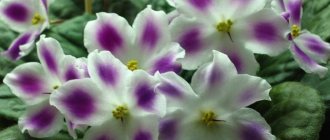
The violet is a low bush with fleshy leaves and a very short stem. The plant blooms with small flowers, which are collected in brushes. Today there are a large number of their colors. They can be either plain or variegated:
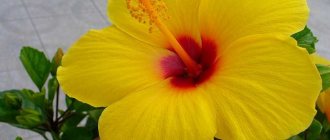
· bordered violets have a bright border along the edge of the inflorescence;
· there are species with fancy colors, on the entire surface of the petals of which there are dots or specks of a different color;
· chimera violets are distinguished by a bright line in the middle of the petal.
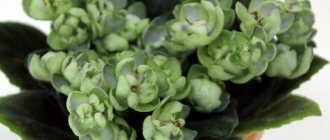
These domestic flowers are also distinguished by the structure of the flowers. They can be simple, semi-double and terry. The latter have petals arranged in several rows, thereby forming rather large inflorescences.
Rooting methods
There are several methods for properly rooting violet cuttings.
Peat tablets
Rooting the leaf in a peat pellet almost always guarantees success. The peat tablet has a loose structure that is not susceptible to rotting. The tablet is also good for subsequent replanting into a flower pot - the delicate roots are not injured and the plant does not experience stress.
Before planting, the tablet is placed in a plastic cup and generously filled with warm water. When the tablet is saturated and swells, you can plant a plant in it.
It is better to cover the container with the tablet with film , periodically ventilating and watering as needed.
Rooting in a peat tablet.
Some gardeners remove the encircling mesh from the tablet, and the contents are moistened and mixed with sphagnum and vermiculite. They claim that this mixture is more balanced for rooting cuttings.
Zip bags
Plastic bags with a zipper are convenient because they save space in the room , but getting sprouted violets out of them without crushing them is somewhat problematic. Before rooting leaves in bags, make sure you have the skill to plant them correctly.
Before planting, fill the zip bag one-third full with soil, lightly moisten it, and plant the cutting. There are no holes in the bag, so the soil in it does not dry out due to condensation. If necessary, the package is opened and ventilated . The bags need to be stored in a warm place; this determines how long the leaf takes root.
Rooting in packages.
You can string them on hanging wire hooks - this way they won’t take up much space and won’t get in the way. Some gardeners prefer to put a cup in a bag, and then root the cuttings in it, so that when removing it, they do not damage the rooted leaves.
This method is quite simple, the result is successful in 80% of cases.
In the ground
The most popular method of propagating Saintpaulia. It is better to take a ready-made mixture for Saintpaulia as soil. If this is not possible, you need to add peat in a 1:1 ratio and a little sand to ordinary soil.
The procedure itself:
- Pour a layer of accessible drainage into a small disposable glass, and pour the prepared mixture onto it;
- Make several holes in the bottom of the cup;
- Moisten the soil with warm boiled water;
- Place the cutting at a depth of 10 mm (slightly at an angle) and sprinkle the hole with soil. Do not compact!
- Place the glass in the second one, without holes, cover the entire structure with film and put it in a warm place.
ATTENTION! Various pathogenic microorganisms like to grow in the soil, so you need to carefully monitor your pets - the slightest signs of decay will require immediate intervention.
In water
Rooting in water is the easiest of all methods:
- boiled water at room temperature into a clean bowl (preferably dark glass) ;
- To prevent acidification, you can add a piece of charcoal to the water;
- The optimal cutting size is 5 cm . If there are several cuttings in a container, they should not interfere with each other;
- The container can be covered with paper and secured with an elastic band;
- Make holes in the paper for the cuttings - the leaf plate should not be in the water, and the tip of the petiole should not touch the bottom of the dish;
- When the roots appear, the paper cover should be cut.
Rooting in water.
If the cut of the cutting turns black, you need to trim it back to healthy tissue. After 2-3 weeks, when the cuttings have roots 10 mm long, it is better to plant it in the ground, in a greenhouse and wait for the children. If you leave the cuttings in water, the babies will be weak and fragile.
In vermiculite
Vermiculite has a lot of useful properties for gardeners. Rooting Saintpaulia cuttings in it gives a positive result of 98%. Grown-up babies are strong, dense, have excellent leaf mass and are born one and a half times faster than in other types of soil.
Vermiculite does not harbor pathogenic microflora and is capable of maintaining stable humidity .
To plant a cutting, you need a small disposable cup or other transparent container (holes in the bottom are not needed):
- Pour a layer of vermiculite into the container and moisten it with warm water;
- Make a hole in the ground, carefully place the cutting in it, dig it in and lightly press the soil;
- Cover the container with film and put it in a warm place (avoid direct sunlight to avoid burns on the plant).
If condensation collects in large drops, it is better to remove it so as not to injure the cutting. If they are not there, the greenhouse can not be opened until the children appear.
In hydrogel
Hydrogel contains a number of advantages over other types of soil:
- reduces the amount of watering several times;
- guarantees the survival of plants;
- simplifies the transplant process.
A gram of hydrogel absorbs 0.2 liters of water. Before planting, it should be poured into a glass (about 1 tsp), filled with warm water or Fitosporin solution and allowed to swell. There should be free, unabsorbed liquid left in the glass. Place the cuttings in the granules and cover the glass. Water must be added regularly as it is absorbed.
Rooting in hydrogel.
After 3 weeks of living in a warm place, the cutting will produce roots that will grow into the hydrogel granules and will be protected by it like a capsule. When the time comes to remove the babies from the mother’s leaf, you can also add a liquid-saturated hydrogel to the soil for them.
ADVICE! It is better to take granules of the smallest size and uncolored.
Using sphagnum moss
Sphagnum moss is found on sale live and dried. Flower growers prefer live : it is loose, has antimicrobial properties and is hygroscopic. A plant rooted in moss produces a strong, dense root system. Sphagnum moss can be stored for future use by freezing it.
Live moss is placed on the bottom of the cup (about 1/3), the Saintpaulia cutting is placed in the moss so that the cut does not rest against the bottom of the container. The top of the glass should be covered with film or a lid. Humidity in the greenhouse should be maintained by regular watering.
Cutting in moss.
After 2 weeks, the cuttings should acquire roots. A cutting rooted in sphagnum produces a large harvest of strong and healthy children.
Sphagnum can also be added to the substrate when transplanting adult violets; they respond gratefully to its presence in the soil.
In sand
Sand for rooting violet cuttings is good because it does not retain excess moisture . It is also loose and soft. If you mix it with vermiculite in a 1:1 ratio, you get an excellent mixture for germinating Saintpaulia cuttings:
- Make drainage holes in the cup and add a layer of drainage;
- Pour in a mixture of sand and vermiculite, moisten with warm water;
- Place the cutting in a 15 mm hole, heat up the soil without compacting it;
- Place the dishes in another glass and cover;
- Place the greenhouse in a warm place, periodically watering and ventilating it.
Rooting in the sand.
Rooting violet cuttings in a zip bag
Propagation of violets by leaf cuttings by rooting them in the ground is more effective. This is understandable, because from the first minutes of rooting the cutting adapts to the conditions in which it will grow. As soon as the roots appear, they immediately receive nutrients from the soil, and there is no need to replant - and this is extra stress for the plant. But this method requires space to place containers with cuttings. And such a luxury as free space is just a dream for many violets. Zip bags are an excellent solution to this problem.
Germinating cuttings in zip bags will allow you to root a large number of varieties without taking up much space. Everything is extremely simple - pour just a little damp soil into a zip bag and place the cutting in it. For 1 cutting you will need no more than a teaspoon of ready-made soil mixture. Close the lock and wait for the roots to appear. Zip bags are convenient because they can be placed anywhere on a shelf or window sill, and, if necessary, hung, this will not affect the rooting process in any way. Cuttings in zip bags need to be watered extremely rarely. After 10-20 days you can see the first roots. When the roots get stronger (about a month), transplant the cuttings into 200 ml plastic glasses.
Possible problems and their solutions
When rooting Saintpaulia cuttings, you may encounter the following problems:
- the violet leaf rots - remove the stalk, cut it to living tissue and dip the cut in Kornevin. Pour warm water into a clean bowl, dissolve 1/3 of an activated carbon tablet in it and lower the handle so that the cut does not touch the dish;
- the rooted violet leaf has lost its turgor - you should cover it and keep it in a greenhouse for some time until the turgor is restored;
- the rooted leaf has broken - continue to care for the “stump” as before. There is a high percentage that children will still appear. And although they will be weaker, time and care will correct the situation. A piece of leaf can be left for rooting;
- the rooted leaf has turned black - this can happen for two reasons: excess moisture and sunburn. If the leaf can still be saved, remove it from the window and open the greenhouse. If possible, cut off the rot to healthy tissue. If you couldn’t save the sheet, analyze your mistakes for the future.
IMPORTANT! The diameter of the container for cutting should not exceed 50 mm!
Propagation of violets by leaf
This method of reproduction has two options:
1. A carefully cut leaf is placed in a small container with substrate. The pot is covered with a transparent bag or glass jar. As a result, a mini greenhouse is formed in which the leaf will take root well and give roots. The greenhouse must be opened daily for ventilation. It should not be exposed to sunlight. As the soil dries, the leaf is watered. When new leaves appear, the bag is removed.
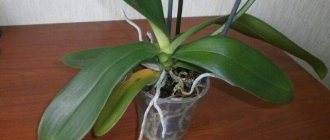
2. A cut leaf with a long petiole is placed in a small container with water, where it should sprout roots after a while. As soon as they reach about one centimeter in length, the leaf can be planted in a pot with substrate.
For propagation, you need to choose healthy large leaves from the middle row of the bush. From one leaf you can get several rosettes.
Information for beginning gardeners
When propagating violets with leaves, beginning gardeners most often have the following questions:
- use of Kornevin: to root the cuttings, you can use a solution of the drug - a pinch per ½ liter of water. The same solution can be watered on a plant planted in the ground. You can also dust the cut of the cutting with Kornevin powder, but some delicate varieties of violets can get a chemical burn;
- the leaf has taken root, but there are no children: perhaps the children cannot overcome the thickness of the soil and they need help. Another option is to stress the cuttings: take them out of the greenhouse and cut off 1/3 of the leaves, most often this helps;
- rooting Saintpaulia cuttings in winter : experienced gardeners root violets all year round. If the window sill is cold in winter, you can simply put foam on it. Cuttings planted using technology will produce new plants both in autumn and winter.
Reviews about violet
Ekaterina, Voronezh: “My violet was flawless until a certain age. When she matured, she began to lengthen and twist the petioles, and turned into a real disheveled mess. To correct the situation, I stripped and transplanted the five into a pot.”
Maria, Moscow: “The rosette is even and beautiful. Probably, such a line came across. But at the same time it grows to large sizes. It produces a lot of flower stalks, I really like the variety.”
Care Tips
- never place Saintpaulias in direct sunlight;
- in the case of violets, it is better to “underwater than overwater”;
- babies can be separated from the mother leaf when their growth has reached 1/3 of the plate;
- To prevent flowers from stretching out in winter, they need additional lighting;
- Every 3 years the plant needs to be renewed.
If something doesn’t work out, don’t give up on floriculture, try it, and everything will definitely work out!
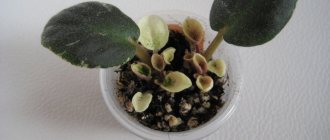
What to do with the kids?
Babies on rooted cuttings appear in about a month and a half. When they get stronger and reach a size of 3-5 cm, they need to be carefully separated from the mother leaf and planted in 100 gram plastic cups. For the first time, this volume of soil will be quite enough for them. The children should be separated in such a way that each child has roots.
It happens that not all babies are the same size. In this case, you can separate larger specimens and leave the small stuff with the parent leaf for growing. After all the children have been separated, the cutting can be replanted to grow new children - it is quite possible to get a second offspring if the leaf was initially strong and healthy.
As the children grow, they should be transferred to larger containers. During all manipulations, starting from rooting the cuttings, it is important not to forget to label the violet variety so as not to get confused in the process.
In conclusion, it is worth noting that propagation of violets by leaf cuttings is not suitable for all varieties of this plant. Chimera violets should not be propagated in this way. The leaves, of course, will produce babies, but the flowering will have nothing to do with the mother plant. As is the shape of the leaves. To preserve the characteristics of the mother plant, chimeras reproduce exclusively by rooting stepchildren.