How do you care for a flower in a store?
When choosing an azalea in a store, it is important not only to choose a healthy plant, but also to ask the seller in detail about what kind of care it was provided with . This is necessary to create the most comfortable conditions for the flower immediately after the move. In addition, having advance information about the nuances of care, you can always predict the prospects for the successful adaptation of a particular plant.
As a rule, azaleas are delivered to the store in small plastic containers filled with a special nutrient substrate that can fully provide the plant with nutrition throughout its sale. Sellers can only provide the plant with a comfortable temperature regime, proper watering and sufficient humidity.
Important! However, some unscrupulous supplier-manufacturers place young rhododendrons in obviously low-quality “poor” soil and “drive out” the buds by using specialized chemicals.
In such a situation, the azalea, which is actually dormant, releases buds, throwing all its strength at it, while its root system begins to seriously lag behind in development. In most cases, specimens treated in this way are doomed to death, so if you purchase them, you need to take a serious approach to “reanimating” the depleted plant.
In order to fully enjoy the beauty and long life of the purchased azalea, you should carefully study the plant before purchasing :
- The planting container should not be too spacious or too cramped for a particular specimen. The plant should sit fairly tightly in the bowl and not wobble.
- There should be no plaque or mold on the surface of the soil, as well as on the bottom of the pot. The soil should not emit an unpleasant odor.
- The soil should not be too dry or too wet, otherwise you risk purchasing a plant with an injured root system.
- Large dark green leaves may indicate overfeeding, so it is best to choose a bush with small light green leaves.
- There should be no visible signs of pest damage on the back of the leaves (cobwebs, spots, insects, etc.)
It is better if the plant is just picking up buds or is already faded, because specimens arriving in the active flowering phase adapt to new conditions longer and more painfully .
When purchasing, it is best to give preference to medium-sized azaleas, because... a specimen that is too large will take a long time to adapt to new conditions, while a very small and poorly formed shrub may subsequently prove unviable.
Where and how much can you buy rhododendron?
Indoor varieties of Rhododendron are a frequent guest on the shelves of flower shops, so purchasing a miniature shrub for your collection will not be difficult .
You can choose a suitable plant either in one of the commercial outlets in the city, or directly from the manufacturer, at a thematic exhibition, or “from hand”, having studied numerous offers on private advertisement sites on the Internet.
Reference! The cost of an indoor azalea in Moscow and St. Petersburg can vary from several hundred to several thousand rubles, depending on its size and variety.
Useful properties of azalea
The main advantage of the plant is that it literally “sucks” all harmful substances from the air. Azalea is placed in new houses, rooms where there was a sick person. The plant is necessary in offices with modern furniture and gadgets.
The popular bookmaker has released a mobile application for Android, you can follow the link absolutely free.
In Japan and China, where the exotic comes from, all animals avoid it. Azalea juice is poisonous. Andromedotoxin affects the gastric mucosa and affects the nervous system. If a child or animal is poisoned, vomiting and diarrhea appear. Treat with rinsing and call an ambulance.
Photo
Check out the photo of the azalea purchased in the store:
What to do next, immediately after purchasing a houseplant?
Immediately after purchasing an azalea and successfully transporting it home, you must:
- Let the plant get used to the microclimate in the house by leaving it in a store-bought package for half an hour to an hour.
- Remove the packaging from the pot.
- Remove the earthen lump from the pot and carefully examine it for the presence of rot, pests, as well as the degree of soil moisture (we talked more about the most common diseases of azaleas here).
- Place the plant in a bright, cool place (18-20°C) and securely protected from direct sunlight.
- If the soil is dry, immerse the pot in a container of soft water at room temperature for 30-40 minutes.
- If the substrate in the pot is flooded and moisture is oozing from it, remove excess moisture with paper towels.
- Provide sufficient air humidity around the plant by placing it on a tray with damp moss or expanded clay. In addition, a humidifier or indoor fountain placed in close proximity to the azalea is suitable.
Attention! Placed on a tray with a damp base, the pot should not touch the water. First you need to place it on a saucer to avoid rotting of the roots and waterlogging of the substrate.
Growing from seeds
Often, a similar procedure is carried out in greenhouses for the selection of new varieties, since at home azalea rarely bears fruit with seeds. If you manage to get the seeds, try growing a new plant from them.
Preparing containers and soil
It takes approximately 6 months to grow a seedling from a seed, so be patient.
To grow seedlings by summer, prepare containers and soil for sowing around the beginning of February.
Preparing containers for sowing:
- prepare a wide, shallow plastic container, with walls about 4 cm high;
- cut small holes at the bottom of the container to absorb moisture;
- you will also need a larger 1.5 liter container with an airtight lid;
- wash both containers with soapy water, rinse and dry;
- dilute 1 tbsp in 5 liters of water. a spoonful of hydrogen peroxide and disinfect the containers in the resulting solution for about 20-30 minutes;
- Dry the molds overnight.
Soil preparation:
- buy acidic peat with a pH level of 3.5-4.5 in a specialized store;
- for additional loosening of the soil, you can use agroperlite, which is either added to the bottom of the mold or mixed with the soil;
- place the required amount of peat in a roasting pan or pan with thick walls;
- moisten the soil a little with water if it is dry;
- place the pan with the substrate in an oven preheated to 220 degrees;
- after 30 minutes, lower the temperature to 180 degrees;
- turn off the oven and do not remove the peat until it has cooled completely.
How to sow seeds
Action plan:
- Fill a small container about 3 cm with the finished cooled peat.
- Water the soil with a weak solution of warm potassium permanganate.
- Do not compact the substrate under any circumstances.
- Carefully place one seed at a time into the soil at a distance of 1.5 cm from each other. You can take the seed using the tip of a toothpick, moistening it in water.
- Do not cover the surface with soil. Simply mist the bare seeds with water from a spray bottle.
- Place the small container in the large one and close the lid tightly.
- Place the resulting greenhouse on a windowsill with diffused sunlight.
- Before germination, spray the seeds in the morning and evening and wipe the lid of the container to remove any condensation that has accumulated.
- The substrate with seeds can be ventilated by opening the lid of the container for 10–15 minutes.
At the stage of seed germination, try to apply moisture evenly and not overfill.
Two weeks after planting you will notice young shoots.
Adding peat to strengthen the azalea
After about 1.5 months, the lids from large containers can be removed. At this time, the young shoots already have several leaves on the stem. Carefully scan the surface of the soil and remove any seeds that do not germinate. Then add substrate so that the roots are reliably protected. Use the same acidic peat that was used to plant the seeds.
Take a closer look at the sprouts. At the bottom of the stem there are two cotyledon leaves. Peat must be added just to the level of these leaves. For the procedure, you can use a teaspoon or dessert spoon.
When the soil is poured, place the container with the seedlings in a larger container filled with about 1.5 cm of water. Do not pour the azalea on top. From this point on, there is no need to close the container.
Cover open containers with seedlings with a very thin translucent cloth. When the sprouts become stronger, they can be planted in cups for growing, observing all the details of care. When the seedling reaches a size of approximately 10 cm, it can be planted in a separate pot.
How to care: step-by-step instructions
Do I need to replant?
There is no need to rush into replanting a newly acquired azalea , since a radical change of soil and concomitant damage to the roots can seriously aggravate the condition of a plant that is already under stress.
The only exceptions are cases when, after purchasing the flower, pests or serious rot are found in the soil of the flower.
We talked in detail about the rules for planting and replanting azaleas here, and from this article you will learn how to replant in the fall.
Where to put the pot?
Indoor varieties of Rhododendrons love coolness and bright, but diffused daylight , so the best location for a new green resident will be the window sill of a north or east window.
Conditions of detention
Azalea does not tolerate heat, but is afraid of cold drafts.
It is important to remember that a miniature shrub should not be located directly above a heating radiator, since exposure to hot and dry air can destroy delicate foliage and inflorescences in a matter of hours.
In addition to the temperature regime, all varieties of azaleas need regular and sufficient air humidification . For this purpose, you can use trays filled with moisture-retaining materials, as well as electric fountains or air humidifiers.
Spraying with a spray bottle is also another way to increase the humidity around the azalea, but only if there are no buds or blooming flowers on the plant itself.
First watering
Before watering a plant that has just arrived in the house, you need to make sure that this procedure is necessary: ideally, the soil in the pot should be evenly moist . If moisture oozes from the earthen clod, remove excess moisture with paper napkins or towels.
In a situation where the soil is noticeably dry, it is necessary to evenly moisten it by completely (to the top edge) immersing the flower pot in a container with soft water at room temperature.
Read more about the procedure for watering azaleas in a separate article.
What should you avoid to preserve your rhododendron?
When caring for an azalea that is in the period of adaptation to new conditions, it is necessary to avoid the following factors :
- Overflow and drying out of the soil.
- Transplanting a plant for no apparent reason (detection of various diseases or pest damage).
- Moving a container with a plant from place to place, as well as changing its orientation relative to the cardinal points.
- Applying any stimulating fertilizers.
- Spraying a bush in flowering.
Transplantation
To avoid damaging the root system, transfer the plant from one pot to another. The earthen lump should remain intact and unharmed. A lot of fresh substrate is added to the containers. Young representatives are replanted every year, and adult pink trees are replanted every 2-2.5 years.
Due to the shallow structure of the root system, a low container is selected for planting. For the same reason, loosening is contraindicated. This can cause significant damage to fragile roots.
Problems and their solutions
If the leaves of a recently acquired azalea begin to wither or fall off, it is necessary to quickly identify the cause of these processes and take measures to save the plant.
Withers
Wilting foliage may indicate both a violation of the maintenance regime and the presence of any pests. As a rule, the foliage begins to wither first, and only then do the flowers and buds wither and fall off , so it is extremely important to regularly check the condition of the green part of the azalea even during the flowering period and take timely measures if fading leaves are found on the bush.
The leaves have fallen
As a rule, the falling of leaves is a consequence of the poor quality of the soil in which the Rhododendron “sits”, as well as violations of the watering regime and air humidity.
If an azalea sheds its leaves en masse, it is necessary to urgently identify and eliminate the cause of this phenomenon, and then treat the plant with specialized preparations to reduce stress.
Pests, diseases and methods of controlling them
Most often, diseases in azaleas appear due to non-compliance with the rules of care and cultivation.
Possible diseases and ways to combat them.
| Signs of illness | Causes | Solution |
| The leaves have begun to wilt or turn yellow. | Insufficient watering or lighting. | Resume necessary watering or move the pot to a brighter place. |
| Gray rot or rust has appeared. | The air temperature is not suitable. | Remove damaged leaves and move the flower to a more comfortable environment. |
| Flowers turn yellow, wither and fall off. | The water is not suitable for irrigation. | Replace regular water with boiled water with mineral fertilizers. |
| Late blight. | Excess moisture. | Adjust watering. |
An azalea can also become infected with scale insects, spider mites, or strawberry mites. Specialized substances, for example, actellik solution, will help in the fight against parasites. Before the procedure, wash the leaves with soapy water and rinse with water. Immediately after this, apply the product to the surface of the leaves according to the instructions on the package.
How to solve the problems of incorrect content?
Improper care of an azalea can destroy it in a matter of days . However, with a certain amount of effort, you can save even a plant in a state of extreme stress.
The right choice of location, good soil, fertilizing and treatment with growth stimulants, as well as ensuring proper watering and air humidity are factors that can revive an indoor Rhododendron that has suffered from errors in caring for it (learn more about how to care for azaleas at home , available here).
Indoor azaleas are truly regal creatures, capricious and demanding of the attention of their owner. However, these miniature shrubs can easily be kept indoors and delight the eye with healthy foliage and abundant flowering. It is only important to carefully study the conditions of keeping plants of this species, carefully approach the choice of the purchased specimen and provide it with proper care during the adaptation period.
Azalea is gaining increasing popularity among gardeners. How to propagate, prune this plant and what are the subtleties of caring for rhododendron in the fall - read in our materials.
When to replant
Urgent replanting may be necessary if the soil is in poor condition. In this case, flowering rhododendron is replanted only as a last resort. Planned transplants are carried out immediately after flowering. Young crops are replanted annually, adult bushes are replanted once every 2-3 years.
How to transplant
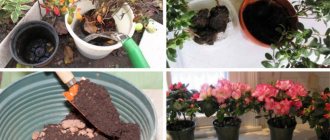
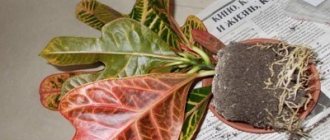
Rhododendrons are prepared for transplantation in advance. To do this, dried leaves, faded buds, and non-viable branches are completely removed from the plant. The pot is placed in a basin filled with a weak solution of a root system biostimulator. Then carefully pull out the root ball from the transport pot. It is placed on a horizontal surface and inspected. Damaged parts are removed with a sharp knife, the rest are shaken off the ground.
The new pot is filled with a layer of drainage, then the plant is placed vertically in the center, straightening the roots. The voids are filled with prepared soil and compacted a little. After replanting, the soil is watered abundantly, the leaves are sprayed with Zircon. The next watering can be done in 4-5 days. During the adaptation period, the rhododendron is placed on a shaded windowsill and left for several days.
